Viewing Objects
To interact with and view objects, you can open them in the view window. BlastLogic provides you with an interactive, 3D view which allows you to understand and manipulate your data. You can add one object to the view window or add multiple to compare you data. You can also remove objects as you desire.
Adding objects to a view window
Adding objects to a view window is the first step to being able to get a feel for your data and begin using BlastLogic's tools. From a view window, you can easily make selections and distinguish between objects. You can either add objects to a new view window or to one you currently have open.
Adding objects to a new view window
To view the current selection in a new view, you can use one of the following methods:
-
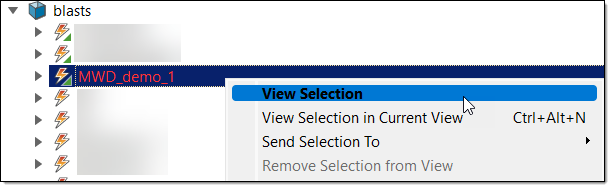
Right-click on the selected object in the project explorer and select View Selection from the context menu.
- Select View Selection, from the View group, on the Home ribbon.
-
Press the keyboard shortcut Ctrl + N.
To view an object without selecting it first, you can use one of the following methods:
-
On the Home ribbon, in the View group, select New View (or press Ctrl + Shift + N). Then, double click on the desired object in the data explorer to open it in this new view.
-
Right click on an object in the data explorer and select View “<object name>” from the context menu. If you have other object currently selected, this method will not alter this selection.
Adding objects to an existing view window
To view objects in an existing view, you can use one of the following methods:
-
Double click the desired object in the data explorer.
Note:If there are no views open, BlastLogic will open a new view for this object.
-
Drag and drop the desired object from the data explorer into an existing view window using the middle mouse button.
Tip!In BlastLogic, you can also use the middle mouse button for the following tasks:
-
Drag and drop objects, such as surfaces or blasts, into tool panel fields.
-
Rearrange objects in the data explorer by dragging and dropping them into the desired positions.
-
Manipulating the view
There are three fundamental ways of manipulating your view of the data: rotating, panning, and zooming. Though these manipulations modify your view of the data, they do not actually modify the data itself. Instead, BlastLogic manipulates the parameters of a conceptual "camera" which changes your view. Everything you see in the view window is from the perspective of this camera.
Rotate 
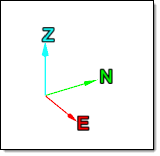
Rotation of the view occurs around the centre of rotation. By default, BlastLogic sets the location of the centre of rotation of the view by the axes, although there are options to hide the axes, or display them in different locations.
You can set and use the rotation tool with the following options:
-
To set the centre of rotation, click
 on the view window toolbar (or press C), and then click on a point in the view window.
-
To show or hide the axes, press A.
- To rotate your view of the data, hold down the Alt key and then use the left mouse button to click and drag in the direction you wish to rotate.
Pan 
To pan your view of the data, hold down the Alt key and then use the middle mouse button to click and drag in the direction you wish to pan.
Zoom 
To zoom in on the data, hold down the Alt key and then use the right mouse button to click and drag in the direction you wish to zoom.
To zoom in on a specific location on the data in the view, move the mouse cursor over that location, then hold down the Alt key and use the mouse scroll wheel to zoom in and out. This differs from Alt + right mouse button, which always zooms to whatever is in the centre of the view.
-
You can use the mouse to rotate, pan, and zoom without requiring the keyboard by switching to Hands-Free Manipulation Mode. To do this, click
 in the selection toolbar located at the top of the project explorer. Then, use the left, middle and right mouse buttons to rotate, pan and zoom without holding the Alt key down. The keyboard shortcut for hands-free manipulation is `.
 -
You can also use the arrow keys on the keyboard to rotate and pan, depending on the manipulation mode. Refer to the Keyboard Shortcuts page for more information.
Manipulation modes
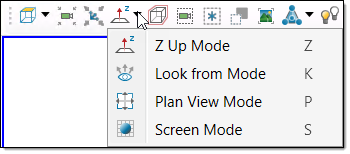
The precise behaviour of rotate, pan, and zoom depends on the manipulation mode. The table below describes the four manipulation modes:
| Manipulation Mode | Behaviour | Keyboard Shortcut |
|---|---|---|
|
|
Constrains the Z-axis to always be vertical. | Z |
|
|
Constrains the view to a single viewpoint. | K |
|
|
Constrains the view such that the data is viewed from above, i.e. looking down the Z axis. | P |
|
|
The view is unconstrained, and can be rotated to any orientation. This is BlastLogic's default mode. | S |
To set the manipulation mode, either:
-
Use the keyboard shortcuts listed in the table above.
-
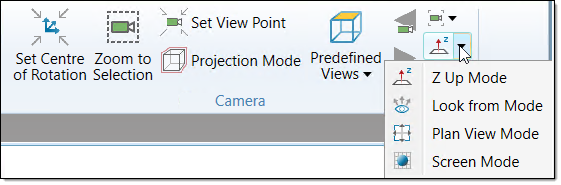
Locate the Set Manipulation Mode button on either the view window toolbar, or on the View context ribbon in the Camera group. The button’s icon indicates the current mode. Click on the button to cycle to the next manipulation mode, or click on the arrow and select the desired mode from the drop-down menu.
Managing object visibility
When you are dealing with many objects, it is essential to be able to control what you’re looking at so you can focus on what’s important. Use the following tools and strategies to make sure you’re only seeing what you need, when you want.
Hiding and showing objects
You can hide objects that you have loaded into a view when they’re not needed or they’re getting in the way. Hidden objects are still loaded in the view, but they are not visible.
There are a few ways to hide and re-show objects.
Hiding objects by picking
To hide an object or multiple objects by picking in the view, hold down the H key to enter Hide mode, and then click on any objects you want to hide while continuing to hold down the H key.
Hiding the selection
To hide the selected objects in a view, right click on an empty region in the view and select Hide Selection from the context menu. The keyboard shortcut is Ctrl + H .
Hiding all except
To hide all objects except an object or the selected objects, right click on an object or a selected object in the view and select Hide All Except <name> from the context menu.
Showing hidden objects
To show the last hidden object, right click on an empty region in the view and select Show Last Hidden. The keyboard shortcut is J.
To show all hidden objects, right click on an empty region in the view and select Show All Hidden. The keyboard shortcut is Shift + J.
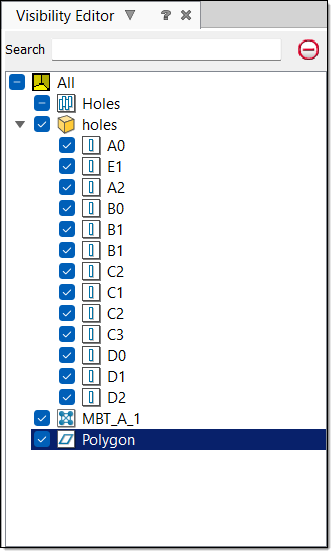
Visibility editor
The Visibility Editor allows you to control whether objects in a view are hidden or shown, by name.
To show (or hide) the visibility editor, either:
-
Click
 in the view window toolbar.
 -
Select
Visibility Editor, from the Effects group, on the View context ribbon. -
Press the keyboard shortcut V.
The editor list shows all of the objects loaded into the view, whether visible or not. You can interact with the editor in the following ways:
-
Select the checkbox next to an item to show it in the view.
-
Clear the checkbox next to an item to hide it in the view.
-
Selecting or clearing the checkbox next to a

 container or
  drillhole database will show or hide all objects within the container.
 -
The Search field allows you to display only objects matching the given string in the visibility list.
Removing objects from the view
Objects can be removed from a view completely. To remove a single object or an object selection from a view, right click on the object or a selected object in either the project explorer, the view window, or the visibility manager, and select the appropriate Remove command from the context menu.
Multiple view windows
You can open as many view windows as you like. Each new view will open as a new tab window in the Workbench document area.

You can drag these documents out so that they “float” as independent windows, or you can dock them into new locations within the document area.
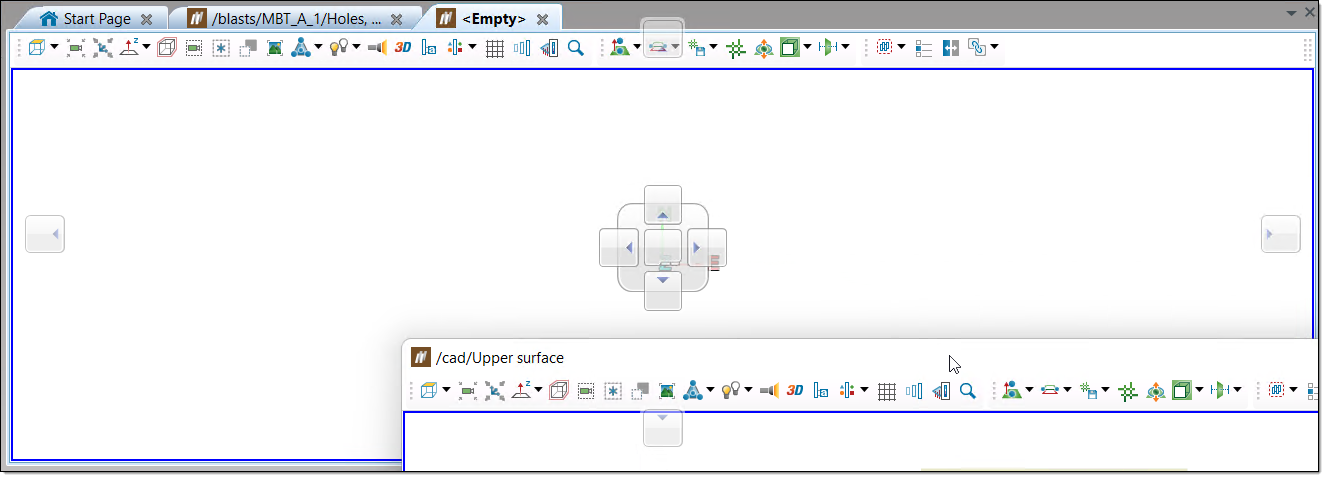
Floating and docking windows
To float a view window, click and drag its document title tab.
To dock a view window to a new location, click and drag its document title tab onto one of the dock targets that appear in the document area, as shown in the image.
Tied views
A convenient way to view multiple objects occupying the same space is to view them side by side in two view windows. You can tie view windows together such that rotating, panning, and zooming in one view does the same in the other.
If you have more than one view window open, the tie ![]() menu button will show in the view toolbar of each view. The button icon indicates whether the view is tied
menu button will show in the view toolbar of each view. The button icon indicates whether the view is tied ![]() or untied
or untied ![]() . Views that are tied together will show an icon with the same colour:
. Views that are tied together will show an icon with the same colour: ![]()
![]()
![]() etc.
etc.
To tile and tie all views in one step, open the drop-down menu and select Tile and Tie. The keyboard shortcut is Ctrl + B .
From the menu you can also untie views, and tie to specific views.
