Entry
The Entry group of the Charging ribbon contains tools that allow you to enter charge and timing data as well as edit loaded primers.

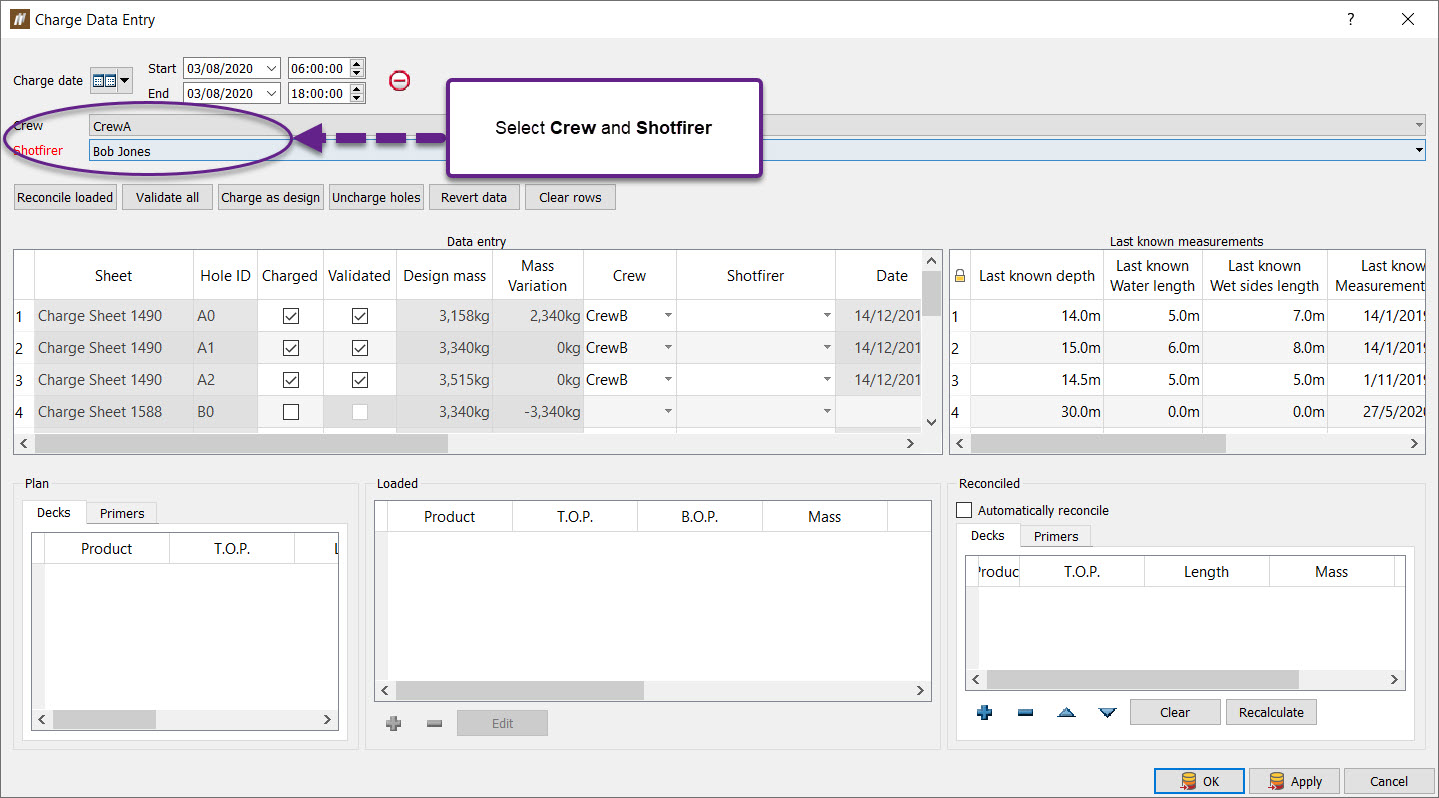
 Charge Data Entry
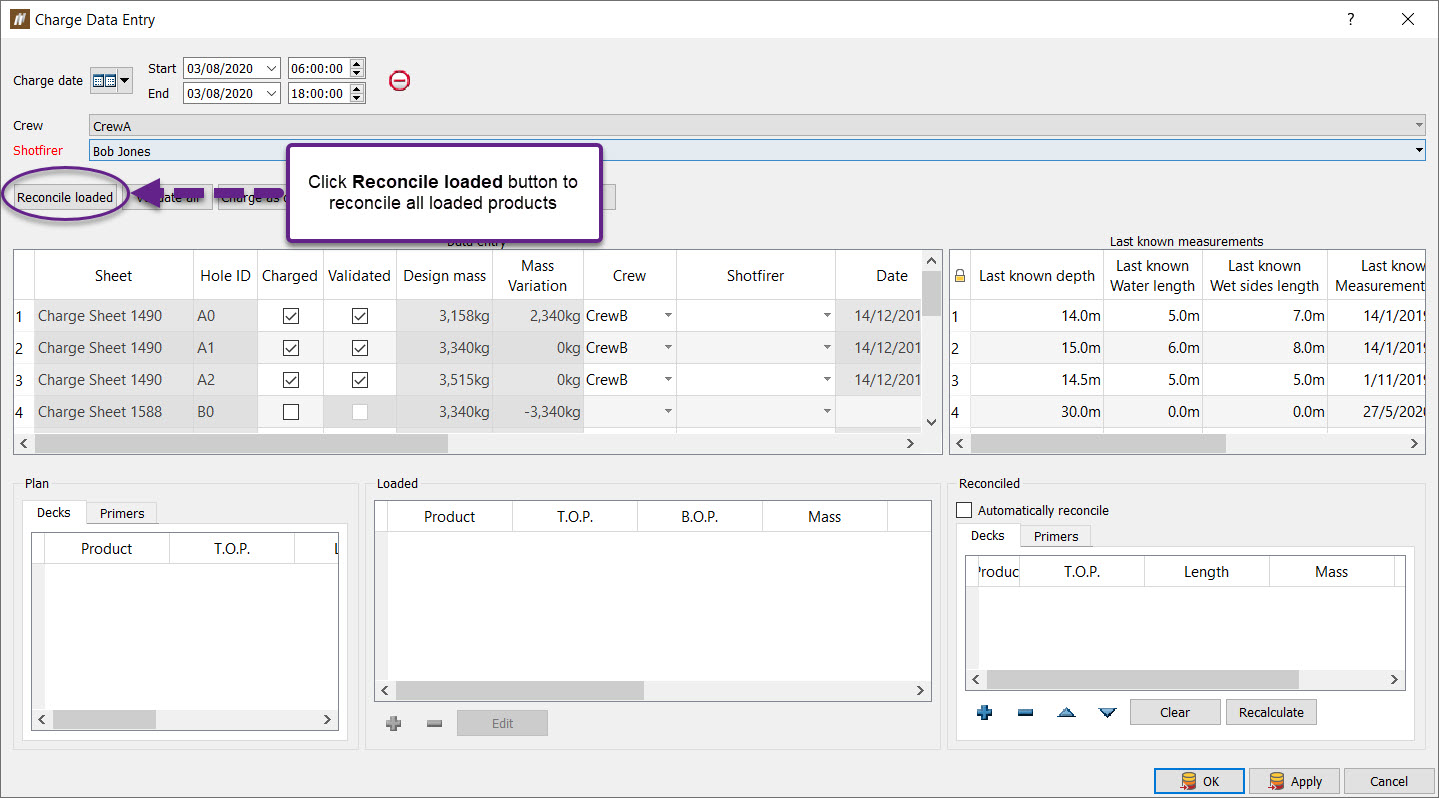
The Charge Data Entry tool enables charge data to be entered against holes in the blast. The panel is split into three sections: planned, loaded and reconciled data. Planned charge and primers come from the charge plan applied previously. Loading usually occurs on the tablet by operators on the field. However, loaded data can be provided on the desktop application for simulation purposes. This data is then usually confirmed or reconciled on the desktop by either D/B engineer or a supervisor.
To create a charge data entry:
-
Select the required holes.
-
Select Charging > Entry >
Charge Data Entry. This will open the Charge Data Entry panel.
- Fill out the Crew and Shotfirer details to complete the rest of the panel.
-
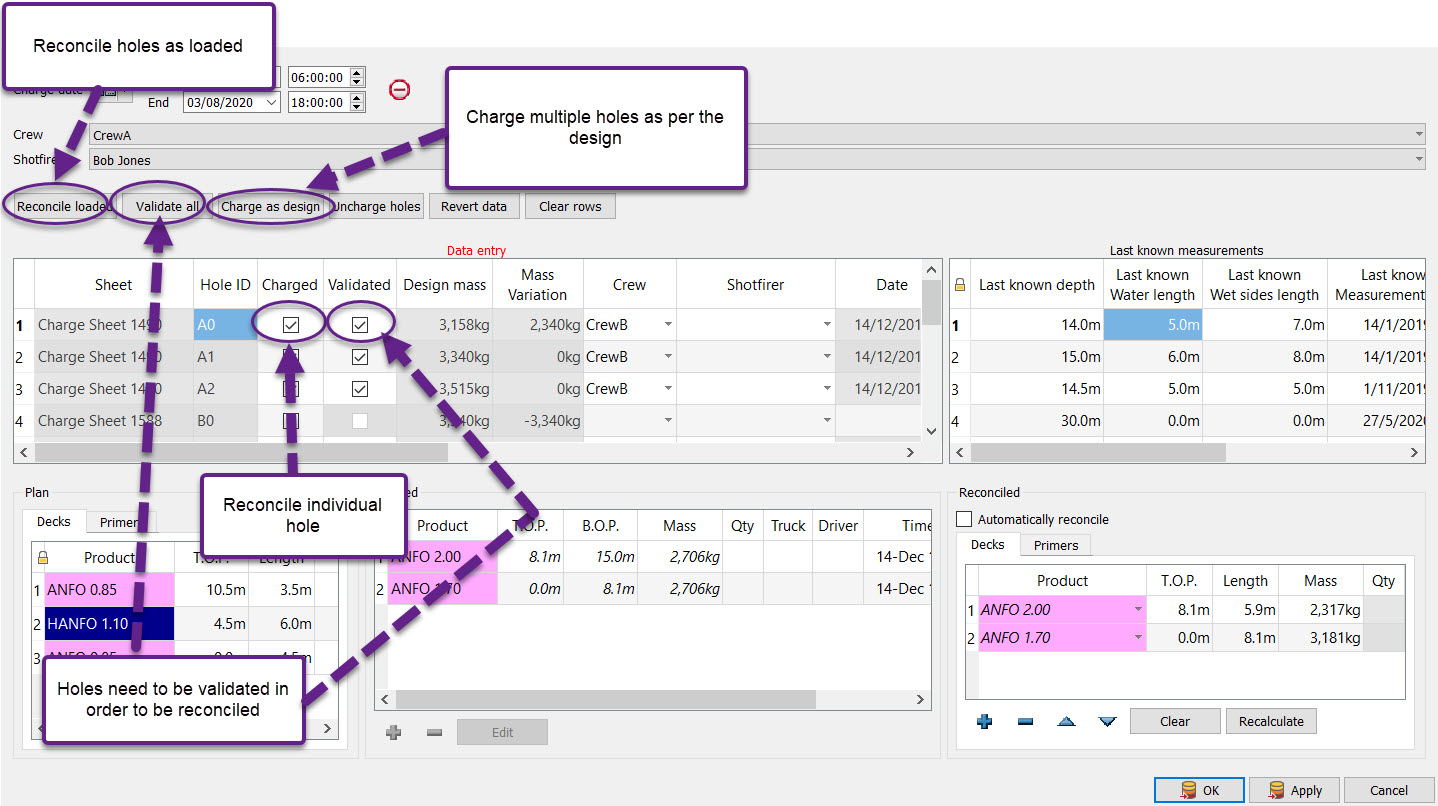
Click on Reconcile loaded to run the charge algorithm for holes that have charge events recorded on the tablet. Note: The charge algorithm merges all decks entered for a particular hole on the tablet and adds 'missing' design decks. Holes with missing decks will be highlighted for the engineer to review. Designs decks that were added by the charge algorithm to complete the hole's 'charge' are shown in the Reconciled table in italics. Holes that have not be completely charged by the crew should not be validated and charged until after loading has been completed.
-
To enter data manually, click the required field in the Data entry table. If data is available, the Plan, Loaded and Reconciled tables will be populated and can be edited.

-
Tick the Charged checkbox to indicate this hole has been charged.
-
To charge all non-charged holes as per the design without entering additional data, click Charge as design. This option requires a selection.
-
To validate all holes, click Validate all. This option does not require a selection but it does require for the hole to be charged. Holes can be individually validates by clicking on the checkbox in the Validated column.
- Click OK or Apply to save changes.
How to transfer charge data from one hole to another
- Choose a hole with loaded data.
- Click the Transfer button. This will open a new panel.
- Select a product and a hole to transfer product to.
- Click the down arrow in between the tables on the right hand side of the panel to transfer product.
- To transfer the product back to the previous hole, select a product and then click the up button in between the tables on the right hand side.
- Click OK or Apply to save changes.
![]()
![]()
![]()
Updating values
The remaining buttons are used for data manipulation. The Revert data button does not require a selection and will revert any changes made since the last save.
The Uncharge holes and Clear data buttons both require a selection:
-
Uncharge holes — Removes all reconciled charge from an entry and removes the Charged status.
-
Clear data — Removes all data from the selected entry/entries.
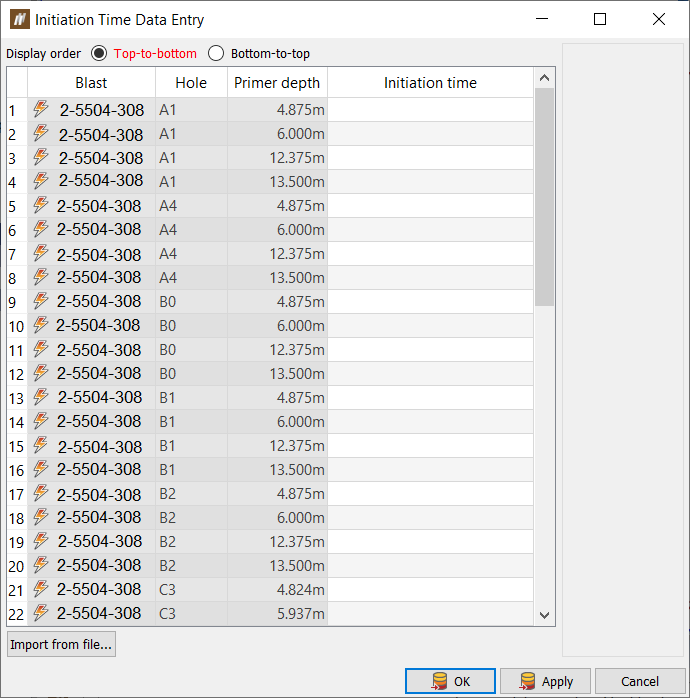
 Initiation Time Data Entry
The Initiation Time Data Entry tool enables the user to add actual initiation timings to primers in a tie-up.
To add initial timings to primers in a tie-up, follow these steps :
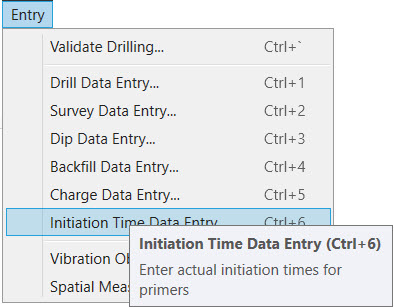
- Go to the Entry menu and select the Initiation Time Data Entry option. This will open a new panel.
-
Select a blast in the Window Explorer that contains holes with reconciled primers. To reconcile primers, go to Entry > Charge Data Entry, select holes with charge plans and click Charge as Design. The Initiation Time Data Entry panel will be populated with reconciled primers at the depth which they are positioned and their corresponding hole.
-
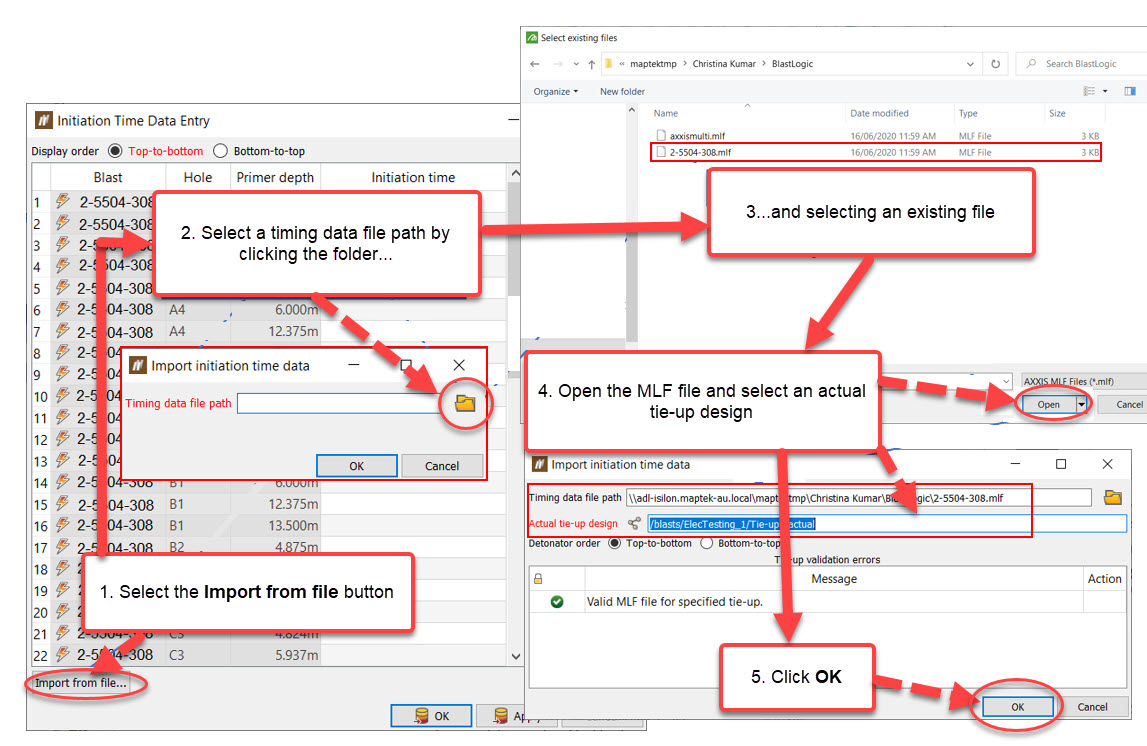
Initiation times can be entered in for each reconciled primer or imported from a *.mlf file as shown below.
 Bulk Edit Loaded Primers
The Bulk Edit Loaded Primers tool allows you to manually add and remove loaded primers to explosive columns in multiple holes that already contain a charge plan. Typically, loaded primers added via the tablet application by operators, however this gives you the option of also adding and removing loaded primers. The tool can also be used to reset the number of loaded primers set in the original charge plan.
The loaded primers cannot be changed for charged, fired or abandoned holes.
Load holes with primers as per the charge plan
- Select holes either from the view window or the data explorer.
-
On the Charging ribbon, in the Entry group, select
Bulk Edit Loaded Primers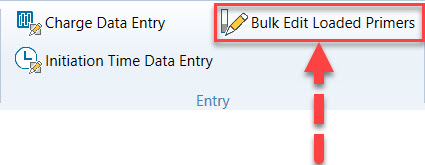
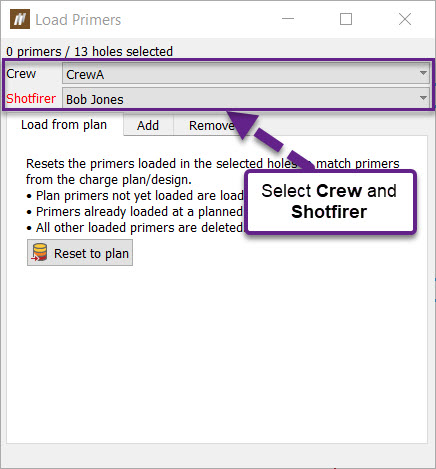
- Choose Crew and Shotfirer.
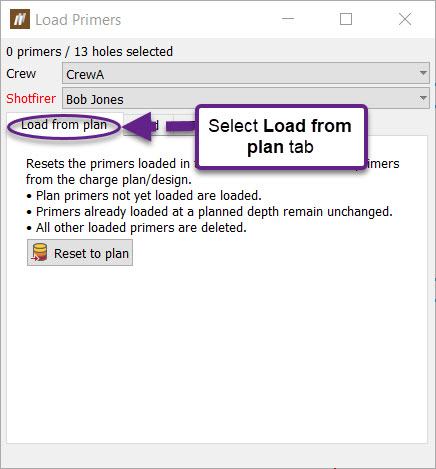
- Select the Load from plan tab from the Load primers panel.
- Click the Reset to plan button. Primers will be loaded according to the charge plan.
Add loaded primers
-
Select holes either from the view window or the Windows Explorer.
- On the Charging ribbon, in the Entry group, select Bulk Edit Loaded Primers.
- Choose Crew and Shotfirer.
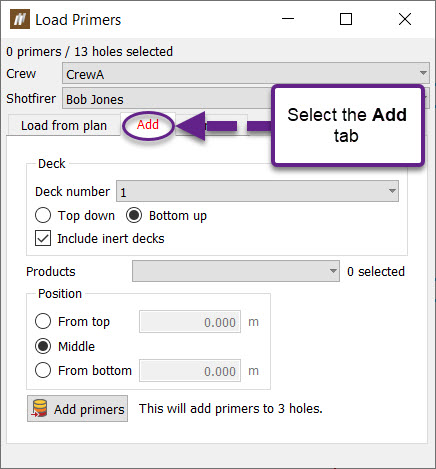
- Select the Add tab.
-
Specify the Deck number to add the primer to.
-
Select the Products to add.
-
Select the Position in the deck.
-
The panel will show how many primers will be added to the selected holes.
-
Click the Add primers button.
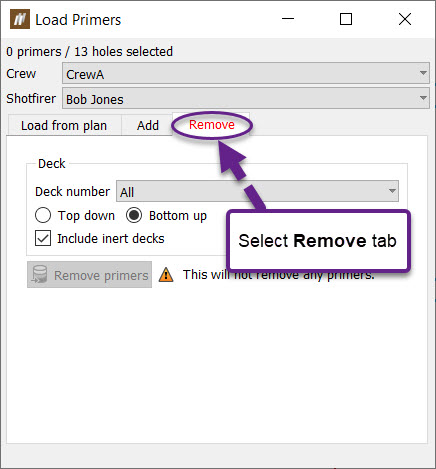
Removing primers
- Select holes either from the view window or the Windows Explorer.
-
On the Charging ribbon, in the Entry group, select Bulk Edit Loaded Primers
- Choose Crew and Shotfirer.
- Select the Remove tab.
-
Select the holes to remove primers from.
-
Specify the Deck number to remove primers from. The panel will show how many primers will be removed from the selected holes.
- Click the Remove primers button.