Draw
The Draw group of the Create ribbon contains tools that allow you to create shapes and text.
 Polygon
Polygons are closed lines or loops which you can use to define the boundaries of areas of interest. This is particularly useful when modelling, filtering or cropping data.
To create a polygon, follow these steps:
-
On the Create ribbon, in the Draw group, select
 Polygon.
The status bar will appear at the bottom of the view window.

-
Click the desired points in the view window to form the polygon. BlastLogic connect the points you click with lines in the view to display the polygon outline.
Alternatively, you can enter the initial desired point into the First point coordinate fields on the status bar and select
 to confirm the point. The First point label will then change to Next point which allows you to enter the next polygon point. You can continue this process until you have entered all of the desired polygon points.
 Tip!
Tip!Click
 in the view window toolbar to enable top view which helps you ensure the polygon you create has the intended coordinates.
 -
Press Enter or click
 to complete the polygon. BlastLogic will save the polygon to the cad container in the data explorer.
 Line
Line
You can create lines to manipulate or add to existing data.
To create a line, follow these steps:
-
On the Create ribbon, in the Draw group, select
 Line.
Line.The status bar will appear at the bottom of the view window.

-
Click the desired points in the view window to form the line. In the view window, BlastLogic connect the points you click with lines to display the line shape.
Alternatively, you can enter the initial desired point into the First point coordinate fields on the status bar and select
 to confirm the point. The First point label will then change to Next point which allows you to enter the next line point. You can continue this process until you have entered all of the desired line points.
 Tip!
Tip!Click
 in the view window toolbar to enable top view which helps you ensure the line you create has the intended coordinates.
 -
Press Enter or click
 to complete the line. BlastLogic will save the line to the cad container in the data explorer.
 Arrow
Arrow
You can create arrows in the view window.
To create an arrow, follow these steps:
-
On the Create ribbon, in the Draw group, select
 Arrow.
The status bar will appear at the bottom of the view window.

-
Click the desired points in the view window to form the arrow. After clicking two points in the view window, BlastLogic will connect the points with an arrow. You can keep clicking to create more arrows.
Alternatively, you can enter the initial desired point into the Starting point coordinate fields on the status bar and select
 to confirm the point. The Starting point label will then change to End point which allows you to enter the second arrow point.
 Tip!
Tip!Click
 in the view window toolbar to enable top view which helps you ensure the arrow you create has the intended coordinates.
 -
Press Enter or click
 to complete the arrow. BlastLogic will save the arrow to the cad container in the data explorer.
 3D Text
The 3D Text tool allows you to create annotations. You can use these annotations in processes such as using tie-up sheets.
To create an annotation, follow these steps:
-
On the Create ribbon, in the Draw group, select 3D Text.
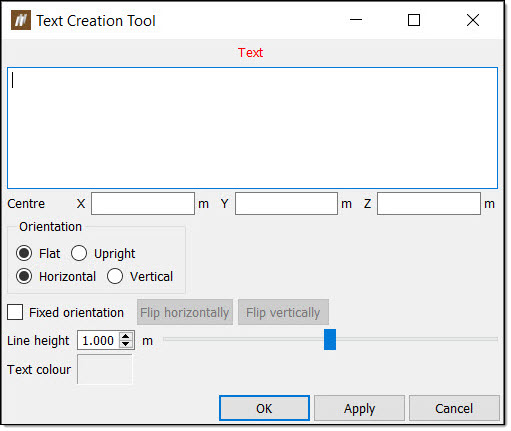
The Text Creation Tool panel will appear.

-
Enter the appropriate information into the Text and Centre fields.
-
Select the options you desire in the Orientation and Fixed orientation sections.
-
Select the height for the line and text colour with Line height and Text colour fields respectively.
-
Click OK or Apply. BlastLogic will save the text to the cad container in the data explorer.

