Create Charge Rule
A charge rule is a JavaScript snippet that defines the location, quantity and types of products you plan to insert into each hole in a blast. The aim of the charge rule is to fill the hole with particular products using the following information:
-
The charge rule parameters
-
The hole length and geometry
-
The blast product catalogue
When you apply a charge rule to a set of holes, BlastLogic automatically creates a charge sheet which operators can access on the tablet. Prior to confirming the application of a charge rule, BlastLogic will display a charge plan preview. This will contain information in a tabular format, as well as a 2D hole view for the selected hole. After you successfully apply a charge rule, BlastLogic will automatically publish the rule for future use.
 Create Charge Rule tool
There are two ways to create a charge rule in BlastLogic. A blank charge rule allows you to create a charge rule from scratch. Alternatively, an assisted charge rule provides you with options which BlastLogic uses to build the charge rule.
To select the tool, use either of the following paths:
-
On the Charging ribbon, in the Design group, select
 Create Charge Rule. In the drop-down menu, you can select from either a
  Blank or an
  Assisted charge rule.
 -
Alternatively, right-click on a blast charge rules container in the data explorer and select Create Charge Rule from the context menu. You can then select from either a Blank charge rule... or an Assisted charge rule....
Either of the following panels will appear:
 Blank
Blank
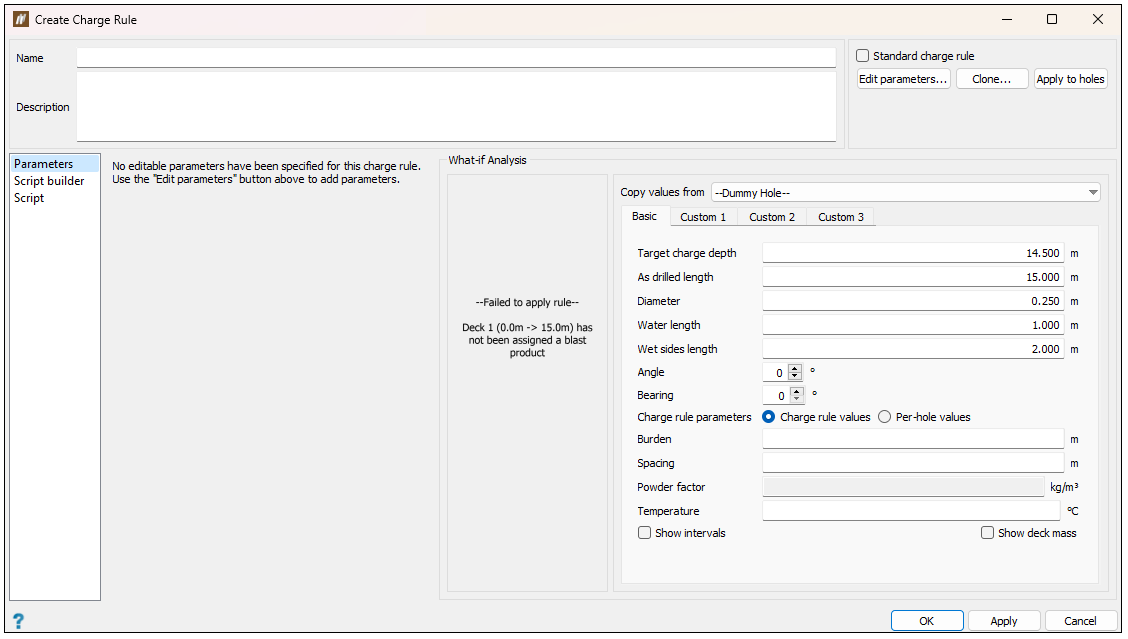
To create a blank charge rule, follow these steps:
-
After entering the Create Charge Rule panel by one of the paths listed above (see Create Charge Rule tool), enter the desired information into the Name and Description fields.
Tip!BlastLogic will use the name you enter to uniquely identify the charge rule. The name must be different from all other existing charge rules. Using a naming convention when you create charge rules will make it easier to find them later.
-
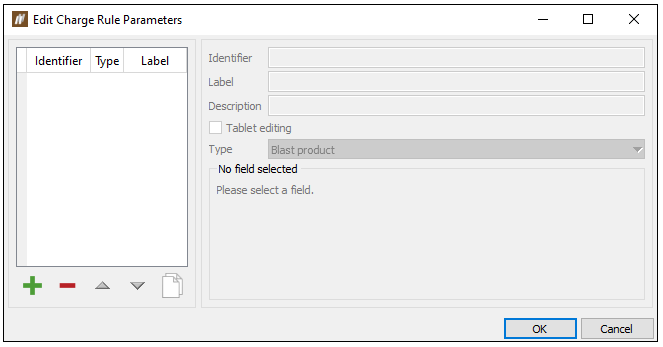
Select Edit parameters.... The Edit Charge Rule Parameters panel will appear.
-
Click
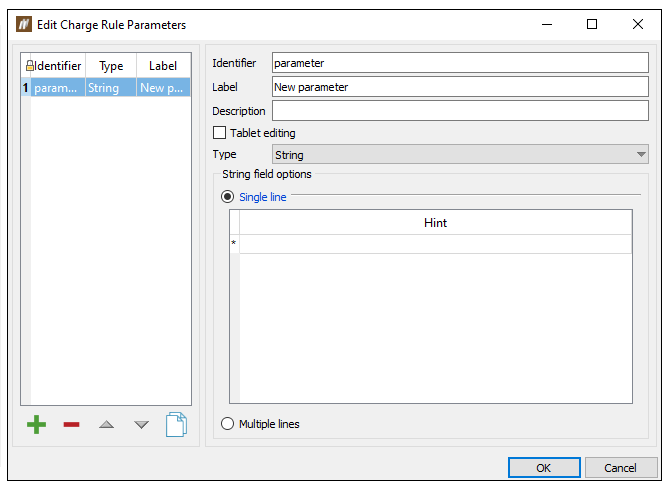
 to add a new parameter. BlastLogic will give the new parameter default names in the Identifier and Label fields.
-
Enter the desired information into the Identifier, Label and Description fields.
-
Select the Tablet editing checkbox to allow operators to edit the charge rule on the tablet.
-
Select the property type using the Type drop-down. There are nine types to choose from in BlastLogic:
-
Blast product. This type contains information on blast products which you can use to fill holes.
-
Blast product family. These types contain information on a group of blast products. This group is known as a blast product family and typically contains a set of one product with varying densities.
- Boolean. You can turn these types on or off via a checkbox.
-
Float. These types must have a range set as greater than a given value, less than a given value, in between two values, or all values. You must also define the dimension and units of float types.
-
Interval label. These types contain the interval labels you wish to include in the rule.
-
Load table. These types add load tables to the rule. Load tables allow you to set load designs in tabular form.
-
Select. These fields display a table, in which you can enter each possible value for the field. These values will be shown in a drop-down list for the field and you can only select one value at a time.
-
Multi-select. These fields are the same as select fields, except you can select multiple values from the drop-down list.
-
String. These types can be either a single line or a multiple line string. Single line strings can have one or more hints to store commonly entered values.
-
-
Specify the additional options. You can also set the following fields, depending on the selected type:
-
Blast product field options
Set the product(s) by filtering using the Filter by products or Filter by types radio buttons and drop-downs.
-
Blast product family field options
Set the product family by filtering using the Filter by families or Filter by types radio buttons and drop-downs. To filter by families, enter the desired family and delay using the Family and Delay columns and drop-downs.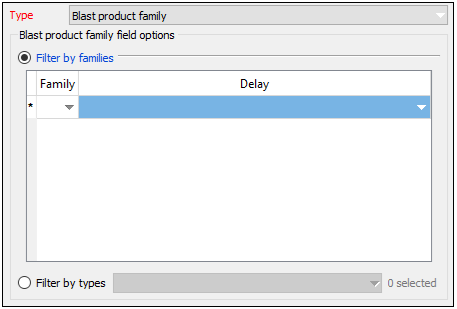
-
Float field options
Range, dimension, and unit can be defined when the Float type is selected. To set the range of the parameter, select one of four range definitions (Range, Less than or equal, Greater than or equal, or All finite values), and enter the desired values. To set the Dimension and Unit, use the corresponding drop-downs.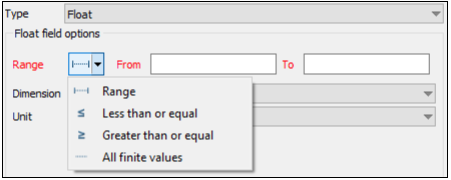
-
Interval label field options
Set the label for the interval using the Interval label choices drop-down.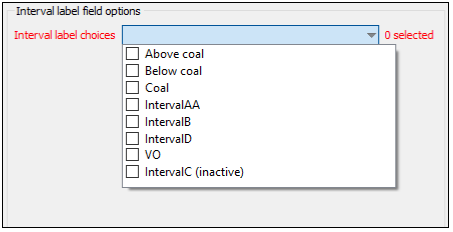
-
Multi-select and Select field options
The label associated with a particular value can be assigned when Multi-select or Select type is chosen.
-
String field options
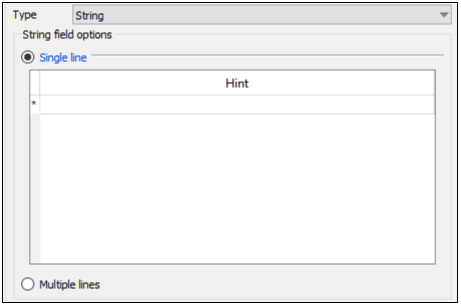
You can set commonly entered values in the Hint column. Optionally, select the Multiple lines radio button for a multiple line string. You cannot define hints when Multiple lines option is selected.
-
-
Optionally, use the following actions to edit the parameters:
-
To remove a parameter, select the parameter and click
 .
. -
To clone a parameter, select the parameter and click
 .
. -
To reorder the parameters, select the parameter you wish to move and click the
 and
and  arrows.
-
-
After adding the desired parameters, click OK.
-
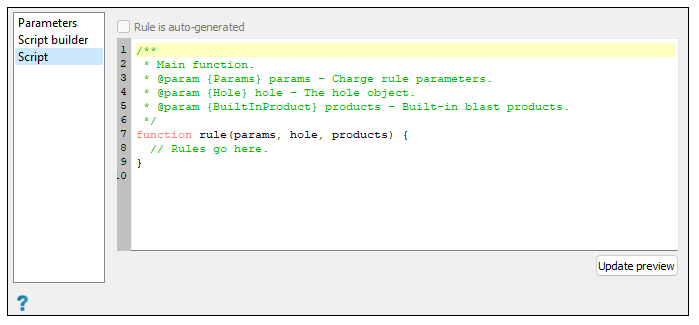
Select the Script tab in the Create Charge Rule panel.
-
Fill out the charge rule script in the Script tab, using the JavaScript programming language. The script is responsible for calculating a set of decks that completely fill the hole with desired blast products.
-
Save the new charge rule by clicking OK or Apply.
Note: The new charge rule does not exist in the database until you save it for the first time. If you decide you don't want to save the new charge rule, click Cancel.
 Assisted
To create an assisted charge rule, follow these steps:
-
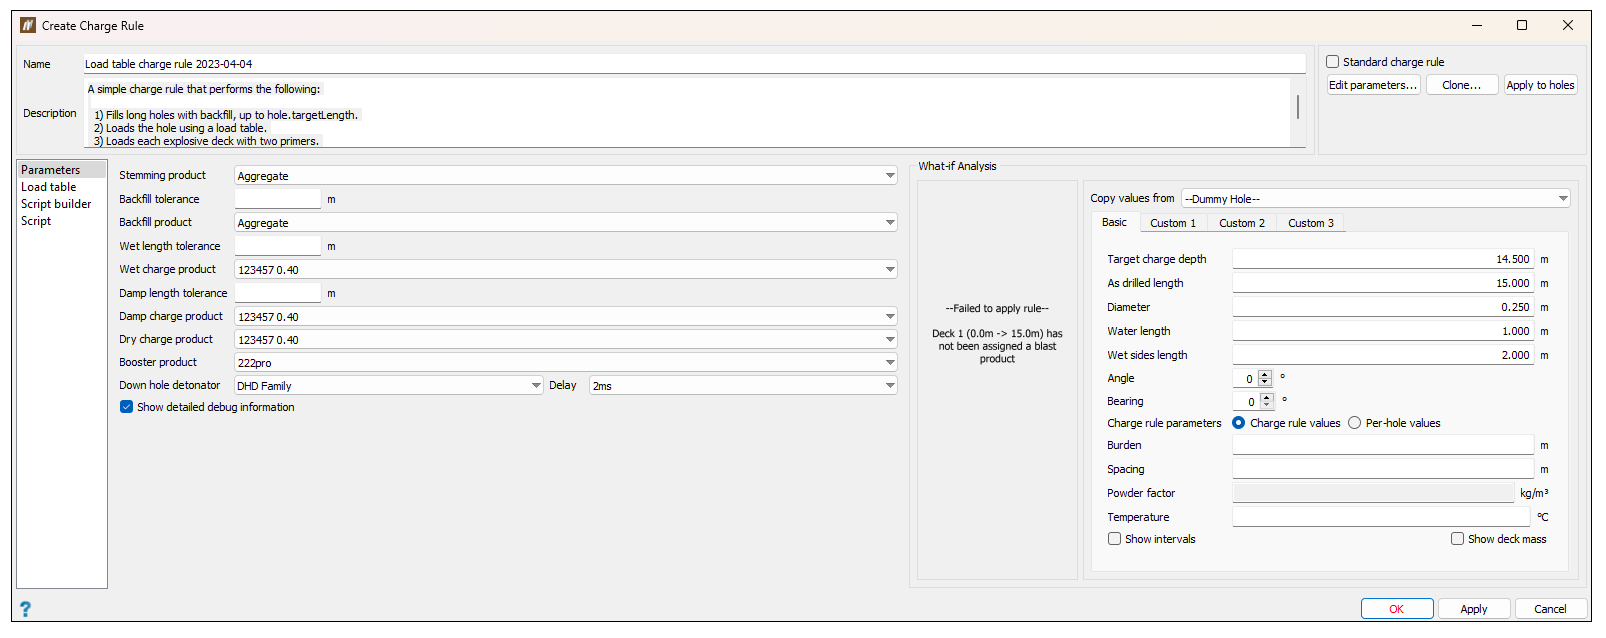
The Create Charge Rule panel will appear after entering it by one of the paths listed above (see Create Charge Rule tool). BlastLogic will automatically fill the Name and Description fields and add the Load table tab to the panel. By default, the backfilling of short holes option is also preselected in the Script builder tab.
-
Optionally, provide the rule with a custom name and description using the Name and Description fields.
Tip!BlastLogic will use the name you enter to uniquely identify the charge rule. The name must be different from all other existing charge rules. Using a naming convention when you create charge rules will make it easier to find them later.
-
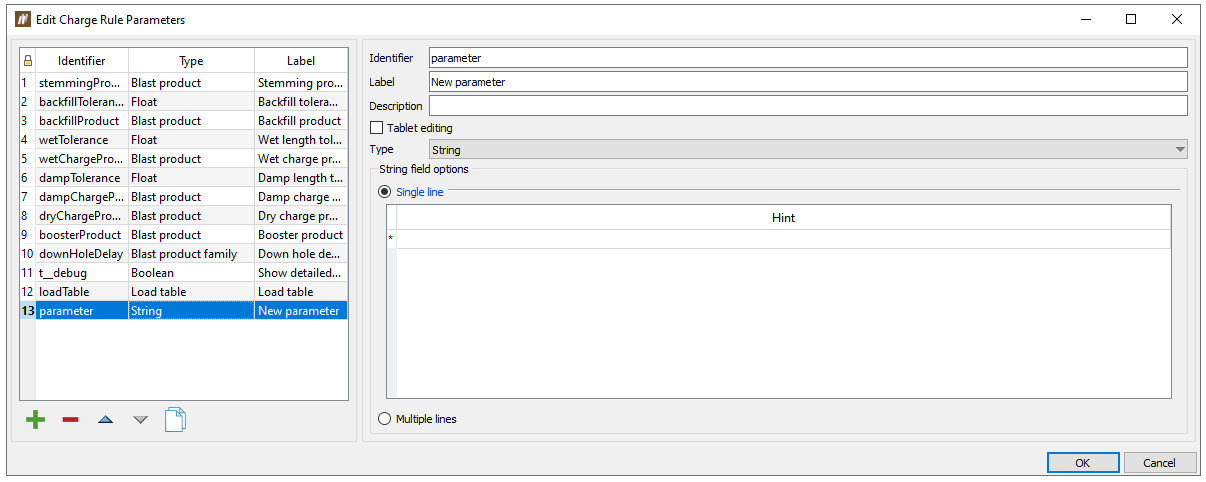
Optionally, add extra parameters. Select Edit parameters... and add the desired parameters by clicking
 and configuring the fields on the right-hand side of the Edit Charge Rule Parameters panel.
 Expand for more information on the parameters options
To configure a new parameter, follow these steps:
-
Enter the desired information into the Identifier, Label and Description fields.
-
Select the Tablet editing checkbox to allow operators to edit the charge rule on the tablet.
-
Select the property type using the Type drop-down. There are nine types to choose from in BlastLogic:
-
Blast product. This type contains information on blast products which you can use to fill holes.
-
Blast product family. These types contain information on a group of blast products. This group is known as a blast product family and typically contains a set of one product with varying densities.
- Boolean. You can turn these types on or off via a checkbox.
-
Float. These types must have a range set as greater than a given value, less than a given value, in between two values, or all values. You must also define the dimension and units of float types.
-
Interval label. These types contain the interval labels you wish to include in the rule.
-
Load table. These types add load tables to the rule. Load tables allow you to set load designs in tabular form.
-
Select. These fields display a table, in which you can enter each possible value for the field. These values will be shown in a drop-down list for the field and you can only select one value at a time.
-
Multi-select. These fields are the same as select fields, except you can select multiple values from the drop-down list.
-
String. These types can be either a single line or a multiple line string. Single line strings can have one or more hints to store commonly entered values.
-
-
Specify the additional options. You can also set the following fields, depending on the selected type:
-
Blast product field options
Set the product(s) by filtering using the Filter by products or Filter by types radio buttons and drop-downs.
-
Blast product family field options
Set the product family by filtering using the Filter by families or Filter by types radio buttons and drop-downs. To filter by families, enter the desired family and delay using the Family and Delay columns and drop-downs.
-
Float field options
Range, dimension, and unit can be defined when the Float type is selected. To set the range of the parameter, select one of four range definitions (Range, Less than or equal, Greater than or equal, or All finite values), and enter the desired values. To set the Dimension and Unit, use the corresponding drop-downs.
-
Interval label field options
Set the label for the interval using the Interval label choices drop-down.
-
Multi-select and Select field options
The label associated with a particular value can be assigned when Multi-select or Select type is chosen.
-
String field options
You can set commonly entered values in the Hint column. Optionally, select the Multiple lines radio button for a multiple line string. You cannot define hints for this option.
-
-
Optionally, use the following actions to edit the parameters:
-
To remove a parameter, select the parameter and click
 .
. -
To clone a parameter, select the parameter and click
 .
. -
To reorder the parameters, select the parameter you wish to move and click the
 and
and  arrows.
 -
To edit a pre-existing parameter, select the parameter and edit the fields on the right-hand side of the panel.
-
-
After adding the desired parameters, click OK.
-
-
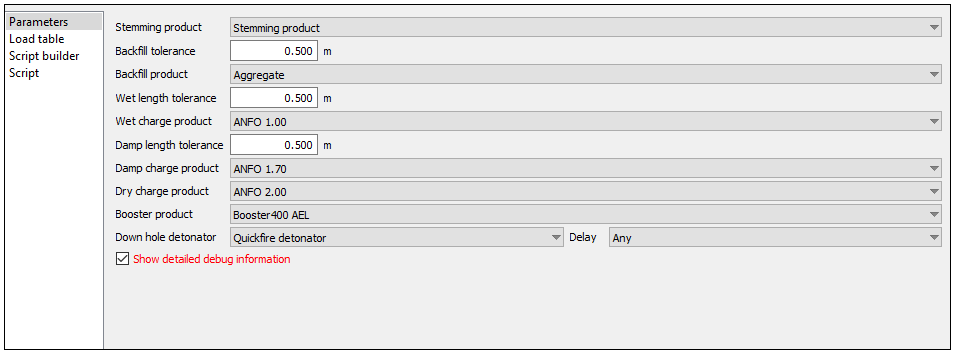
Optionally, edit the parameter values. BlastLogic prefills each parameter field in the Parameter tab. You can edit these values using the corresponding drop-downs.
-
Select the Load table tab from the left side bar. This tab will allow you to fill holes based on their charge depths.
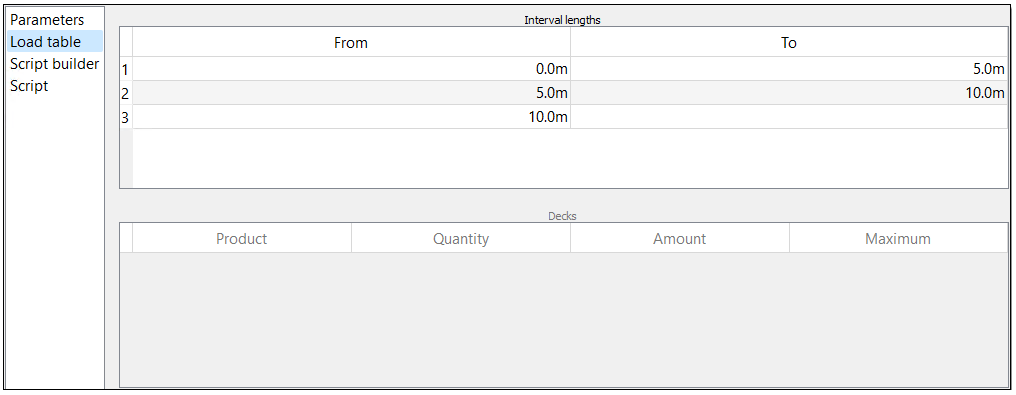
There are two tables in the load tables tab: the Interval lengths table and the Decks table. Each row in the Interval lengths table defines a range of hole lengths via the From and To columns. Each row also has an associated list of decks that are applied to the hole if the length of the hole falls within range. You can define these decks in the Decks table.
Note:This tab will only appear if you have defined a load table parameter in the Parameters tab. To add a load table, select Edit parameters... and click
 to add a new parameter. Enter the appropriate information into the parameter fields and select Load table from the Type drop-down. Click OK to save the parameter.
If you are not using a load table, proceed to step 8.
-
Enter the desired length intervals into the Interval lengths table. You can define the interval boundaries using the From and To columns. The last row of this table always has a blank To value as BlastLogic applies it to all the remaining holes with a length greater than or equal to the From value of that row.
-
Specify the decks for each interval by selecting the interval and adding the desired information into the Decks table. This table contains the following fill method headings:
-
Product: The type of product you wish to add.
-
Quantity: The quantity of the product you wish to add.
-
Amount: The amount of the product you wish to add.
-
Maximum: The maximum length of the deck you wish to use.
There are six different ways to specify the size of a deck, as provided in the Quantity column of the Decks table:
-
Variable ratio
The ratio of the deck to be filled with the specified product. Ratio values for non-explosive decks are considered ratios of length, whereas ratio values for explosive decks are considered ratios of mass.Note:Variable length decks can optionally use the Maximum column. This column defines the maximum length of a given deck. The remainder of the hole should be covered by other deck options as specified above, including at least one variable length deck with no maximum.
-
Fixed length
The deck is always a specified length in the hole, with the length given in metres. The sum of all fixed length decks must not exceed the minimum length specified in the Interval lengths table. -
Fixed volume
The deck always takes up a specified volume in the hole. BlastLogic calculates the length of this deck based on the diameter of the hole when you apply the charge rule. The volume is specified in cubic metres. -
Fixed mass
The deck will always be a specified mass, given in kilograms. BlastLogic automatically calculates the length of the deck based on the density of the chosen blast product and the diameter of the hole when you apply the charge rule. This option is not available for products with an undefined density. -
Target powder factor
The deck will always be specified by meeting a target powder factor, determined by the products density and the current hole diameter. This value is on a per deck basis, independent of any other explosive deck. This option is only applicable for explosive decks with a valid density. -
Length above water
The top of this deck will extend to the specified distance above the wet part of the hole, given in metres. By default, the length above water decks will use the wet-sides measurement of the hole as the reference water level. However, a charge rule script can choose to calculate its own value to use as this water level.The Length above water decks also contain the following properties:
-
You cannot place Length above water decks on top of variable length decks.
-
If the hole is dry, BlastLogic will exclude this deck from the resulting charge plan.
-
BlastLogic will reduce the length of the deck if either of the following occur:
-
There is insufficient space remaining in the hole.
-
The blast product is explosive and the target explosive mass has been reached.
-
-
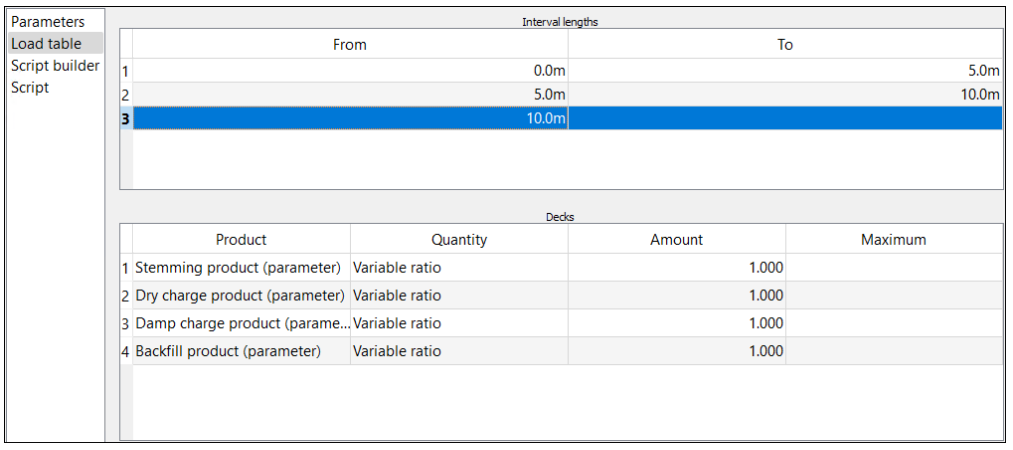
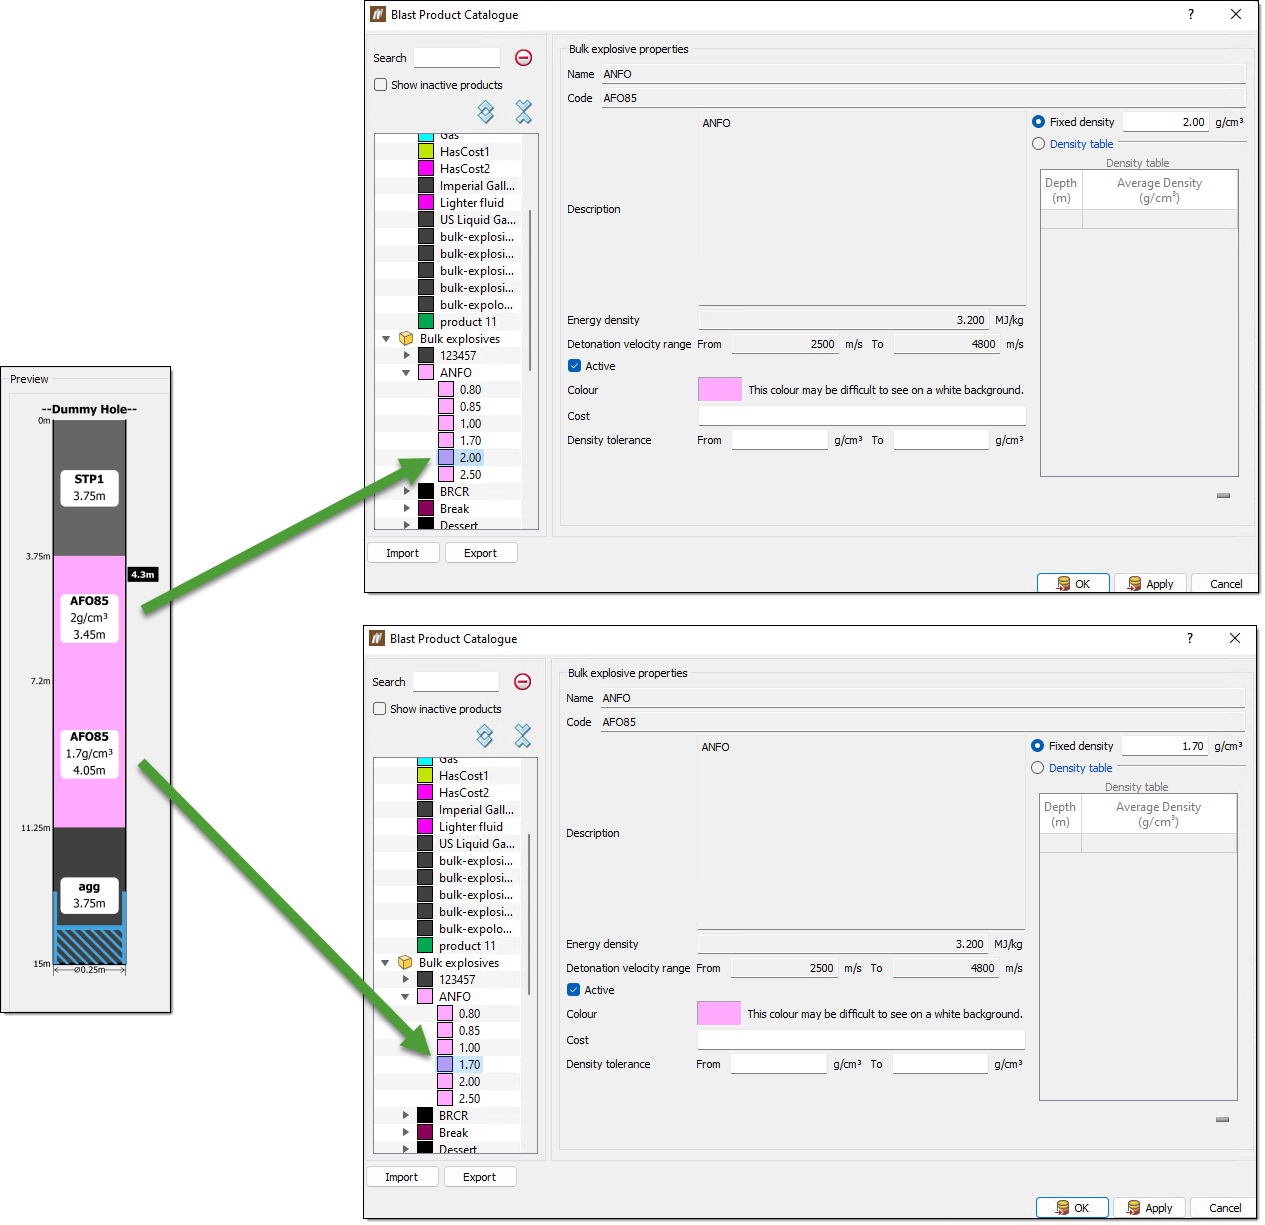
In the screenshot above, the Quantity column is set to Variable ratio with the Amount column set to 1.000. This corresponds to each product having a variable mass ratio of 1:1 in the hole. You can view this in the 2D hole preview.
You can view the densities of each material in the Blast Product Catalogue. To open this catalogue, navigate to the Home ribbon, go to the Setup group and select Blast Product Catalogue. In this view, you can see that BlastLogic has increased the amount of AFO85, due to its lower density. For more information on this catalogue, see Blast Product Catalogue section of the Setup topic.
-
-
Review the Script builder tab. After you fill in the load table, BlastLogic creates a simple script in the Script builder tab. In this tab, you can view and edit the preselected options to generate a new script if you desire. Alternatively, fill out the charge rule script manually in the Script tab, using the JavaScript programming language. The script is responsible for calculating a set of decks that completely fill the hole with desired blast products.
-
Save the new charge rule by clicking OK or Apply.
Note: The new charge rule does not exist in the database until you save it for the first time. If you decide you don't want to save the new charge rule, click Cancel.
Loading a charge rule
To load a charge rule from the server, see the Load Charge Rules or Load Charge Rules From Holes sections of the Load topic.
Cloning an existing charge rule
After publishing a charge rule, you can only modify its name and description. BlastLogic prevents further editing to preserve the charge rule settings for historical accuracy.
To make changes to an existing charge rule, you must make an editable copy of the charge rule by cloning it. The cloned charge rule contains exactly the same information, parameters and rules as the original copy, but you can modify all aspects of it.
To clone a charge rule, follow these steps:
-
In the data explorer, in the charge rules container, double-click on the charge rule you wish to change. The Edit Charge Rule Defaults panel will appear.
-
Select Clone.... BlastLogic will display the same panel but with a cloned version of the charge rule, named Copy of <charge rule name>.
 Note:
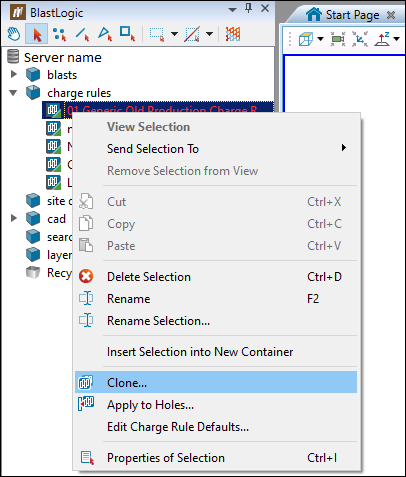
Note:Alternatively, clone a charge rule by right-clicking on the charge rule, located in the charge rules container in the data explorer, and select
 Clone from the context menu.