Points
Source file: points.htm
The Points group on the Geometry ribbon contains tools that allow you to insert, add, and move points, as well as a tool to generate a points object from holes.

 Insert Points
Use ![]() Insert points to insert points along a line segment, effectively dividing it into new segments. The existing line segment can be part of a line, polygon, circle or any other compatible object.
Insert points to insert points along a line segment, effectively dividing it into new segments. The existing line segment can be part of a line, polygon, circle or any other compatible object.
-
On the Geometry ribbon, go to the Points group and select
Insert Points.
Alternatively, right-click on the outline of the object in your view, and from the context menu select Edit > Insert points....
The status bar will display the Pick an edge to replace prompt.
-
Select the point to insert from in the view window.
The digitisation tool requests a location for the new point.
-
Click at the location for the new point, or enter coordinates and click
 in the status bar.
The function is reset and ready for adding another point from the last point. -
To exit the function when finished, right-click, press Enter or click
 in the status bar.
 -
To exit without completing the function, press Esc or click the
 in the status bar.
Tip: Use the action plane to simplify selecting points accurately.
 Add Points
Use this tool to add a new point and link it to an existing point. The existing point can be part of a line, a shape, or any other compatible object.
-
On the Geometry ribbon, go to the Points group and select
Add Points. Alternatively, right-click on the outline of the object in your view, and from the context menu select Edit > Add Points....
The status bar will display the Pick point to add from function.
-
Select a starting point on a CAD object in the view window from which to add new points.
-
Click at the location of the new point, or enter coordinates in the digitisation request and click
or press Enter.
-
Repeat step 3 to add more points, as required.
-
To complete the function and retain the new points, right-click anywhere in the view window, or click
in the status bar. -
To exit and discard the new points, press Esc or click
in the status bar.
Tip: Use the action plane to simplify selecting points accurately.
 Move Points
Use ![]() Move points to move an existing point to a new location. The point can be part of a line, polygon, circle, surface or any other compatible object.
Move points to move an existing point to a new location. The point can be part of a line, polygon, circle, surface or any other compatible object.
-
On the Geometry ribbon, go to the Points group and select
Move Points. Alternatively, right-click on the outline of the object in your view, and from the context menu select Edit > Move Points....
The status bar will display the Pick point to move function.
-
Select the point to move in the view window. The digitisation tool requests a new location.
-
Click at the new location or enter coordinates in the digitisation tool. The point is placed at the new location.

The function is reset and ready to select another point. -
To exit the function when finished, right-click or click
in the status bar. -
To exit without completing the function, press Esc or click the
in the status bar. You can also right-click before selecting a new point location.
Tip: Use the action plane to simplify selecting points accurately.
 Points From Holes
The ![]() Points From Holes tool allows you to generate a point set from a selection of holes.
Points From Holes tool allows you to generate a point set from a selection of holes.
To generate a point set from a hole selection, follow these steps:
-
Select the desired holes in the view window or project explorer.
-
On the Geometry ribbon, in the Points group, select
Points from Holes.
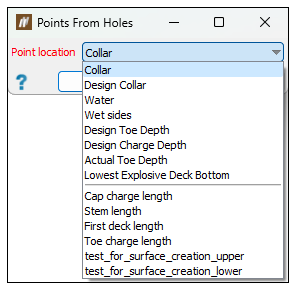
The Points From Holes panel will appear. -
Select a surface location or down-hole property from the Point location drop-down.
-
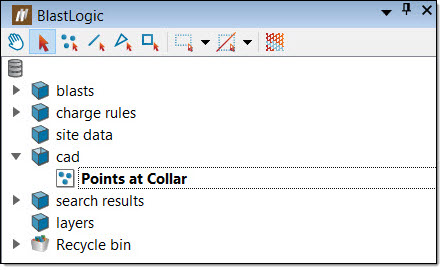
Click OK or Apply. The points object will appear in the
cadcontainer in the project explorer. -
Optionally, you can export the object as a point text file. To do this:
-
Select the object in the project explorer.
-
On the Home ribbon, in the Data group, select Export. The Export panel will appear.
-
Select Point text file (*.txt) from the Export as drop-down.
-
Enter the location you wish to save the file in the Path field.
-
Click OK or Apply.
-