Configuration
Once a component has been added to the Flowchart > Flowchart tab, additional information needs to be provided in the Configuration tab. The type of information required will depend on the component added.
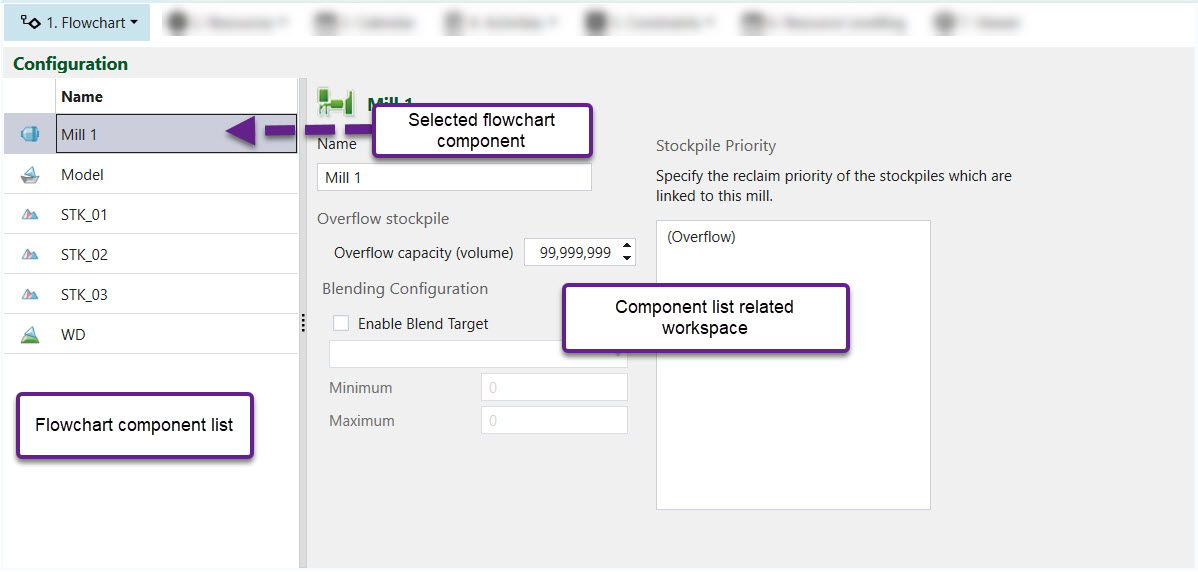
The Configuration tab consists of three main elements: the Flowchart component list, the selected flowchart component, which will be highlighted and the Component related workspace. When a component is selected, the workspace is populated with fields related to that component for you to complete.
Flowchart components
Each flowchart component has a specific workspace for you to complete.
Pit (solid)
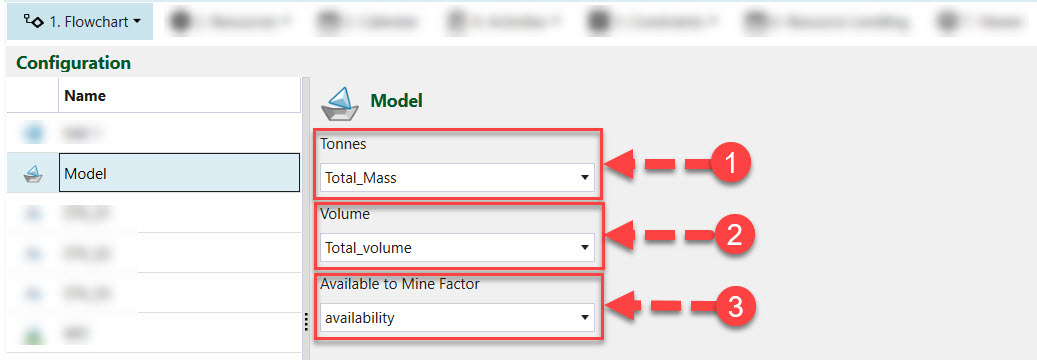
The following fields for each solid need to be set using attributes from the imported pit:
-
Tonnes— Provide the attribute which best represents the maximum tonnes.
-
Volume— Provide the attribute which best represents the maximum volume.
-
Available to Mine Factor— Provide the attribute which best represents the availability of a solid.
Mill
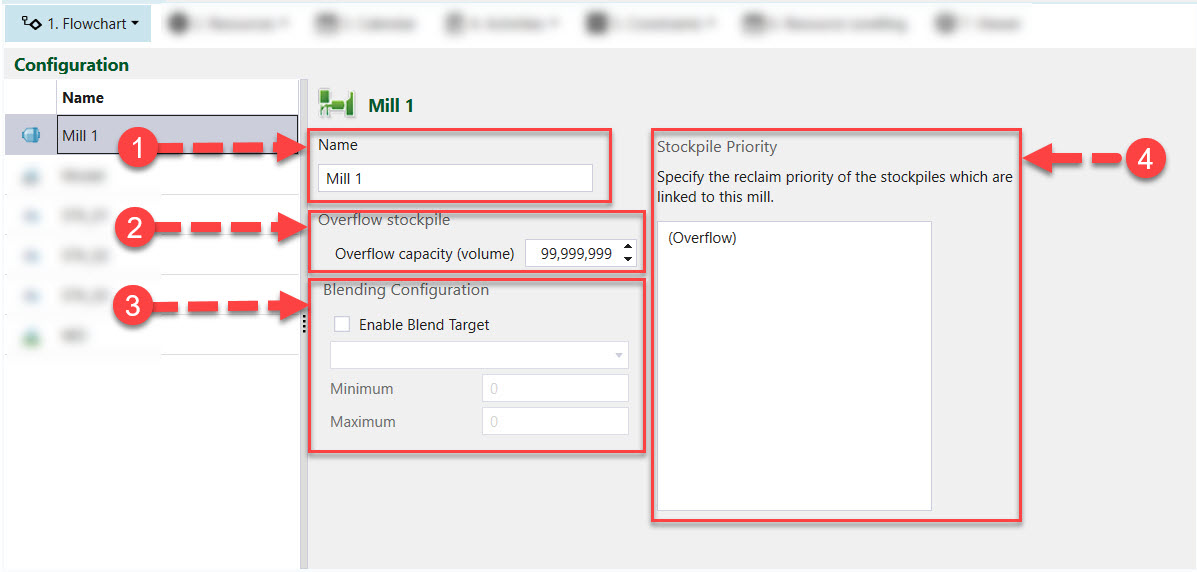
The configuration tab for a mill is used to set:
- Name — Provide a Name to the mill of your choosing. The default name is Mill <number>, where number represents the number of mills in the setup.
- Overflow capacity — Enter the capacity of the stockpile adjacent to the mill, which is called overflow. The greater the overflow capacity, the more likely it is for material to be sent to it.
- Blending Configuration— Choose an attribute imported via the pit to represent grade. Set a minimum and maximum target for the final mined solid.
- Stockpile priority— Provide the stockpile order by dragging and dropping list items. Material is sent first to the stockpile which appears first in the list. Evolution automatically gives the overflow stockpile first priority.
Flow control node
The Configuration - Flow control sub-tab is used to define the Accumulation Rate Limits which are maximum rate at which material can be transferred from the pit to the specified destination. The Accumulation Rate Limits can be defined in terms of Tonnage or Volume per hour.
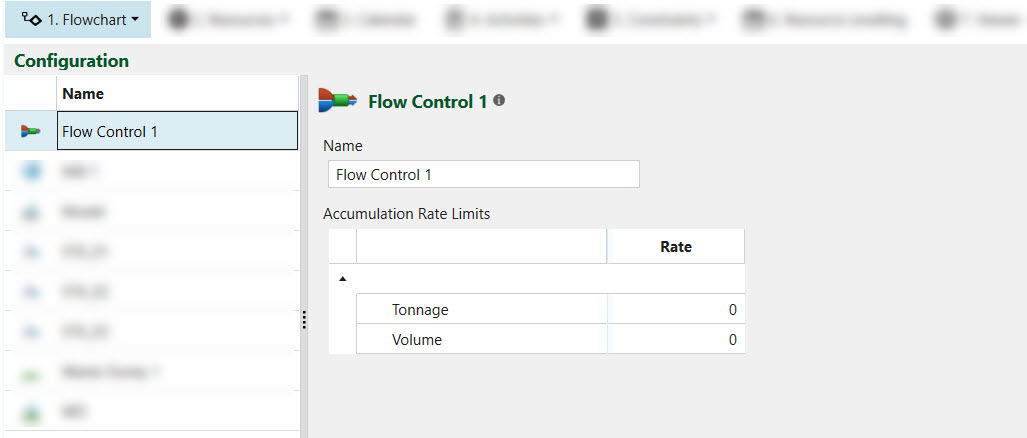
Once the setup has been evaluated, you can check whether the limit has been honoured using pivot reporting.
Troubleshooting
When checking whether the flow control rate has been enforced, there are a few competing rates which need to be considered - the mill productivity set in the Resource Groups > Single Coverage Appointments tab and the activity productivity rate set in the Activities > Duration Scripts tab. The flow control rate needs to be lower than both the mill productivity and the activity productivity rate in order to be enforced by the software.
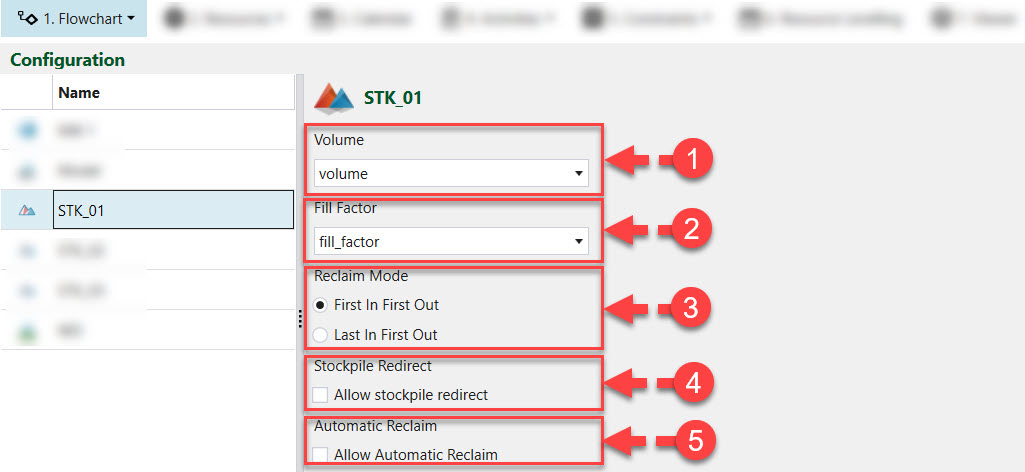
Reserve stockpile
There are five fields to configuring a reserve stockpile:
-
Volume — Provide an attribute from the imported reserve stockpile model which represents maximum volume for each unit of space (solid) within the model. An attribute for Volume must be provided for the configuration of the reserve stockpile model to be successful.
-
Fill Factor— Provide an attribute from the imported reserve stockpile model which represents the fill factor for each unit of space (solid) within the model. An attribute for Fill Factor must be provided for the configuration of the reserve stockpile model to be successful.
-
Reclaim mode— Select the reclaim mode from the following options:
-
FIFO (First In First Out) where the first solid sent to the stockpile, is the first solid to be reclaimed.
-
LIFO (Last In First Out) where the last solid sent to the stockpile, is the first solid to be reclaimed.
Evolution will automatically choose FIFO reclaim mode.
-
-
Stockpile Redirect— Check this if you want to allow stockpile redirect behaviour. If allowed, material that is otherwise determined to be transferred to the stockpile, will be sent to the mill, if the mill capacity hasn’t been reached.
-
Automatic reclaim— Check this if you want to allow automatic reclaiming behaviour. If selected, material will be reclaimed from the stockpile only when the mill is under capacity.
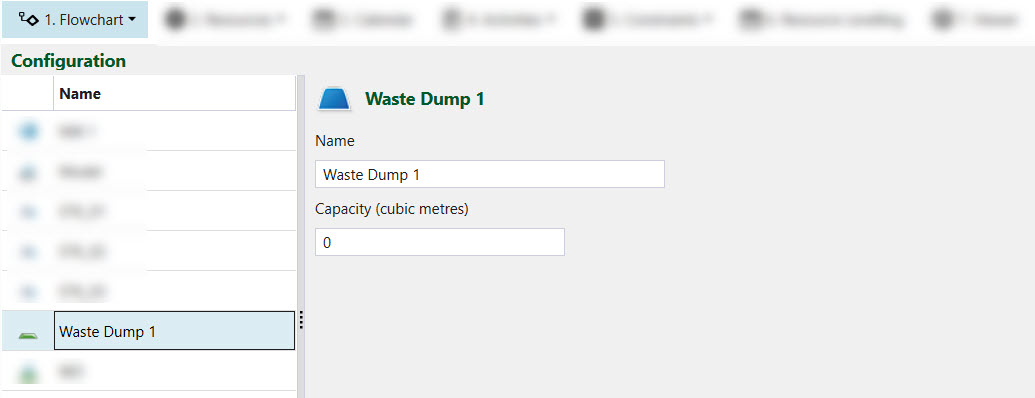
Virtual waste dump
A virtual waste dump only needs its Capacity defined.
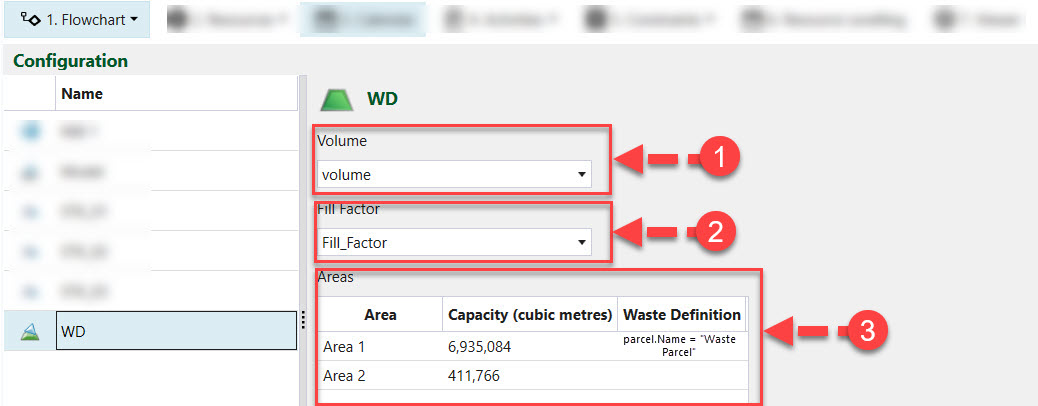
Reserve waste dump
To configure a reserve waste dump, set the following fields:
-
Volume — Select the attribute from the imported reserve waste utility, that best represents the maximum volume for each unit of space within the reserve waste utility.
-
Fill Factor — Select the attribute from the imported reserve waste utility, that best represents the fill factor for each unit of space within the reserve waste utility.
-
Areas — Provide a waste definition for each area defined in the imported reserve waste utility. This definition determines the type of material that the waste utility can accept. For example, if the waste definition for Area 1 is set to the following:
parcel.name = "Waste Parcel"
This means that only the proportion of material that is classified as “Waste Parcel” can be sent to Area 1 in the reserve waste utility. If the waste definition is left blank, this means that all material can be sent to the specified area.
You can also set the waste definition for the entire waste utility using the Resources > Resource Groups > Waste Utilities tab.