Targets
The Calendar > Targets tab has four main sections: Calendar toolbar, Summary, Targets and Equipment specific targets.
Calendar toolbar

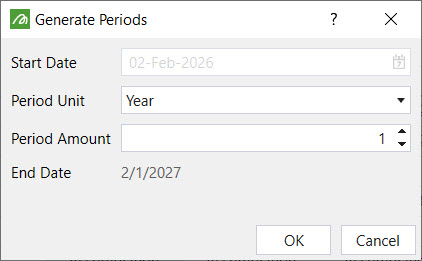
How to generate multiple periods
- To generate multiple periods at once, click the lightning bolt icon in the Calendar toolbar.
- This will open up a new panel. Provide the said information and click OK.

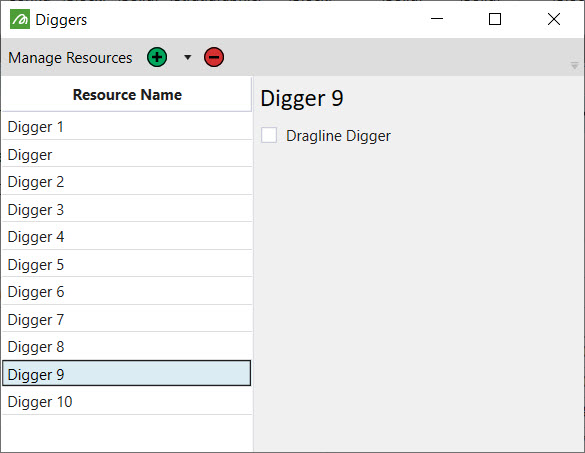
How to add/ delete diggers
- Click the digger icon in the Calendar toolbar.
- This will bring up a new panel.
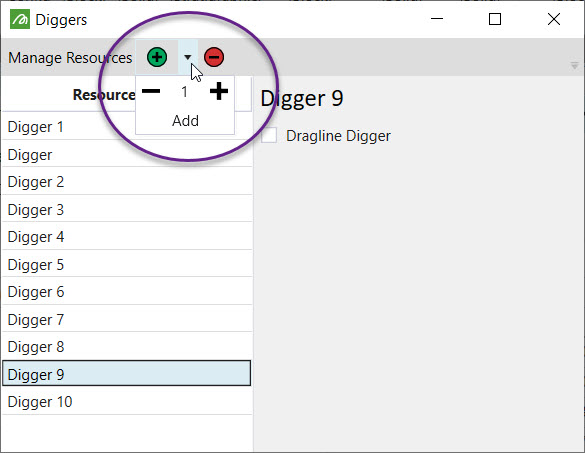
- To add diggers, click the drop down menu next to the green plus icon. Adjust the number of diggers that are required by clicking the plus or minus buttons and then click Add.
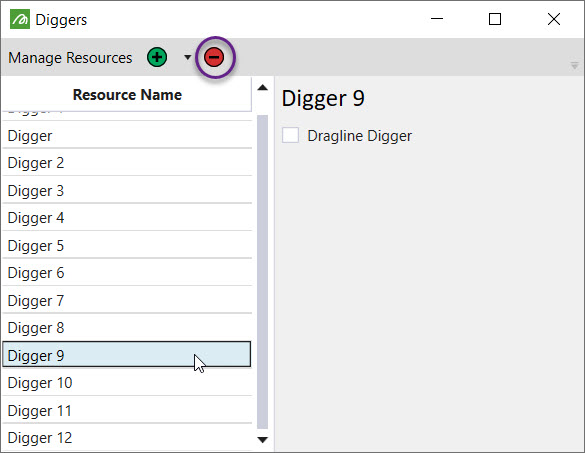
- To delete diggers, select a digger from the list and then click the red minus icon.

How to add a period
- Click the drop down arrow next to the green plus icon in the Calendar toolbar. Adjust the number of diggers that are required by clicking the plus or minus buttons and then click Add. The periods will be add to the end of the list. To insert periods before a selected period, click here.

How to delete a period
- Select a period.
- Click the red minus sign in the Calendar toolbar.

How to insert a period before selected period
- Select a period in the Calendar.
- Click the insert icon in the Calendar toolbar.

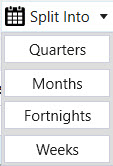
How to split a period
In reserve setups, it isn't necessary for all periods to be the same length or have a time frame of a month. It is also possible to have periods in reserve that are fortnightly, monthly, quarterly or yearly. But be mindful that this will have an effect on the NPV.
To split a period:
- Select a period in the Calendar.
- Click the Split Into dropdown menu in the Calendar toolbar.
- From the drop down list, select a time unit to split the period into.

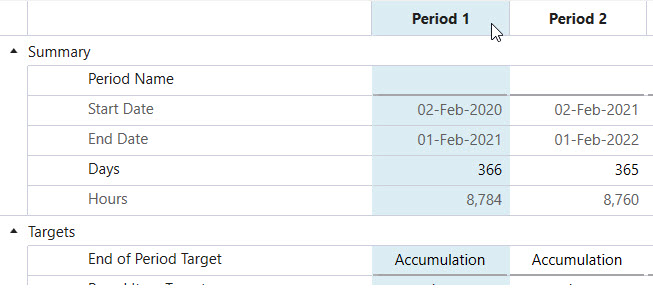
Summary
In the summary, you specify the number of active days in the period.

Targets

In the Targets section, select the End of Period Target, the Parcel Item Target and if applicable, the Target Value.
The End of Period Target tells Evolution when to move on to the next period. There are three end of period target types: Accumulation, Process Accumulation and Equipment Time. Accumulation is the total amount of material that can be processed in the period. The Parcel Item Target can be set to mass (tonnage) or a volume. If the Accumulation option is selected, a Target Value needs to be defined.
If the End of Period Target is Process Accumulation, this means that the period will end when the mill reaches its full capacity. The Parcel Item Target or Target Value is not defined for this option. Instead, the target value is the mill capacity (tonnes) which is defined in the equipment specific section of the calendar.
The Equipment time end of period target depends if the setup is an equipment or material movement setup.
If the setup is an equipment setup, the actual target value is the total haulage hours. This field is read-only. If the setup is a material movement setup, the total digger available hours is the target value. It is also read-only and pre-calculated from value investigation required.
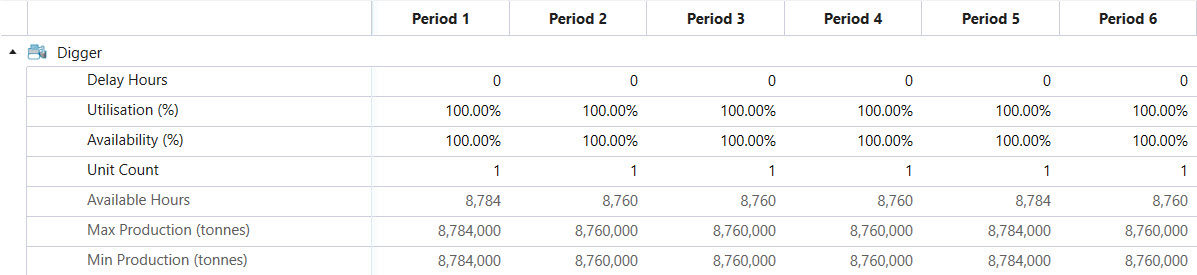
Digger
For each digger in the setup per period, you specify its Utilisation and Availability as percentages. Based on these values, Evolution will calculated the number of Available Hours for each digger per period.
Mill & Stockpile
Both the mill and the stockpile have the same parameters to set: capacity and ore definition per period. The ore definition dictates the type of material that can be sent to it. For example:
parcel.Name = "HG" (high grade)
parcel.Name <> "W" (waste)

Stockpiles have an additional field that needs to be set: Reclaim Mill. If there are multiple mills in a setup, select the mill that will be used to accept material from the stockpile. You can also set the Reclaim Mill to the Flowchart option, which means that any mill connected to the stockpile in the flowchart will be used to accept material from the stockpile.