Virtual Solids
The Virtual Solids tab lets you create and manage virtual solids. Creating a virtual solid allows you to inject additional material into your setup, without creating a solid in Vulcan. You do not have to import any data to create a virtual solid and they have no associated geometry. Instead, virtual solids are defined by existing shared pit attributes. These attributes are initially set to default values and you can edit them as desired. We recommend defining attributes which allow Evolution to determine the time needed to mine the material, such as tonnage.
Creating a virtual solid
To create a virtual solid, follow these steps:
-
From the Configuration Setup Tabs, in the 4. Task Sequence drop-down, select Virtual Solids.
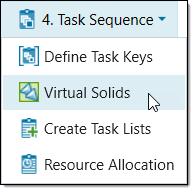
The Virtual Solids window will appear.
-
Customise the attributes you wish to use for the solid. To do this, follow these steps:
-
Select Filter Attributes.

The Virtual Solids Filter panel will appear.
-
Drag the attributes you wish to hide in the view from the Displayed Attributes field into the Hidden Attributes field. Evolution will only display the attributes in the Displayed Attributes field in the window.

-
Click Save to save these settings. Evolution will update the virtual solids table.

-
-
Enter a name for the virtual solid in the Name field.
-
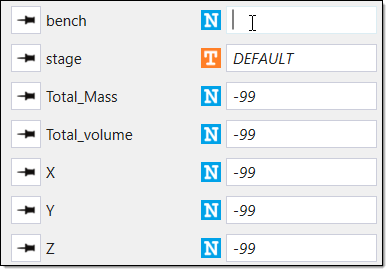
Enter the desired information into the attribute fields in the attributes list.
 Tip!
Tip!You can customise the attributes list with the following:
-
To pin important attributes to the top of the attributes list, click
 . To unpin an attribute, click
  .
.
-
To reset all of the attribute values to the default state, select Reset Values. You can change the default states by editing the Numeric and Text fields in the Defaults section of the window and clicking Apply.

-
-
Click Create Virtual Solid. Alternatively, you can press Enter after you type the name into the Name field to create the virtual solid.
The virtual solid will appear in the virtual solids table with the specified attribute values. Evolution will also add the virtual solid to the Virtual Tasks table, which you can navigate to by selecting the Task Lists tab from the 4. Task Sequence drop-down.
-
Optionally, you can edit the attribute values by clicking in the corresponding virtual solid table cell and entering the desired information.
-
Optionally, you can remove a virtual solid by clicking the Remove button at the end of the solid row.
Importing and exporting virtual solids
To import a virtual solid from the clipboard, follow these steps:
-
From the Configuration Setup Tabs, in the 4. Task Sequence drop-down, select Virtual Solids.
The Virtual Solids window will appear.
-
Select Import.

Evolution will import the virtual solids from the clipboard.
To export a virtual solid, follow these steps:
-
From the Configuration Setup Tabs, in the 4. Task Sequence drop-down, select Virtual Solids.
The Virtual Solids window will appear.
-
Select the virtual solids you wish to export from the virtual solids table.
-
Select Export.

Evolution will copy the selected virtual solids to the clipboard.
