4. Generate a Schedule
Once the setup has passed basic validation, you can submit it to the server for processing.
To generate a schedule:
-
Click Run under Scheduling in the Evolution Ribbon.

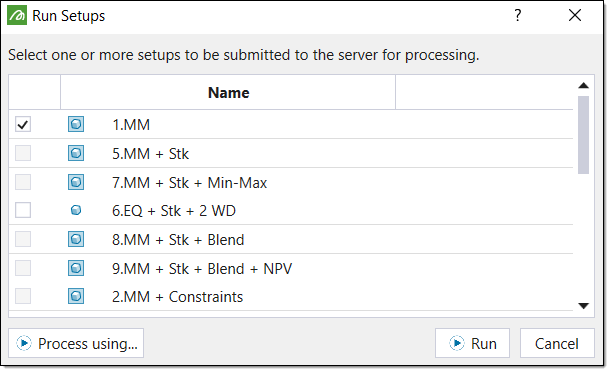
The Run Setups panel will appear which contains a list of setups.
-
Select the checkbox corresponding to the desired setup.
-
Click Run. Evolution will submit the setup to the server for evaluation.
-
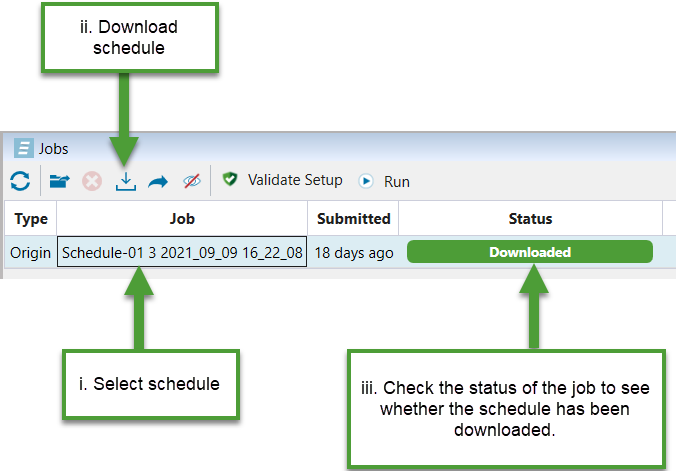
View the status of the job in the Jobs window in the Reporting Window. Once the server has returned a result, download the job from the Jobs window by clicking
 .
. 
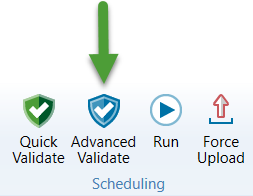
If errors are returned from the server, you can performed Advanced Validation to troubleshoot the setup configuration.
-
The downloaded job will appear in the Project Explorer under a schedule collection.
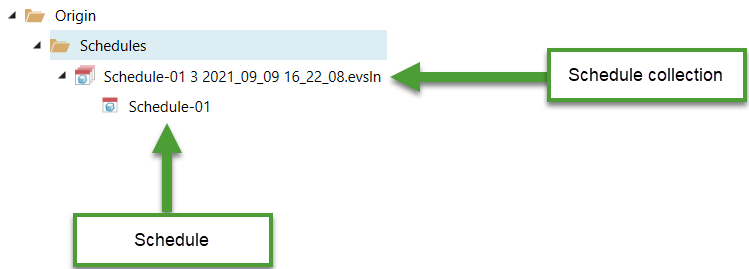
If the setup has additional objectives, the server can return several schedules. The schedule collection stores all of these schedules. The schedule icons represent the objective the schedule performed best in. The following table describes each icon:
Icon Description 
Material Movement Schedule
This icon represents when a schedule performed best in the material movement objective.
Equipment Schedule
This icon represents when a schedule performed best in the equipment objective.
Min-Max Schedule
This icon represents when a schedule performed best in the min-max objective.
Blend Schedule
This icon represents when a schedule performs best in the blend objective.
Net Present Value Schedule
This icon represents when a schedule performed best in the NPV objective.
Blocks Schedule
This icon represents the following schedule cases:-
A schedule has performed best in more than one objective.
-
A schedule contains a trade off between two objectives.
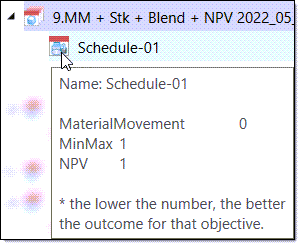
You can use the tooltip mentioned below to determine which case a schedule falls under.
You can confirm the objective performance by hovering over the icon in the project explorer. A tooltip describing the performance of each schedule objective will appear.
-
