5. View the Schedule
Once you have downloaded your schedule, you can analyse the results using pivot reporting
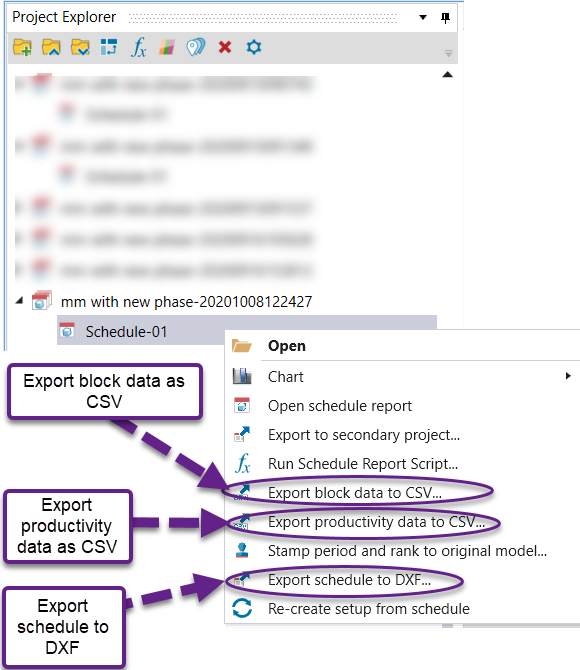
If you would like to export the data and analyse it externally, Evolution also provides you tools to export the block data or productivity data as a CSV or the schedule results as a DXF.
Exporting a schedule
Evolution provides a number of export options for block schedules:
-
As block data
Stage X Y Z Period Rank Digger 8 38425 62075 10442.5 1 1 Digger1 -
As productivity data
Stage X Y Z Type Period Rank Digger Source Destination Grade Destination Diverted STP Tonnes Cycle Time (secs) Number Of Cycles Digger Hours Haulage Hours Distance (feet) Component Distances (feet - multiple rows) Total Fuel Burn (Gal) Trolley Time (Hours) Total Trolley Distance (feet) Waste Utility Waste Area Truck Name Truck Litho Unit Volume Mill Reporting Items 3 240700 14241 -115 Mill 10 5435 Digger Stage 2 Mill 1 Mill 1 2774.539556 2146.063498 30.82821729 2.964251663 18.37758662 260286.8985 N/A 2154.055235 0 0 0 Cat_777 1 1 N/A -
As a DXF (see Export to DXF for more information)
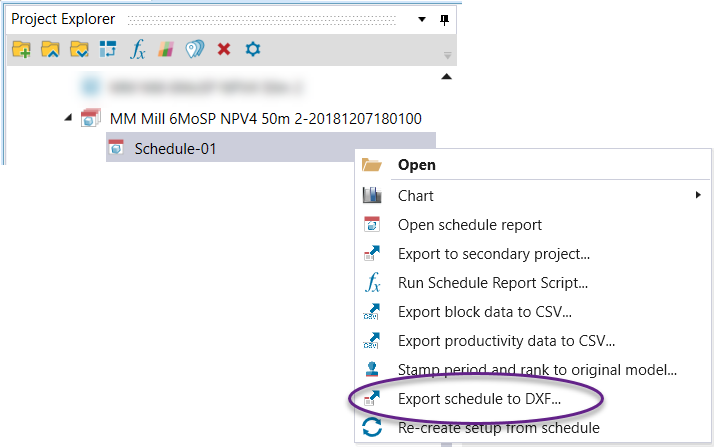
These options can be accessed by right-clicking a schedule in the Project Explorer to open up the context menu.
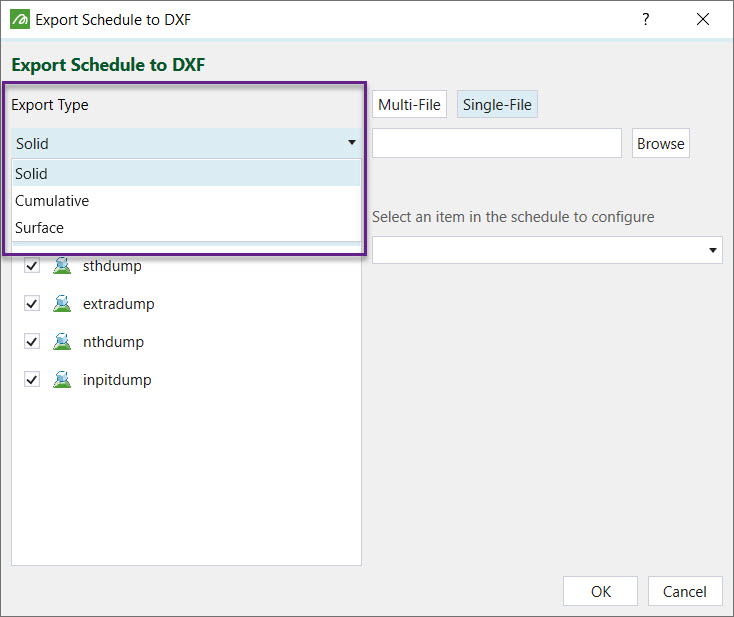
Export a schedule to DXF
The Export to DXF option allows you to export scheduling block surface information as a triangulation surface or surfaces. You can export the information as multiple surfaces per period or as a single DXF file separated into layers.
To export to DXF:
-
Right-click the schedule in the Project Explorer and select the Export Schedule to DXF option.
-
An Export Schedule to DXF panel will appear. Select an Export Type.
-
Solid — Exporting to solid creates a triangulated solid of the individual period blocks.
-
Cumulative — Exporting to cumulative creates a triangulated solid of the block faces up to and including the period.
-
Surface — Exporting to surface creates a triangulated surface of the blocks mined in a particular period. This projects some benches up to ensure the surface generated through this option can be intersected with the topography surface in any GMP.
-
-
You can either:
-
Select multiple models and export them to the same location by selecting the Multi-File option.
-
Select a single model and export them to separate locations by selecting the Single-File option.
-
-
Click OK.