Process Flow
The Process Flow tab is used to define the flow of material from the pit to various processes in the setup. It contains two separate sub-tabs: Process Flow and Configuration.
Process Flow
The Process Flow tab is used to define the overall material process flow from the source to the final product output from the processing facility.
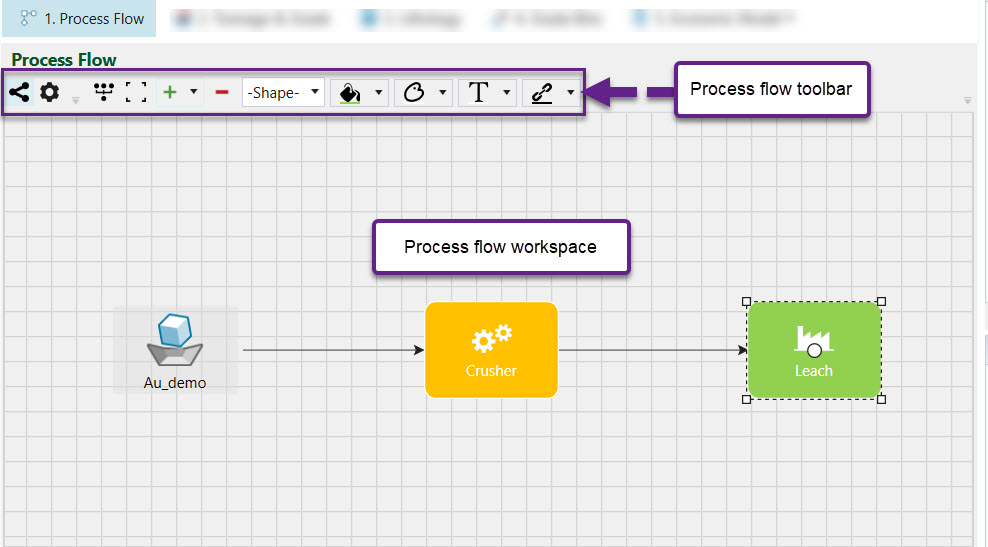
The following components can be added to the Process Flow design:
- Pit — This represents a mining pit.
- Crusher — This represents an equipment device use to initially break up material.
- Initial Stockpile — This represents an existing stockpile for single element setups. A stockpile is a temporary storage site for material which will be sent to a process at a later time.
- New Stockpile — This represents a newly created stockpile used in multi-element setups.
- Standard Process — This represents a generalised process used to further refine material.
- Complex Plant — This represents a more detailed process used to further refine material.
- Waste Dump — This represents a site to transfer waste material.
How to add a process flow node
To add a process flow node, open the drop down menu by clicking the arrow next to the green plus sign in the Process Flow toolbar and then select a process node.

How to delete a process node
To delete a process node, click on the object in the workspace and then click the red minus sign in the Process Flow toolbar.
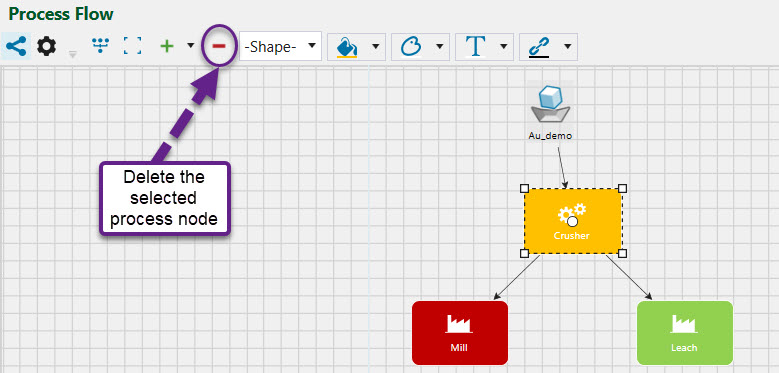
How to link two process nodes together
To link two process nodes:
- Click on component A.
- Click on the white circle on component A.
- Drag the arrow all the way to the white circle on component B and wait until the circle is outlined grey.
- Release the mouse. The link should be created.
How to customise the appearance of process nodes
The shape and colour of process nodes and the links between them are able to be customised using functions from the Process Flow toolbar. Note: Select the process node first before applying the appropriate function.

Function (1) allows you to change the shape of the process node.
Function (2) allows you to change the colour of the process node.
Function (3) allows you to change the colour of the outline of the process node.
Function (4) allows you to change the colour of the text inside a process node.
Function (5) allows you to change the colour of the links between process nodes.
Configuration
Pit
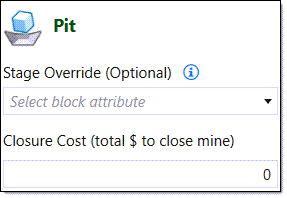
Pit configuration requires a closure cost value which is the total cost to close the mine. To do this, enter the corresponding value into the Closure Cost field. Optionally, you can change the pit stage by selecting a new attribute from the Stage Override drop-down. This allows you to have different stage attributes for setups with the same pit models.
Initial stockpile
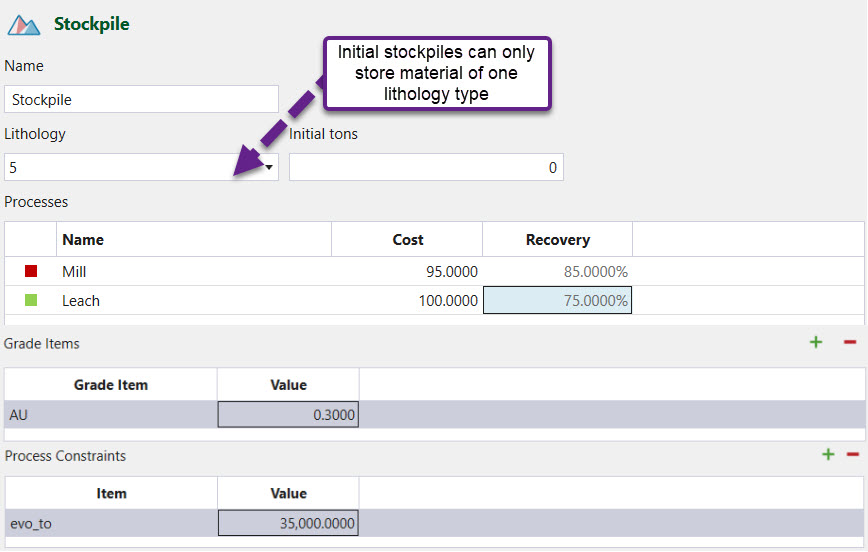
The following needs to be provided to configure an initial stockpile:
-
Name — Provide a name for the initial stockpile. Evolution will automatically provide a name for you.
-
Lithology — Choose the lithology type that the stockpile can store from an attribute from the imported pit. Only one can be chosen for an initial stockpile.
-
Processes — Set the cost and recovery of material from the initial stockpile for each process in the setup.
-
Grade Items — Add as many grade items as you would like. For each grade item, set the value of material stored at the initial stockpile.
-
Process Constraints — Add as many process constraints as you would like. Process constraints are represented by attributes or columns from the imported pit. For each process constraint, set a maximum value. That is, the combined value of all blocks sent to the stockpile must be equal to or under the value set for the defined process constraint.
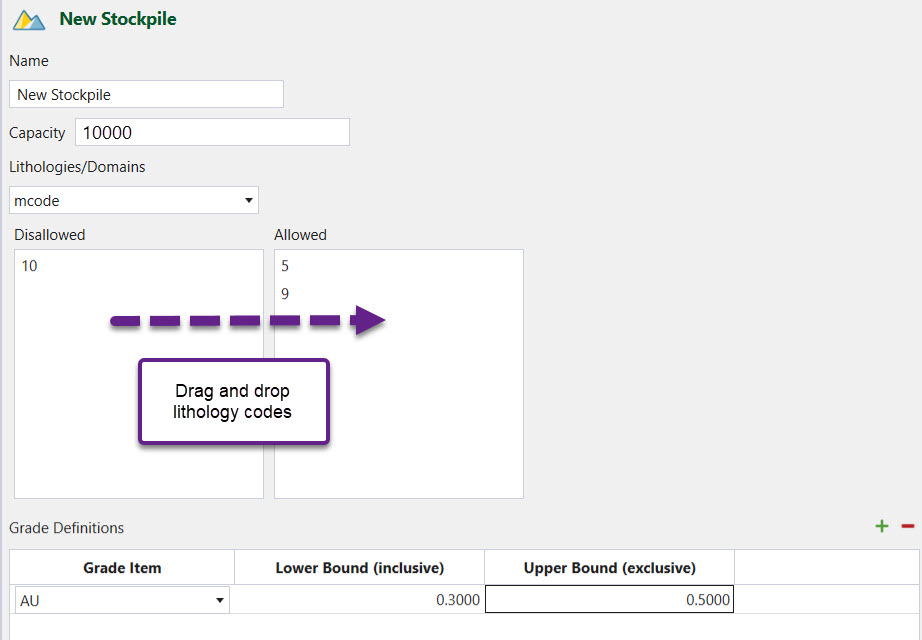
New stockpile
The following needs to be provided to configure a new stockpile:
-
Name — Provide a name for the new stockpile. Evolution will automatically provide a name for you.
-
Capacity — Enter a maximum capacity for the new stockpile.
-
Lithologies/Domains — Choose an attribute from the imported pit which represents the lithologies or domains that the new stockpile accepts.
-
Grade Definitions — Add as many grade definitions as you would like. For each grade definition, choose an attribute from the imported pit which represents that grade and set an upper and lower bound.
Standard destinations
All other standard destinations have only a Name field which allows you to change the destination name if you desire.
