Evolution Help
Source file: home.htm
Product Overview
Maptek Evolution is an enterprise mining application that is used to generate scheduling solutions for short-term, mid-term and long-term planning. Use Evolution to consider different scenarios using similar input model data and compare results in terms of productivity and grade, haulage and waste landform optimisation.
There are three separate scheduling modules in Evolution:
|
|
Strategy
|
|
|
Origin
|
|
|
Epoch |


There is one pit module in Evolution:

|
Phase
|
Navigating the Help
If you're new to Evolution, we recommend that you explore the following topics:
-
Creating a New Project
To start using Evolution, you will need to create an Evolution database known as a project. Alternatively, if you’ve already created a project, you can follow the steps in Opening an Existing Project to get started. -
Interface Overview
Learn about the user interface and the Evolution ribbon. -
Models
Before configuring your setup, you will need to import or create models that represent your pits, waste dumps, stockpiles and road networks. You will use the information stored in these models to configure your setups.
Evolution Workflow
There are some key steps to generating an Evolution mining schedule. Each step will vary depending on the type of schedule that is being generated.
|
Step 1: Create a Setup |
Step 2: Configure the Setup |
Step 3: Validate the Setup |
Step 4: Generate a Schedule |
Step 5: View the Schedule |
Step 6: Analyse the Schedule |
Step 1: Create a Setup
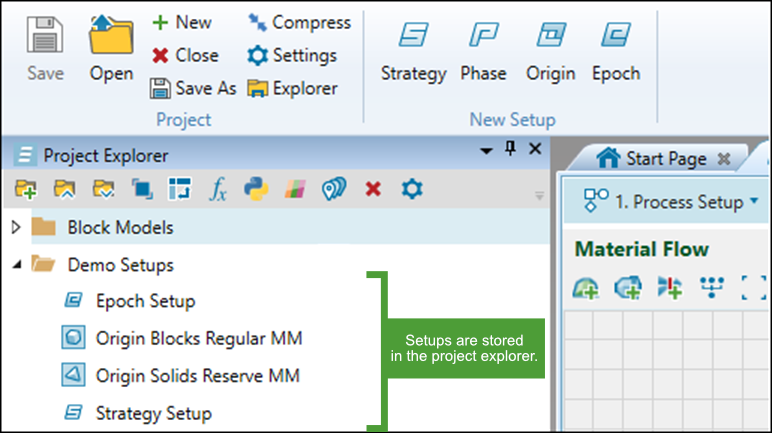
The first step to generating your schedule is to create a scenario which we refer to as a setup. You can create multiple setups in a single project based on the same or similar input data. Any setup you create will be stored under the project explorer. How you create your setup, will depend on the type of schedule you are generating:
Step 2: Configure the Setup
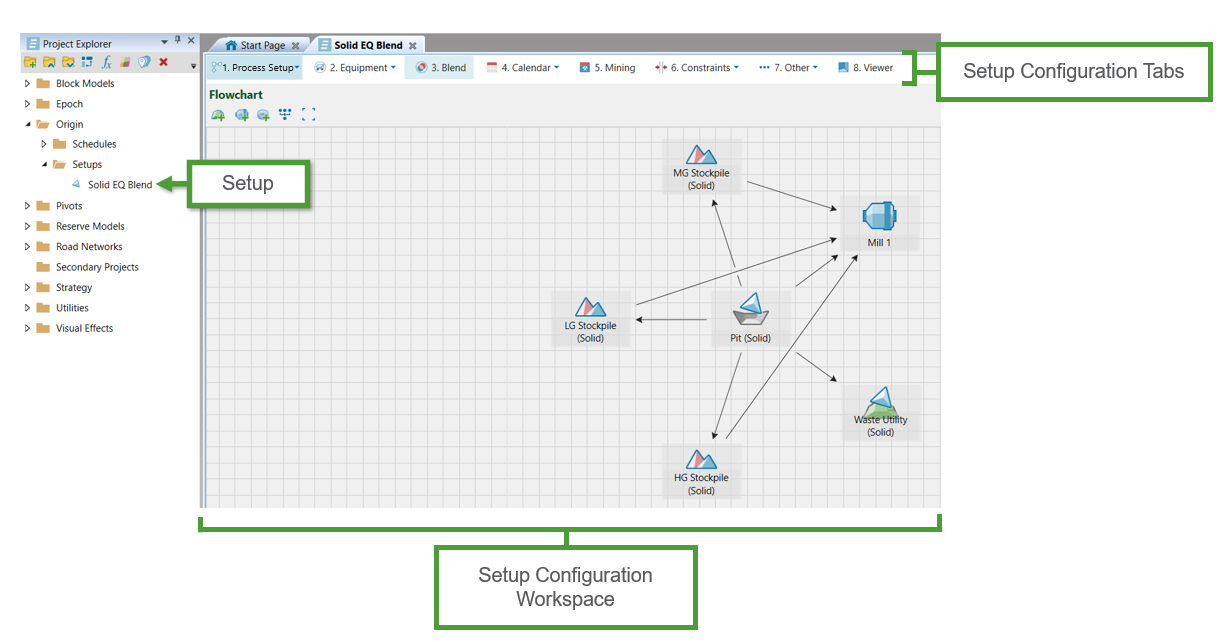
Once you have added a setup to your project, you can start to configure the setup. How you configure your setup will depend on the type of schedule you are generating. However, there are some key elements which are common to each type of setup as highlighted in the image below: the setup configuration tabs and the setup configuration workspace. Each tab represents a different aspect of the setup to configure. Click on a tab to open its workspace.
Step 3: Validate the Setup
After configuring the setup, to ensure that the setup has been configured correctly, you validate the setup. Only basic validation is required to submit a setup for schedule generation, however if you want a more comprehensive check, then you can perform advanced validation. Errors and warnings will be displayed in the Output Window as shown below.
Note: Validation procedures are the same for all types of setups.

Step 4: Generate a Schedule
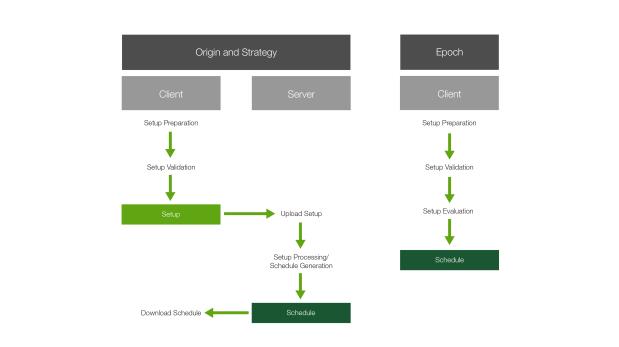
Once you have validated your setup, the next step is to generate your schedule. If the schedule you are generating is either from Origin or Strategy, this process will be performed on and downloaded from the server. On the other hand, Epoch schedules are generated using the Evolution client program. The results of Epoch schedules can be viewed as they are generated.
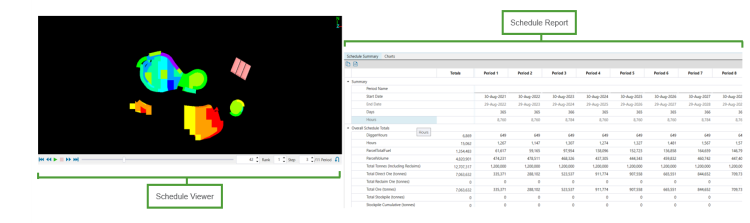
Step 5: View the Schedule
Now that you have generated the schedule, you can view the results. For Epoch alone, you can view the results as you are generating the schedule. Other types of schedules need to be downloaded first before being viewed.
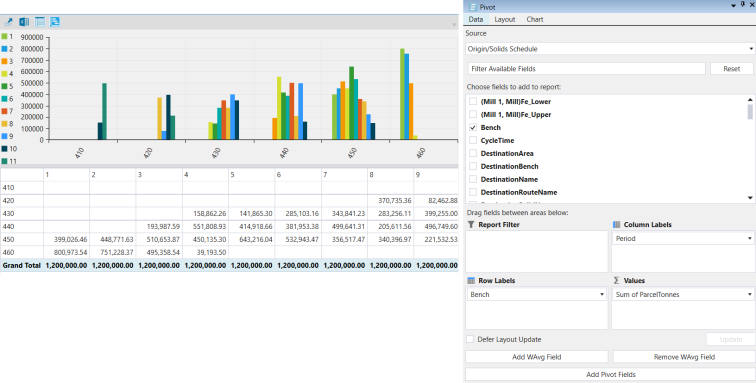
Step 6: Analyse the Schedule
Once a schedule has been generated and downloaded, you can evaluate the results using pivot reports. Epoch leverages pivot reports using the Live Dashboard which is able to analyse results as soon as they are processed. Otherwise, you can export the results to CSV format to be evaluated in an external program such as Microsoft Excel.