Activity Sequence
Source file: epoch-setups-activities-activity-sequence.htm
Use the ![]() Activity Sequence subtab to add and define activities at a solid or parcel level.
Activity Sequence subtab to add and define activities at a solid or parcel level.
The ![]() Activity Sequence subtab consists of the toolbar, settings area, and workspace.
Activity Sequence subtab consists of the toolbar, settings area, and workspace.
Note: Evolution will populate the settings area when you select an activity in the workspace.

Toolbar
The Activity Sequence toolbar allows you to add and remove activities included in your sequence, and to customise the way they are displayed in the flowchart.

|
|
Add activity Adds a new activity to your sequence. You can select from the following activities:
The selected activity will be added to your workspace (see Workspace for information on specifying the sequence between activities). Tip: To rename an activity, double-click on it in the workspace and enter the new name in the editable field. |
|
|
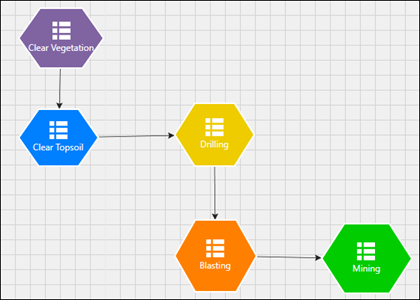
Auto Layout Diagram
Aligns activities to visualise dependencies between them. |
|
|
Size Diagram to Fit Places your diagram in the centre of your workspace. |
|
|
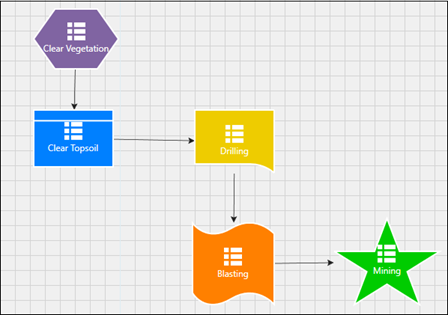
Select Activity Shape Changes the shape of the selected activity. To change the shape of an activity:
The shape you chose will be applied to the selected process node. Tip: Assign a different shape to each activity to better differentiate activity types in your sequence. |
|
|
Select Activity Background Colour Changes the colour of the selected activity. To change the background colour of an activity:
The colour you chose will be applied to the selected process node. Tip: Assign a different colour to each activity to better differentiate activity types in your sequence. |
|
|
Select Activity Border Colour Changes the colour of the shape outline of the selected activity. To change the colour of the shape outline of an activity:
The colour you chose will be applied to the selected activity. |
|
|
Select Activity Text Colour Changes the text colour of the selected process node. To change the text colour of an activity:
The text colour you chose will be applied to the process node. |
|
|
Select Link Colour Change the colour of arrows that link the activities. To change the colour of the linking arrow:
|
|
|
Delete Activity Deletes the selected activity from your sequence. Tip: You can also delete an activity by selecting it, then pressing Delete. |

Settings
Use the settings area to configure the activity you have selected in the workspace. For each activity you add, specify the following:
-
The Resource Fleets that will perform the activity. Click
 (Select fleets allowed to work in this activity) and select the required fleets from the list.
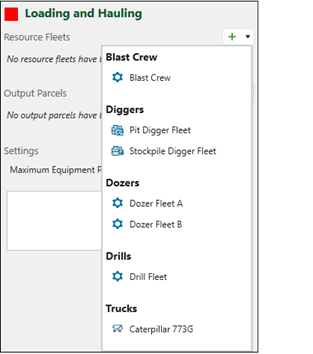
-
Click
 to remove the assigned resource fleet from the list.
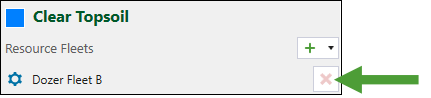
-
-
The Output Parcels the activity will produce (if applicable). Click
(Select parcels produced by this activity) and select the parcels from the drop-down list.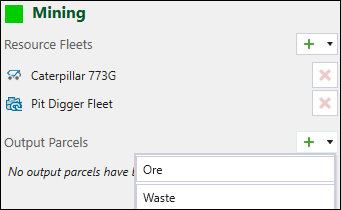
Note: The parcels listed in the Output Parcels drop-down list will correspond to the type of activity you have selected. Each parcel can only be the output of a single activity.
-
Click
to remove the assigned output parcel from the list. 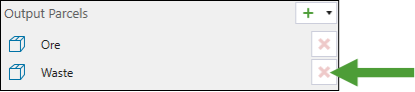
-
-
The Maximum Equipment Per Solid. This field describes the maximum number of primary equipment that can perform the given activity for a given solid at a given time.

Note: If no other activities are available and the maximum number of primary equipment has been reached, any additional pieces of equipment will stand down.
Workspace
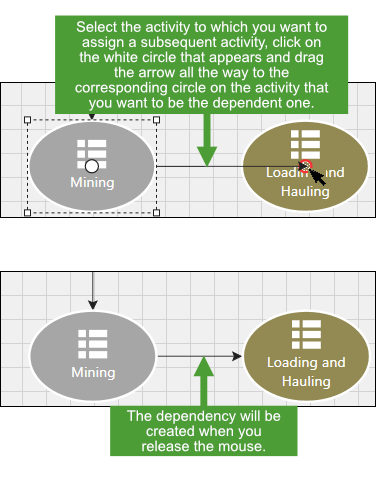
Use the workspace to define the sequence and dependency between the activities.
Follow these steps to link two process nodes together:
-
Click on the activity to which you want to assign a subsequent activity.
-
Click on the white circle that appears.
-
Drag the arrow all the way to the corresponding circle on the activity that you want to be the dependent one.
-
Release the mouse. The dependency will be created.
Note: The arrowhead always points to the dependent node.
Note: See Toolbar for more information on adding and arranging activities in your workspace.
