Task Lists
Source file: task-lists.htm
The Task Lists tab allows you to view and edit task lists in the schedule viewer. This way, you can automatically see how changes to your task lists affect the schedule. For information on configuring task lists in Epoch, see Task Lists.
Tab structure
The Tasks Lists tab is located among View Manager tabs in the bottom right corner of the ![]() Viewer.
Viewer.
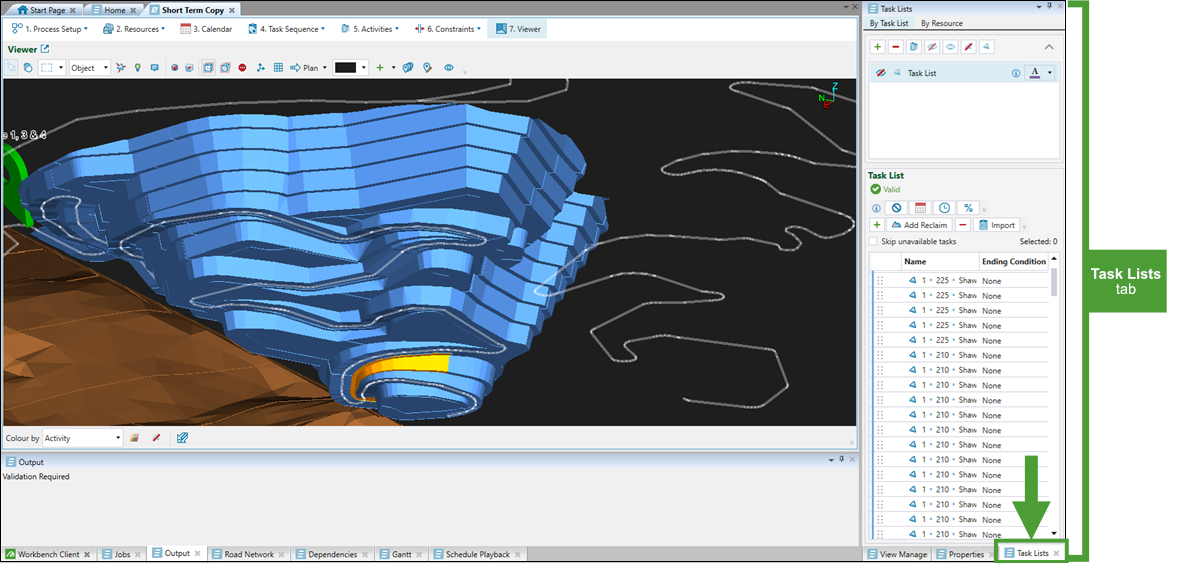
The Task Lists tab comprises the following parts:
-
Task Lists that features all task lists defined for your setup (in the By Task List subtab) and the resources associated with the configured task lists (in the By Resource subtab).
-
Task List view that shows all tasks in the selected task list.
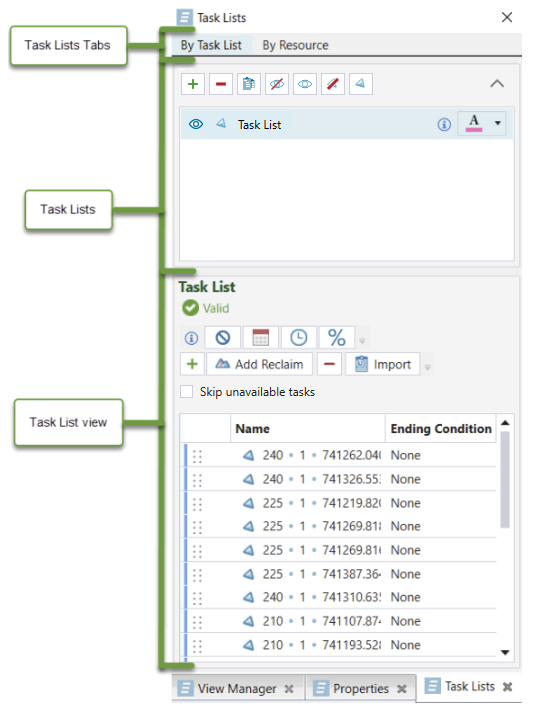
By Task List subtab
The By Task List subtab features the following controls:
|
|
Add task list
|
|
|
Delete task list
Deletes the selected task list. |
|
|
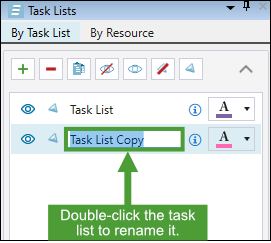
Clone task list
Tip: Double-click on the task list to rename it. |
|
|
Hide all task sequence arrows
Hides all task sequence arrows displayed in the viewer. |
|
|
Show all task sequence arrows
Displays all task sequence arrows in the viewer. |
|
|
Hide all corresponding solids
Hides all solids in all task lists. |
|
|
Show all corresponding solids
Displays all solids in all task lists. |
Additionally, you can customise the way each task list is displayed by using the following controls:
|
|
Visible/Hidden Displays or hides the task sequence arrows in the viewer. |
|
|
Visible/Hidden
Displays or hides all solids in the selected task list. |
|
|
Select task list colour
Opens a colour picker allowing you to select the colour of the task sequence arrows in the viewer. |
-
Click on a task in a task list to highlight the associated solid in the viewer.
-
Hover over a solid in the viewer to see the associated task. To select a task associated with a given solid, right-click on the solid in the viewer and click
 Select Corresponding Tasks from the context menu.
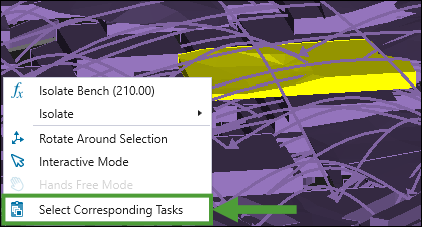
-
Hover over
 to see the list of resources that are allocated to the given task list.
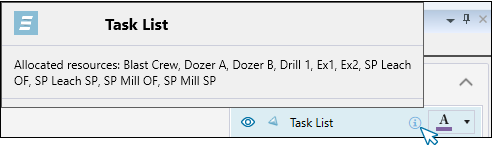
By Resource subtab
The By Resource subtab allows you to associate resources with task lists. For more information on managing resources in your setup, see Resources.
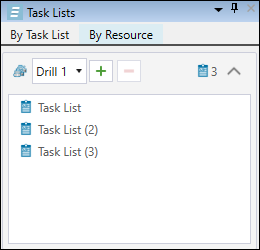
To link the given resource type to a task list, select it from the ![]() drop-down and click
drop-down and click ![]() (Allocate task list to a resource). Next, in the Associate Task Lists With Resource panel, select task lists to which you wish to allocate the selected resource. Click OK to confirm your selection.
(Allocate task list to a resource). Next, in the Associate Task Lists With Resource panel, select task lists to which you wish to allocate the selected resource. Click OK to confirm your selection.
Tip: Select multiple task lists by pressing Ctrl or Shift, or by clicking the Select all checkbox.
Note: You can unlink a resource from a given task list by selecting it from the drop-down and clicking ![]() (Remove task list allocation from resource). The task lists that have no resources allocated to them will be deleted from the By Resource subtab, but will still be included in the By Task List subtab.
(Remove task list allocation from resource). The task lists that have no resources allocated to them will be deleted from the By Resource subtab, but will still be included in the By Task List subtab.
Refining task lists
To refine task lists in the viewer tab, follow these steps:
-
Click
 Viewer in the Evolution ribbon. The viewer window will appear in the workspace.
 -
Select the Task Lists tab from the View Manager tabs. The Task Lists tab will appear.
Tip: We recommend opening live dashboard or pivot while you edit the task lists. This allows you to see the impact of your changes on the schedule, while you make the changes. For more information on the live dashboard and pivots, see Live Dashboard and Pivot Reporting.
-
Select how you wish to view the task lists. You can select from the By Task List or By Resource tabs in the Task Lists Tabs area. By default, Epoch displays the By Task List tab.
-
Refine the task lists. You can do this by using the following:
-
Importing a task list
To import a task list in the viewer, see Importing task lists.
Editing a task list
You can edit the selected task list by using the provided controls. See By Task List subtab for more information.
-
To add tasks to a task list, see Steps on adding tasks to a task list.
-
To move a task to a different position in the task list, drag the task to the required position. Alternatively, select a group of tasks (using Ctrl or Shift) and drag the group to a new position in the task list.
Creating a new task list
To create a new task list in the viewer, follow these steps:
-
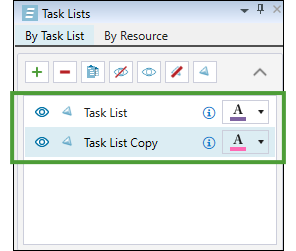
Click
 (Add task list). Epoch will add a new task list to the Task Lists area.
 -
Click
(Open task templates window) in the Task List viewer.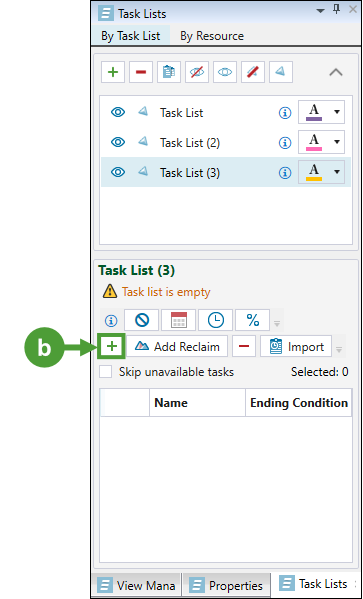
The Task Templates panel will appear.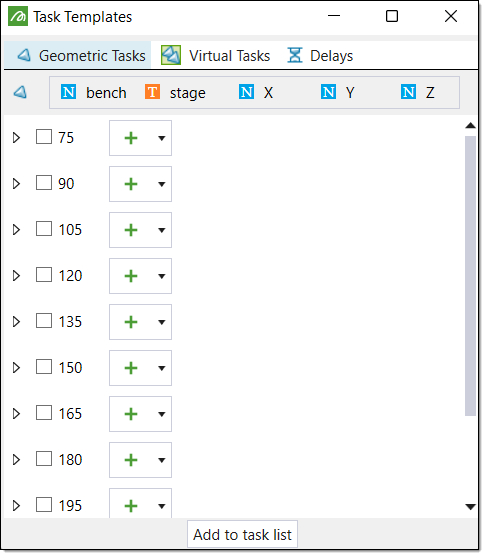
-
Add tasks to the task list.
 Expand for steps on adding tasks to a task list.
Epoch contains three types of tasks that you can add to a task list. Use the following options to add the required task type:
-
Geometric Tasks
To add geometric tasks, follow these steps:-
Select the Geometric Tasks tab from the Tasks Templates panel.
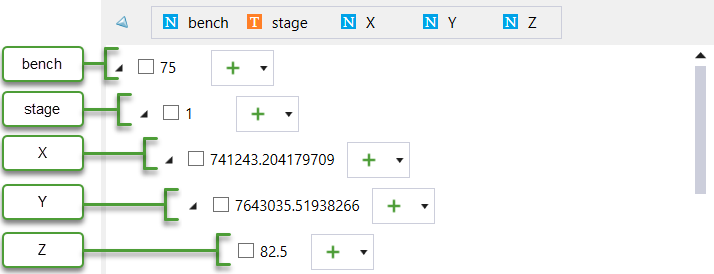
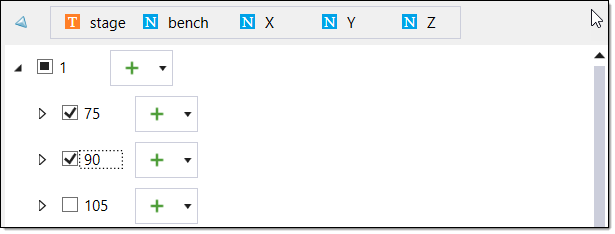
Epoch will display the geometric tasks in order of the task key definition. For example, if the task has the attribute definition of bench, stage, X, Y, and Z, then the geometric tasks will appear in this order, in a hierarchical tree structure.
-
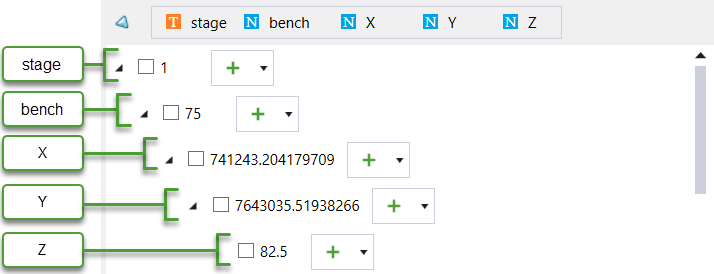
Optionally, rearrange the task key attributes to modify the geometric task tree structure. You can do this by dragging the required attribute to the required position.

Epoch will update the tree as you make these modifications.
-
Add geometric tasks using the following selection methods:
-
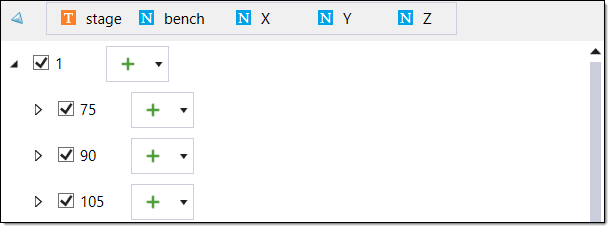
Full checkbox selection. You can select the higher level heading checkboxes to include all of the tasks under the checkbox heading.
You can add the selected tasks to the task list by clicking Add to task list.
-
Partial checkbox selection. You can select individual tasks in each heading drop-down. Epoch will flag a heading that contains some selected tasks with the partially selected checkbox
 .
.You can add the selected tasks to the task list by clicking Add to task list.
-
Icon selection. You can select groups of tasks using the
 (Add all tasks in this group to the selected task list) button next to each task heading. When you click this button, Epoch will automatically add the corresponding tasks to the task list.
Optionally, you can add the tasks in the reverse order by clicking the
drop-down and selecting Add in reverse order. Epoch will add the corresponding tasks to the task list, in the reverse order to how they appear in the Task Templates field.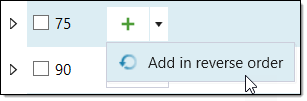
Tip: Rearrange the tasks in the task list by dragging them to the required areas.
-
-
-
Virtual Tasks
To add virtual tasks, follow these steps:-
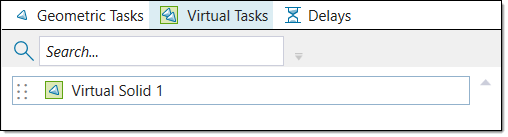
Select the Virtual Tasks tab from the Tasks Templates field. Epoch will display the virtual solids in the Tasks Template fields.
-
Find the required virtual solid by scrolling through the list or by using the search bar.
-
Drag the required virtual solid from the Task Template field into the required position in the task list field.
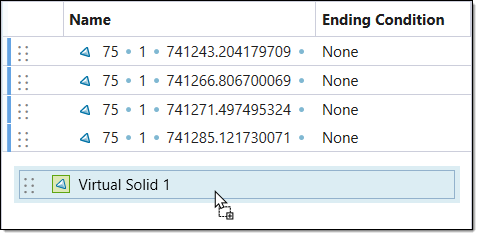
Epoch will add the virtual solid to the table in the following form:

-
-
Delays
To create and add delays, follow these steps:-
Select the Delays tab from the Task Templates field.
-
Click
(Add delay template). A new delay row will appear in the field, with the default name Delay.
-
Optionally, enter a new name for the delay in the name area.
-
Set the duration of the delay by clicking
 and adjusting the days, hours, and minutes.
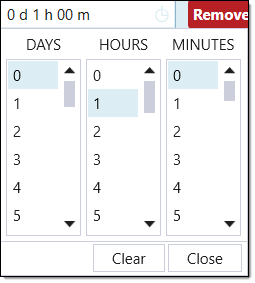
-
Click Close.
-
Drag the delay from the Task Templates field to the required position in the Task List table.
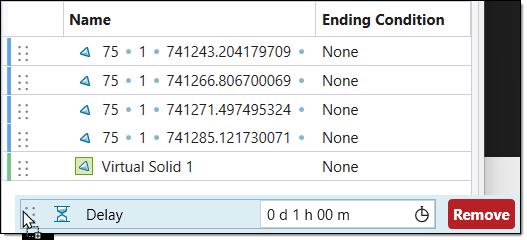
Epoch will add the delay to the table in the following form:

-
Optionally, add reclaim tasks to the task list. Reclaim tasks allow you to manually schedule stockpile reclaims to the schedule.
To add reclaim tasks to a task list, follow these steps:
-
Select Add Reclaim.
Epoch will add a Reclaim task row to the bottom of the task list.
-
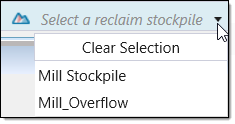
Select a stockpile for the reclaim task from the drop-down.
-
Select an accumulation type for the reclaim task from the drop-down.

-
Enter an ending condition value into the Ending Condition column cell of the reclaim row. The equipment will remain assigned to this reclaim until this value is met.

Note: Each setup can have manual or automatic stockpile reclaim behaviour. If you select automatic reclaim behaviour, Epoch will ignore any reclaim tasks defined in a task list. See the Reserve stockpile for more information.
-
-
Optionally, add ending conditions to the tasks.
Expand for steps on adding ending conditions.
-
Select the required task from the Task List field.
Tip: Hold Ctrl while selecting to add the same ending condition to multiple tasks.
-
Select the required condition type:
-
 None: Makes it obligatory to complete the entire task before the next task begins. In other words, the task has no ending condition.
 -
 Date: Ends the task at a specified date.
 -
 Duration: Ends the task when a specified duration of time has passed.
 -
 Percentage: Ends the task when a specified percentage of the total work required to complete the task is done.
Note: If a percentage of a task has already been completed, the percentage ending condition is measured from the initial required work of the task and not the remaining percentage of the work required.
-
-
Configure the conditions with the following:
-
A
None condition requires no configuration. -
For a
Date condition, a date field will appear in the Ending Condition column of the Task List table. Enter the required date by selecting  and using the drop-down calendar. Click Close to save the selected date.
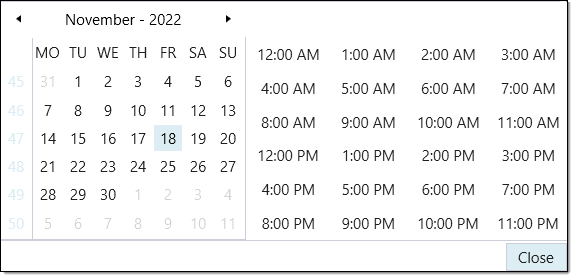
-
For a
Duration condition, a duration field will appear in the Ending Condition column of the Task List table. Enter the required duration by clicking  and using the drop-down duration panel. Click Close to save the selected duration.
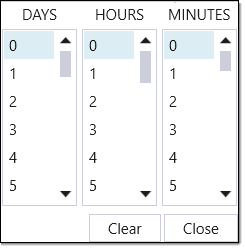
-
For a
Percentage condition, a percentage field will appear in the Ending Condition column of the Task List table. You can specify the percentage by double-clicking in the field and entering a value. You can also use the arrows to adjust the percentage value.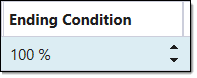
-
-
-
Optionally, choose to skip unavailable tasks by selecting the Skip unavailable tasks checkbox.
-
Re-validate the schedule. After making the required changes, Epoch will prompt you to re-validate the schedule in the Schedule Playback tab. Select either Quick Validate or Advanced Validate.
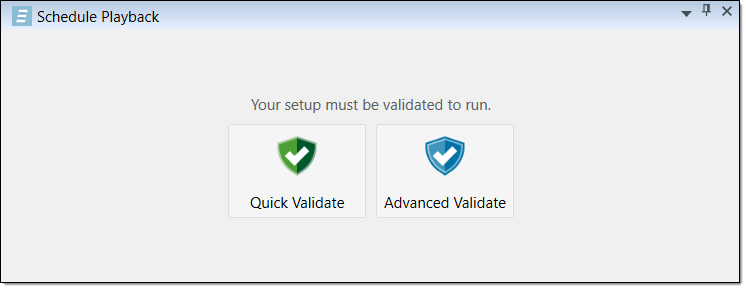
-
