Reblocking a Block Model
Source file: how-to-reblock-model-new.htm
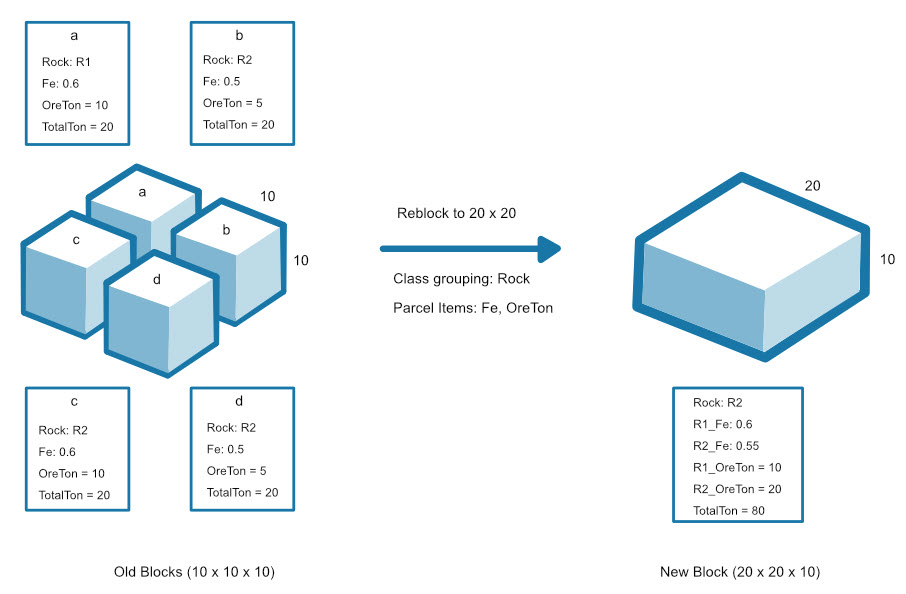
Reblocking a block model allows you to integrate smaller blocks into a bigger one. Reducing the number of blocks in your model results in speeding up the scheduling process in Evolution.
Follow these steps to reblock a model in Evolution:
-
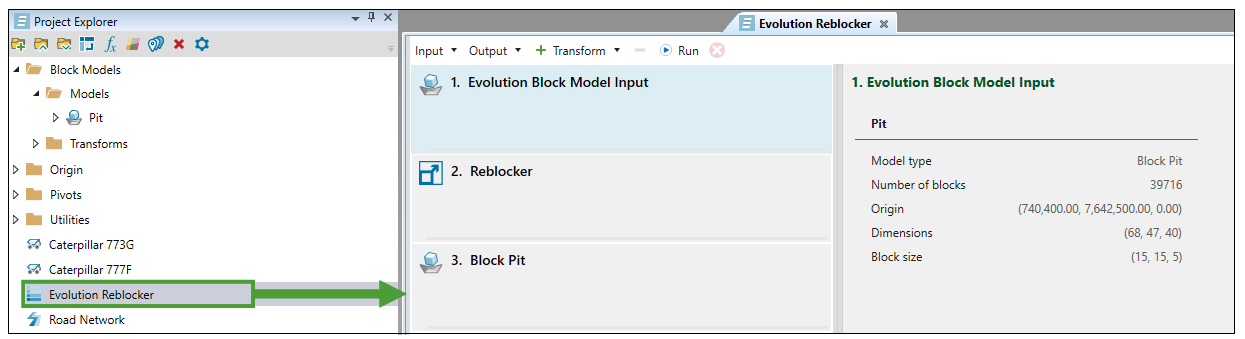
Right-click on the model in your project explorer and select
 Reblock.
A file named Evolution Reblocker will be created in the project explorer and opened in your viewer.
-
Click on the
 2. Reblocker tab to specify the new properties of the blocks that make up your model.
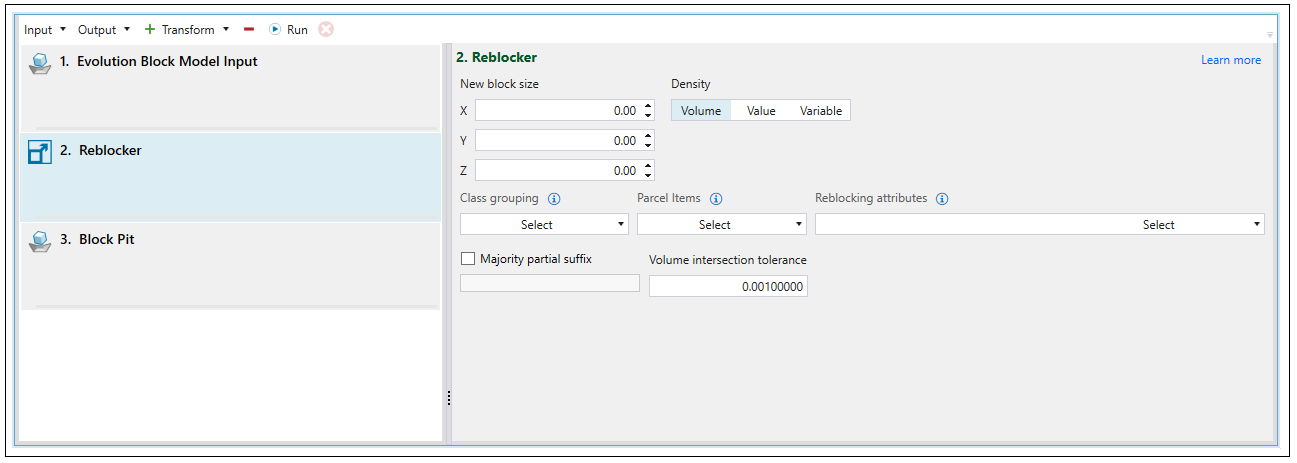
-
Enter a new block size by providing X, Y and Z values.
-
Determine the method for calculating the density by selecting Volume, Value (fixed value) or Variable (variable in the block model).
-
From the Class grouping drop-down, select a block model attribute by which the blocks should be grouped (e.g. rock, material, or stage).
-
From the Parcel Items drop-down, select items to be split by class grouping.
Note: Parcel attributes are calculated for the class group of every block which makes up the newly created block.
-
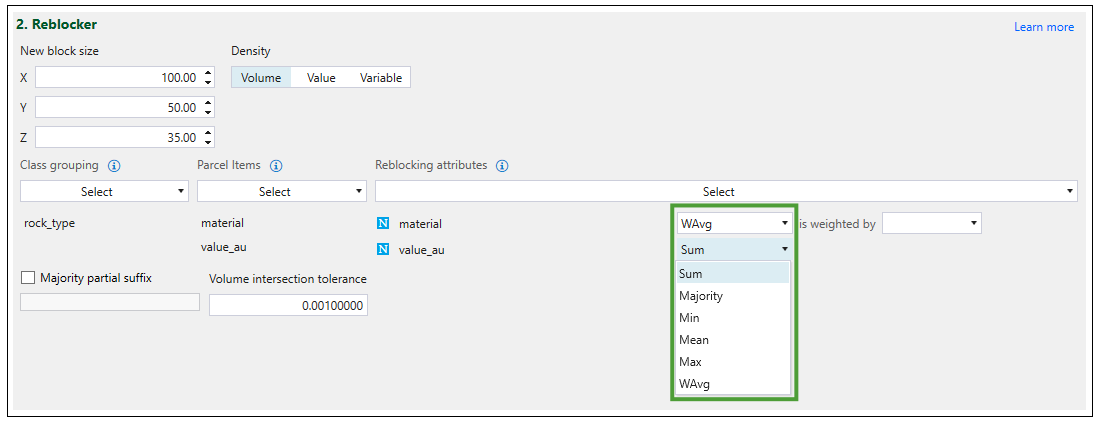
In the Reblocking attributes field:
-
Using the drop-down, select aggregation behaviour for each parcel item.
-
Select block attributes to be included in the new block.
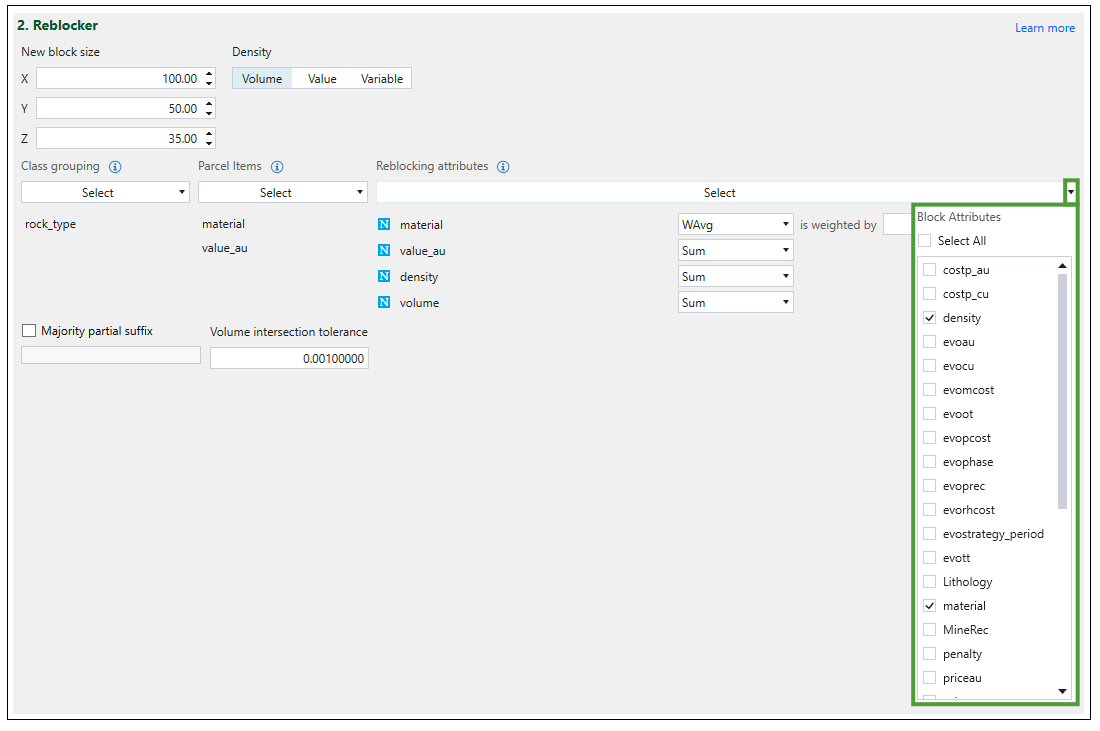
Note: Parcel items can be weighted by the block attributes that you have selected.

-
-
Select Majority Partial Suffix checkbox and enter a suffix identifier to recalculate attributes for the newly created block. The calculation will be based on determining the most frequently occurring value.
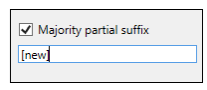
Note: The suffix you enter will be added to the included attributes for the newly created blocks.
-
In the Volume intersection tolerance field, set the overlapping tolerance between the blocks.

- Click on the
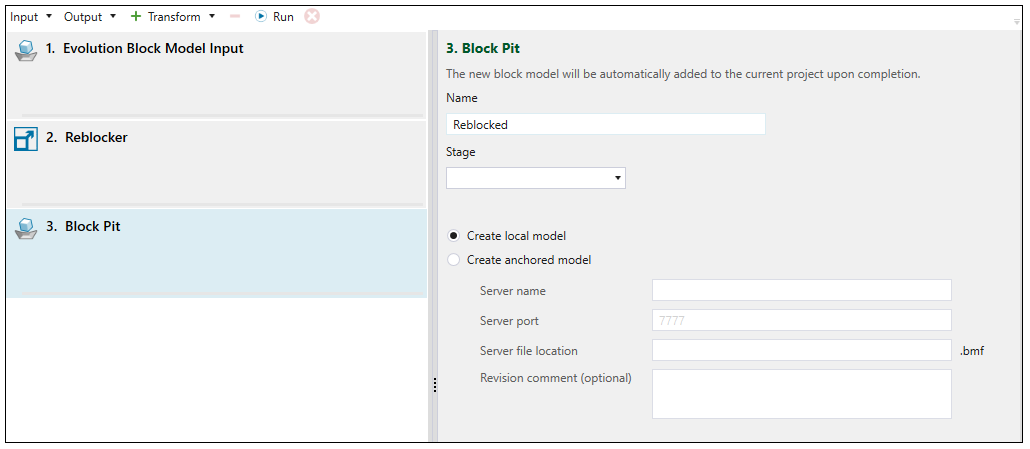
 3. Block Pit to specify the output.
 -
Designate a name for the newly created block model.
-
Specify the stage using the Stage drop-down.
-
Select Create local model if you want the model to be saved only on your machine.
-
Select Create anchored model and enter server details to save the model on the server.
-
Click
 Run. The reblocked model will be added to the Models folder in the project explorer.
Note: The attributes listed in the Stage drop-down will be the same as these selected in the Reblocking attributes drop-down.
