Import Haul Network Attributes with Trolley Data
Source file: how-to-import-haul-attributes.htm
To import trolley and other haul network attributes, you can assign attributes in Vulcan and then import the haulage network into Evolution.
Assign attributes in Vulcan
-
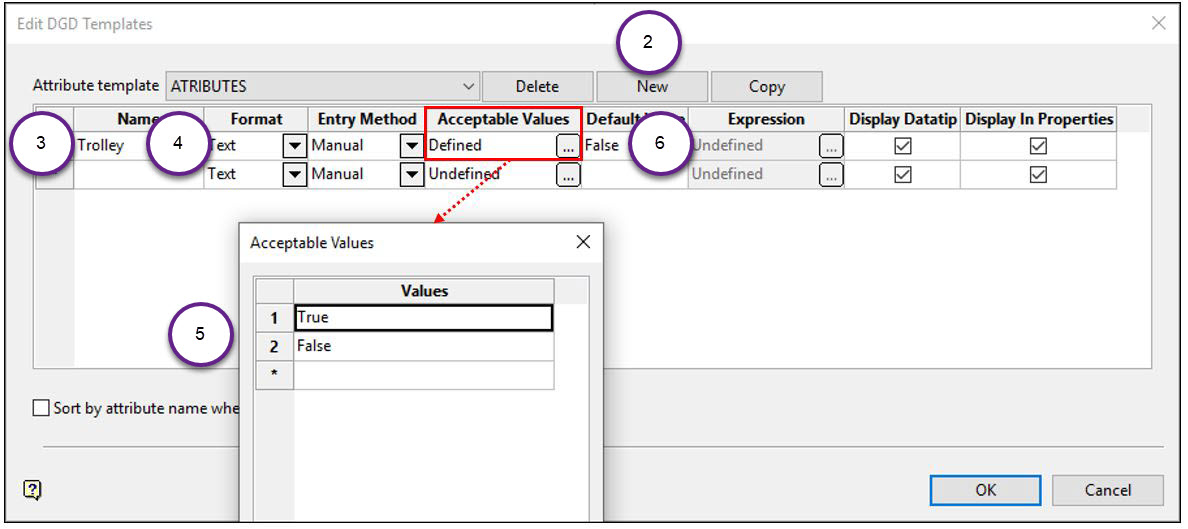
Go to Design > Templated Attributes > Edit DGD Templates.
-
Make a new template name.
-
Add the attribute name i.e. trolley.
-
Set the Format column to text for trolley.
-
Define the Acceptable Values that will be used for this attribute i.e. true or false.
-
Define a Default Value i.e. false.
-
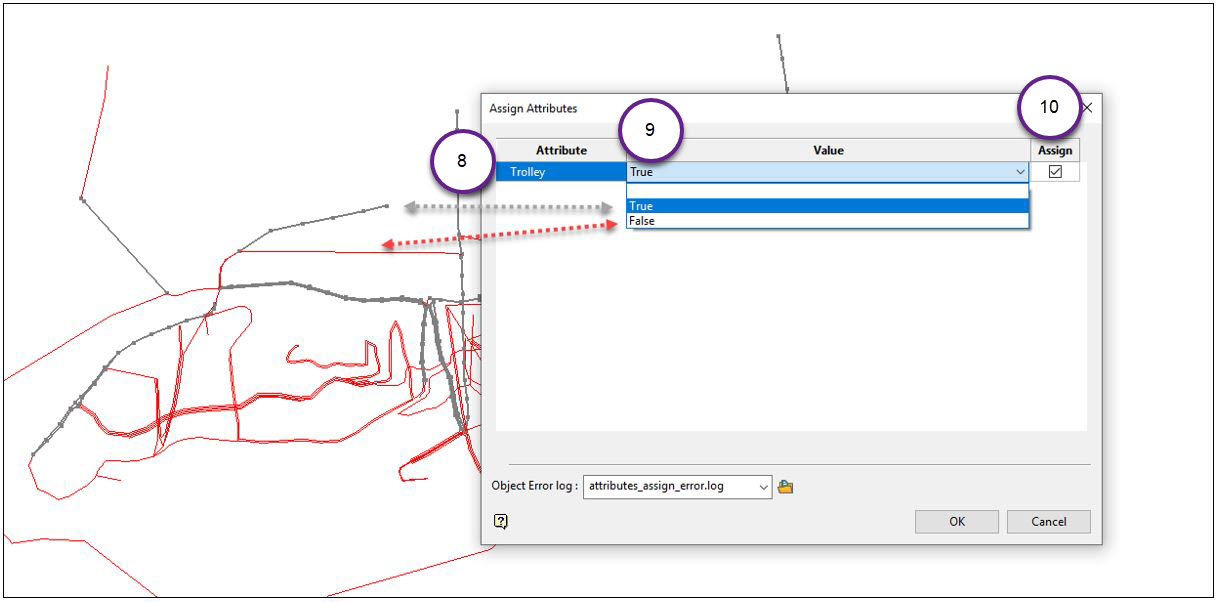
Go to Design > Templated Attributes > Assign Data.
-
Select the Attribute to apply.
-
Select the Value of the attribute to apply to the object or layer i.e. true or false.
-
Tick the Assign checkbox.
-
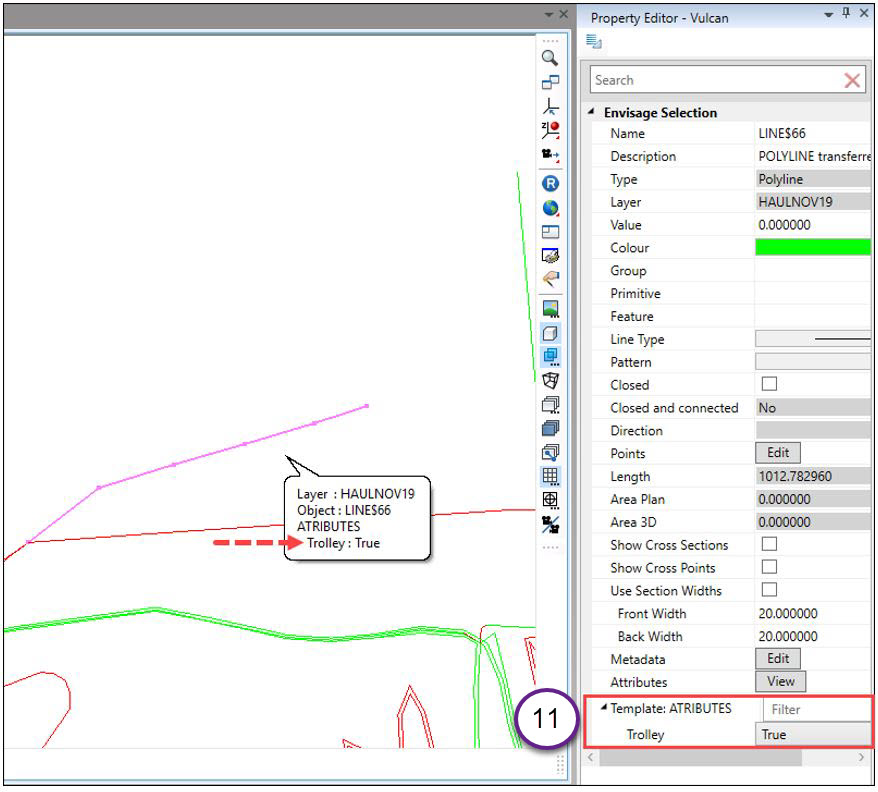
Check that the attribute has been assigned correctly by viewing the Property Editor.
Import Road Network into Evolution
Road networks enable the software to calculate the time it takes to transport material from one point to another. For more information, see Road Networks.
Follow these steps to import a road network into Evolution:
-
Select the
 Road Network icon on the ribbon.
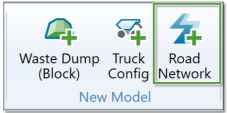
-
Select the file path to import by clicking the Browse button to open the file path selector. Alternatively, if you want to create a single road network from multiple files, select Multiple files and then click the Browse button to select the folder containing the files.
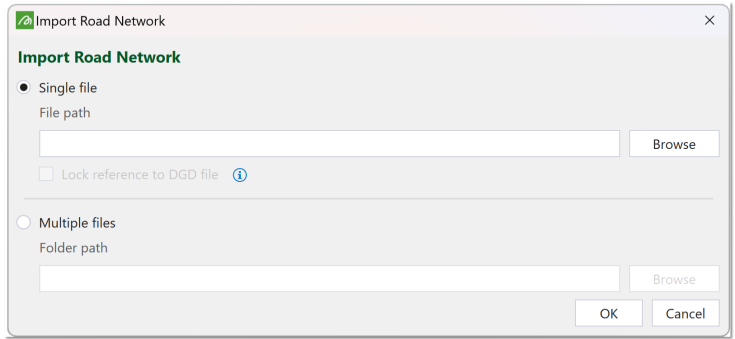
Note: All comma-separated values (
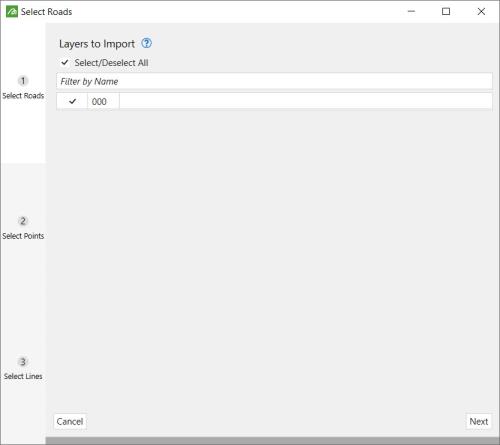
.csv) and Vulcan design database (.dgd.isis) files in the selected folder will be imported. - Select the layer to import and click Next at the bottom right of the window.
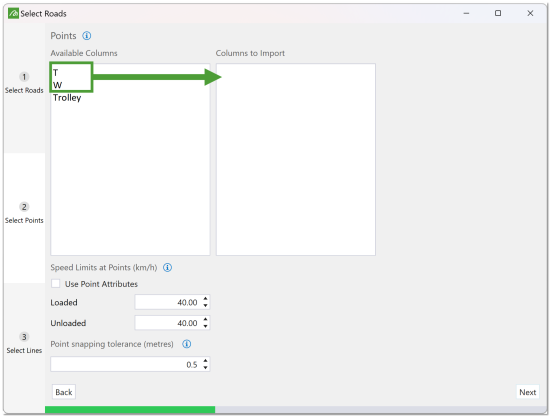
- Select the point attributes you want to import and drag them from the Available Columns to the Columns to Import field.
-
Configure the fields under Speed Limits at Points (for Loaded and Unloaded) and Point Snapping Tolerance as desired and click Next.
-
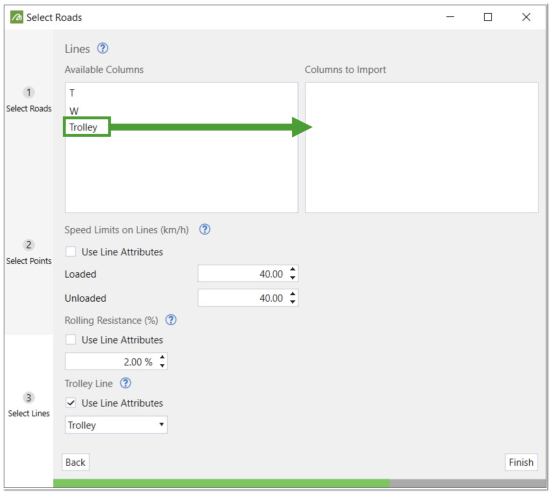
Drag the Trolley attribute from the Available Columns list to the Columns to Import list. Select the Use Line Attributes checkbox of the Trolley Line field and choose the attribute (Trolley).
-
Configure the fields under Speed Limits on Lines (for Loaded and Unloaded) and Rolling Resistance as desired.
-
Click Finish. The road network will be loaded in the viewer.
Note: If you are looking to use a trolley line (conveyor) in Evolution, the Trolley attribute should be selected for edges.