Polygons
Polygons identify areas of interest and can provide limits for other tools, including ![]() Cut / Fill,
Cut / Fill, ![]() Cross Section , and
Cross Section , and ![]() Export Surface. You can define polygons manually, generate them from source surface boundaries, or import them from another package. Related polygons can be grouped together into sets.
Export Surface. You can define polygons manually, generate them from source surface boundaries, or import them from another package. Related polygons can be grouped together into sets.
Polygons tab
You can manage polygons and polygon sets on the ![]() Polygons tab located on the
Polygons tab located on the ![]() Home page.
Home page.

Polygons list
The ![]() Polygons list lists all saved polygons. The following controls are available:
Polygons list lists all saved polygons. The following controls are available:
|
|
Draw polygon Define a new polygon. See Defining a polygon on this page for instructions. |
|
|
Upload polygon Upload an existing polygon from file. See Uploading a polygon on this page for instructions. |
|
|
Select polygon Selected polygons display in the view. If a single polygon is selected, the |
|
|
Edit polygon (appears when a single polygon is selected) Edit the selected polygon. See Viewing and editing a polygon on this page for instructions. |
|
|
Clear selected Remove all polygons from the view. |
|
|
Selected settings (appears when hovering over a polygon in the list) Manage the following polygon settings:
|
|
|
Disable polygon (appears when hovering over a polygon in the list) Disabling a polygon removes it from the list. A confirmation dialog appears before the polygon is disabled. Note: You cannot retrieve a polygon once it has been disabled. The name of a disabled polygon cannot be reused. If you anticipate needing to reuse a name for a polygon you want to disable, rename the polygon before disabling it; you will then be able to reuse the previous name. |
Defining a polygon
Polygons are defined by a sequence of points that establish the polygon vertices.
To define a polygon:
-
On the
 Polygons tab, make sure the Polygons list is expanded.
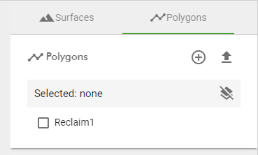
-
Click the
 button. The view will enter polygon definition mode.
 -
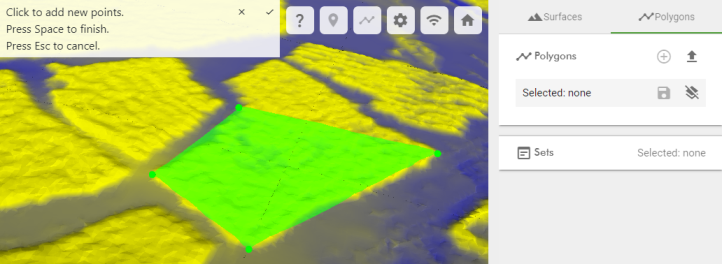
Define the polygon vertices by clicking on the surface in the view.
Instructions for defining the polygon also appear in the view.
-
Click on the surface to add successive points to the polygon.
Note: A polygon cannot intersect itself. The polygon definition tool will not allow you to add a point that will result in a self-intersection.
-
Press Space to complete the polygon.
-
Press Esc to cancel and exit polygon definition mode.
-
-
To save a completed polygon, click the
 (Save polygon) button in the Polygons list.
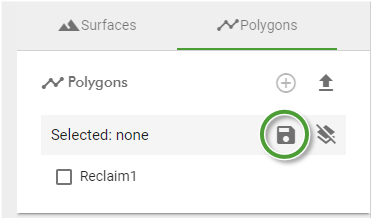
Then, in the Save Polygon dialog, enter a name for the polygon and click Save.
Note: Polygon names must be unique. You cannot reuse the name of a polygon that has been previously defined, even if you have disabled it. If you anticipate needing to reuse a name for a polygon you want to disable, rename the polygon before disabling it; you will then be able to reuse the previous name.
Viewing and editing a polygon
Saved polygons are listed in the ![]() Polygons list.
Polygons list.
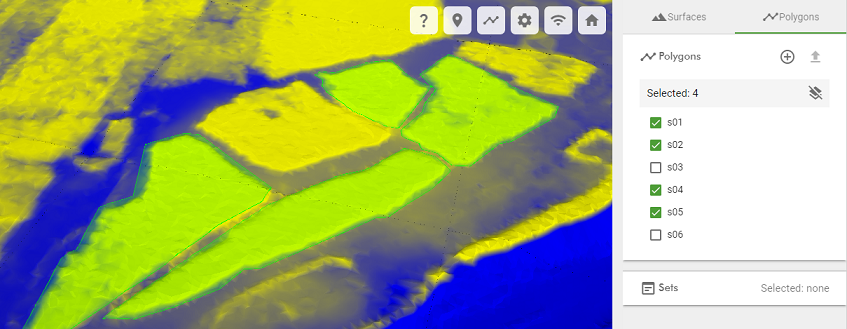
-
To display a polygon in the view, select its checkbox in the
Polygons list. -
To edit a polygon, make sure it is the only selected polygon, then click the
 (Edit polygon) button.
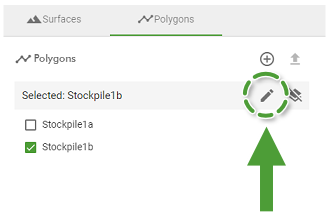
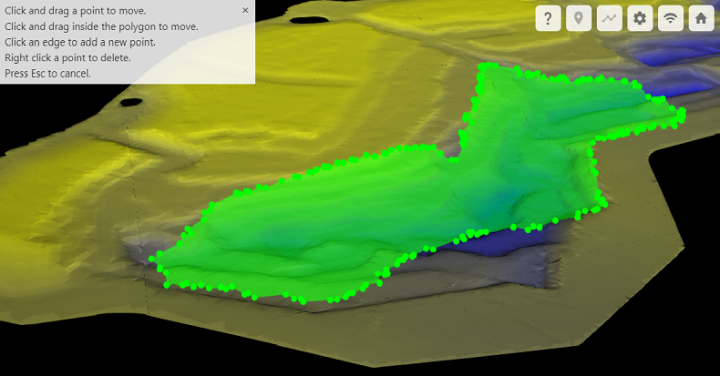
The polygon will become editable in the view.

-
To move a single point, drag it.
-
To move the whole polygon, click inside the polygon and drag.
-
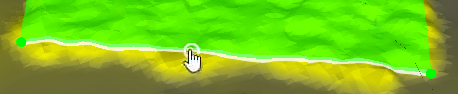
To insert a new point, hover over an edge to highlight it. Click to define a new point. Move the mouse to position the point and then click again to complete.
-
To delete a point, right-click on it.
-
To cancel editing, press Esc.
-
To save changes to the edited polygon, click the
(Save polygon) button.
Instructions for editing the polygon also appear in the view.
-
Uploading a polygon
You can upload polygons that have been defined in another software package such as Maptek PointStudio.
To upload a polygon:
-
Make sure no polygons are selected in the
Polygons list. -
Click the
 (Upload polygon) button.
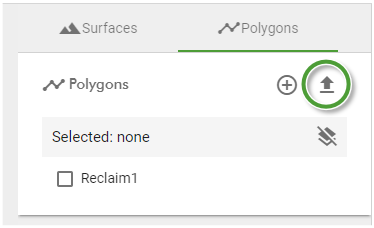
-
In the file browser that appears, select one or more files defining polygons and click Open.
NoteFiles defining polygons must be one of the following formats:
- Maptek Object file (
.maptekobj) - AutoCAD DXF file (
.dxf) - GeoJSON file (
.geojson)
- Maptek Object file (
-
In the Polygon Upload dialog, select the coordinate system the polygons are in, then click Upload.
Generating a polygon from a surface boundary
You can automatically generate a polygon representing the boundary of a source surface.
To do this, follow these steps:
-
Make sure the
 Surfaces tab is selected and you are not in polygon definition or edit mode (press Esc to make sure).
 -
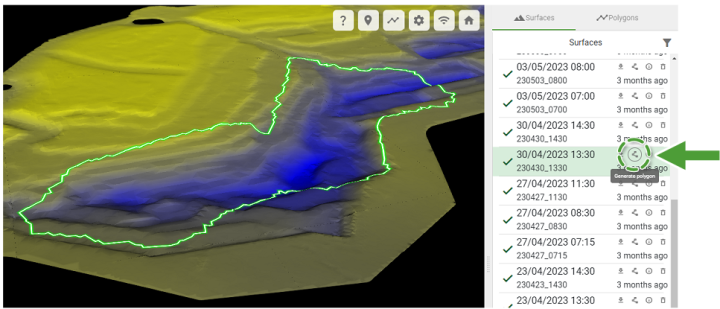
Hover over the surface in the list that you want to generate a polygon from. The boundary of the surface will display in the view.
-
Click the
 (Generate polygon) button in the list item.
The boundary polygon will become editable in the view.
-
To move a single point, drag it.
-
To move the whole polygon, click inside the polygon and drag.
-
To insert a new point, hover over an edge to highlight it. Click to define a new point. Move the mouse to position the point and then click again to complete.
-
To delete a point, right-click on it.
-
To cancel editing, press Esc.
-
-
To save the polygon:
-
Switch back to the
Polygons tab. -
Click the
(Save polygon) button.
-
In the Save Polygon dialog, enter a name for the polygon and click Save.
Note: Polygon names must be unique. You cannot reuse the name of a polygon that has been previously defined, even if you have disabled it. If you anticipate needing to reuse a name for a polygon you want to disable, rename the polygon before disabling it; you will then be able to reuse the previous name.
-
Polygon sets
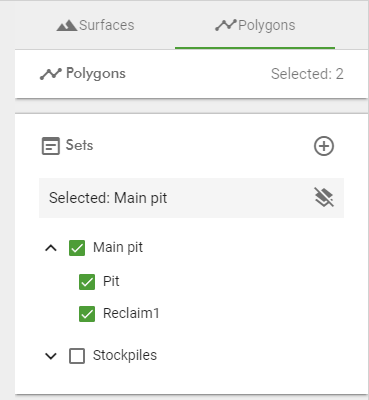
A polygon set groups multiple polygons together. The set can then be selected as a whole to display all members of the set at once, or used in any tool that requires a polygon input. A single polygon can belong to multiple polygon sets.
The ![]() Sets list on the
Sets list on the ![]() Polygons tab allows you to manage polygon sets.
Polygons tab allows you to manage polygon sets.
The following controls are available:
|
|
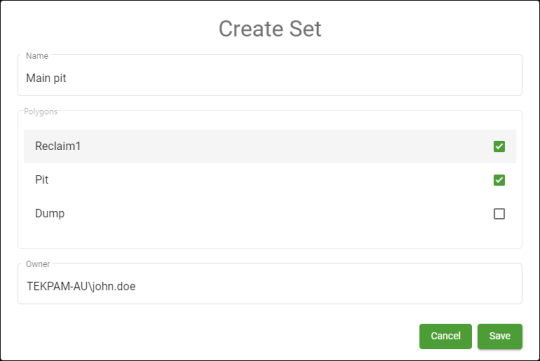
Create a new set
|
|
|
Select set
|
|
|
Clear selected
|
|
|
Expand set
|
|
|
Collapse set |
|
|
Set settings (appears when hovering over a set in the list)
|
|
|
Delete set (appears when hovering over a set in the list) |