Surface Imagery
GeoSpatial Manager has built-in support for colouring the surface using site imagery, such as aerial photography, uploaded as GeoTIFF files. This feature requires a Mapbox or ArcGIS account to host the imagery. Once uploaded, custom imagery is available to all users.
Alternatively, imagery can be obtained from Bing Maps.
-
Up to 15 Mapbox images can be displayed at a time. If your Mapbox account contains more than 15 images, the most recent 15 images that are older than the selected date will be displayed.
-
GeoSpatial Manager will display all imagery hosted in the ArcGIS service as a single file without a time stamp.
-
Bing Maps imagery is not necessarily up-to-date, so should only be used as a guide.
Viewing surface imagery
To view surface imagery, open the ![]() Colouring tool on the
Colouring tool on the ![]() Home page and select Imagery. The surface will display Bing Maps, Mapbox or ArcGIS hosted images if available, whichever is the preferred provider.
Home page and select Imagery. The surface will display Bing Maps, Mapbox or ArcGIS hosted images if available, whichever is the preferred provider.
|
|
|
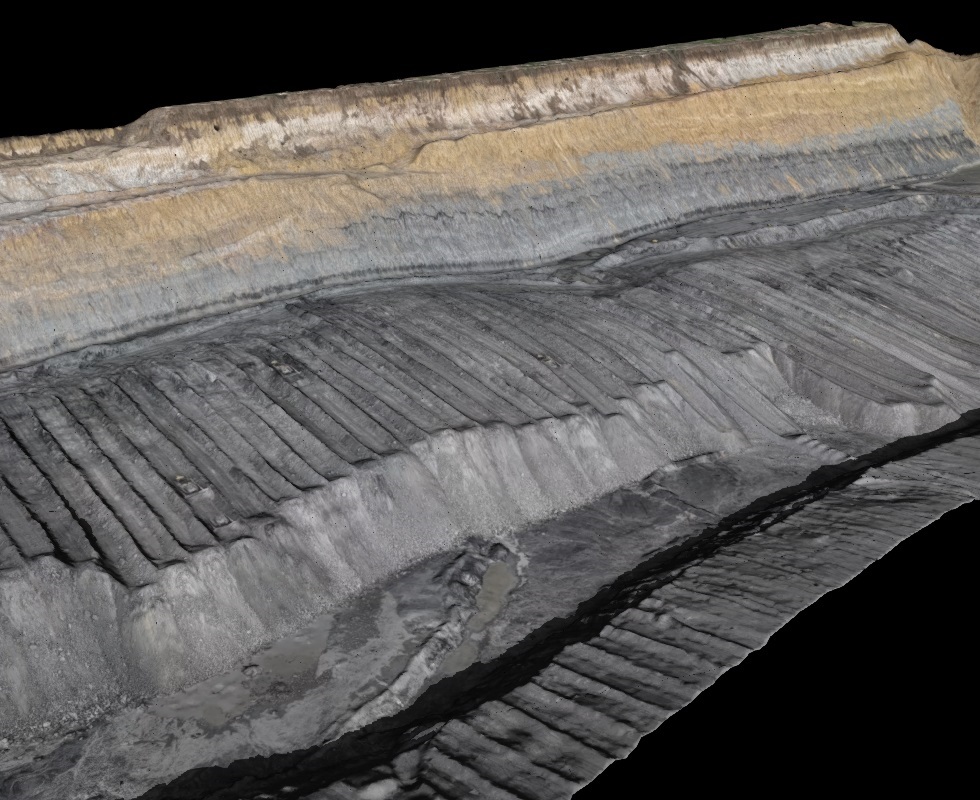
A terrain surface displaying drone aerial photography. |
Configuring GeoSpatial Manager for use with an imagery provider
GeoSpatial Manager can display imagery hosted by any one of these providers: Bing Maps, Mapbox, and ArcGIS.
Note: Your role must have the Edit Settings permission enabled to configure GeoSpatial Manager for use with an imagery provider. See Site Settings > Roles for more information.
To enable imagery navigate to ![]() >
> ![]() Site Settings, then select the
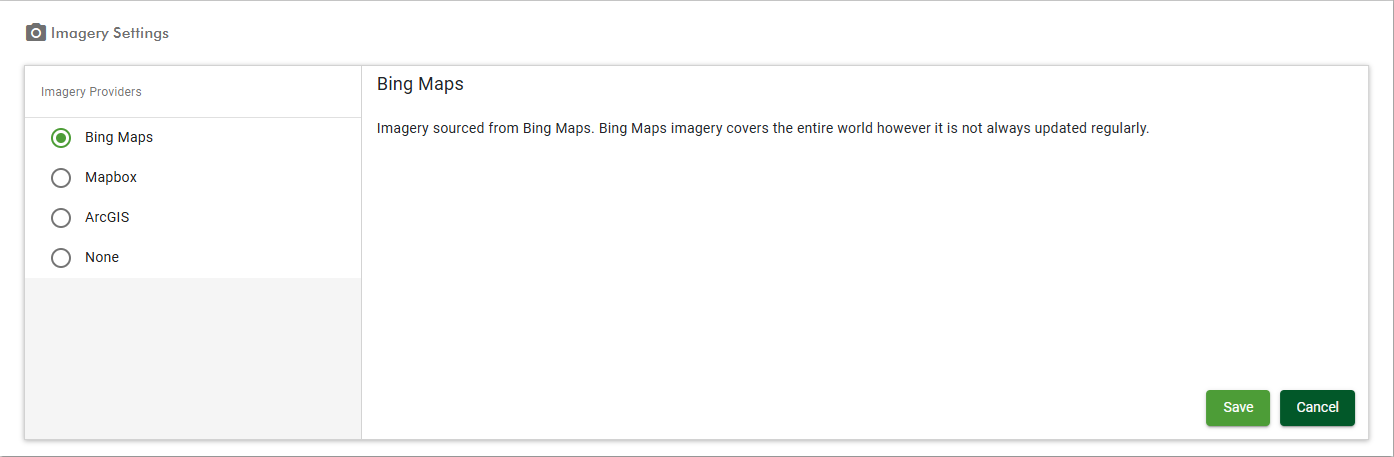
Site Settings, then select the ![]() Imagery Settings tab. Follow the instructions below relevant to your preferred imagery provider.
Imagery Settings tab. Follow the instructions below relevant to your preferred imagery provider.
To enable Bing Maps, select Bing Maps, then click Save.
GeoSpatial Manager must be connected to a Mapbox account with a correctly configured API access token before images can be uploaded.
To configure GeoSpatial Manager for use with Mapbox, follow these steps:
-
Set up and configure your Mapbox account.
-
If you do not already have a Mapbox account, sign up at mapbox.com.
-
Log in to your account.
-
Create an API access token. The token must have at least the following scopes included:
-
SCOPES:LIST
-
UPLOADS:READ
-
UPLOADS:LIST
-
UPLOADS:WRITE
-
TOKENS:READ
-
TOKENS:WRITE
-
TILESETS:LIST
-
TILESETS:READ
-
TILESETS:WRITE
-
-
After creating the token, copy the token to the clipboard. You will need to paste it into GeoSpatial Manager in the next step.
-
-
Enter your Mapbox credentials in GeoSpatial Manager.
-
In GeoSpatial Manager, go to
 > Site Settings .
 -
Expand
 Imagery Settings.
 -
Under Imagery Provider, select Mapbox, then fill out the following fields:
-
Username: Enter your username. You can find this under Account in your Mapbox account.
-
API Token: Paste the API token copied in step 1d above.
-
-
Click Save.
-
GeoSpatial Manager must be connected to an ArcGIS account with correctly configured credentials before images can be uploaded. If necessary, consult your ArcGIS administrator for assistance.
To configure GeoSpatial Manager for use with ArcGIS, follow these steps:
-
Set up and configure your ArcGIS account.
-
Enter your ArcGIS credentials in GeoSpatial Manager.
-
In GeoSpatial Manager, go to
> Site Settings . -
Expand
Imagery Settings. -
Under Imagery Provider, select ArcGIS, then fill out the following fields:
-
Server URL: Enter the URL of the ArcGIS service where the images are stored.
-
Portal URL: The root URL used to access the ArcGIS REST API, which is usually in the form:
https://www.arcgis.comfor ArcGIS Online orhttps://machine.domain.com/webadaptor/sharing/restfor ArcGIS Enterprise.
-
-
Under Authentication, select the appropriate authentication method and fill out the fields accordingly.
-
Click Save.
-
If the credentials are correct, you will now be able to upload image files and view them in your GeoSpatial Manager project.
Note: If ArcGIS is the preferred imagery provider, images cannot be uploaded via GeoSpatial Manager. They must be uploaded directly to ArcGIS. Procedures for this are beyond the scope of this site.
-
To display images, click the
 Colouring tool and select Imagery.
Displaying Bing Maps images
If Bing Maps is selected in Site Settings, imagery will be displayed as soon as you select Imagery in the ![]() Colouring tool.
Colouring tool.
Displaying images stored in Mapbox
If GeoSpatial Manager has been configured for Mapbox, as described above, you can import hosted images as below.
Note: Images must be GeoTIFF files (.tif, .tiff) that correctly georeference the surface model. As with surfaces, imported images must have a date and time specified on import to ensure a correct chronological association with the surface model.
Tip: You do not need to import existing Mapbox images. GeoSpatial Manager will display the newest up to 15 images stored in your Mapbox account that are older than the selected date.
For more detailed information on importing image files, see Importing Data.
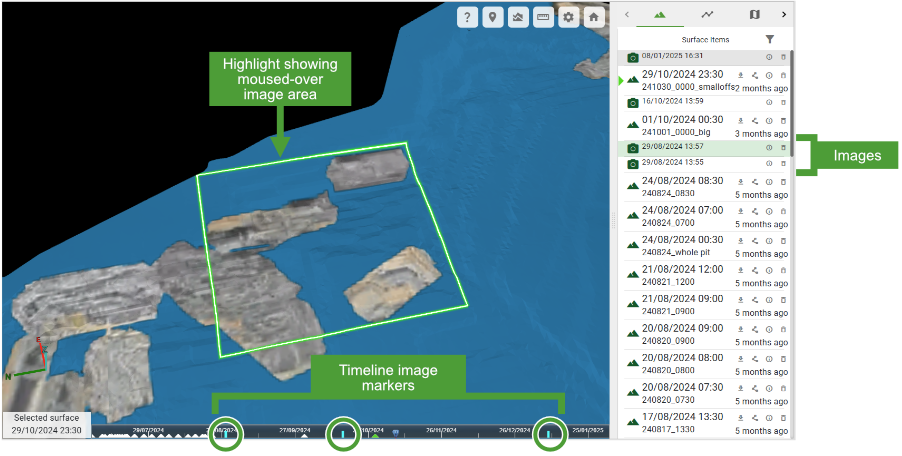
When you select Imagery, images will then appear in the Surface Items list and corresponding markers will appear on the timeline.
When you mouse over an image in the list, the boundary of the area it covers will be highlighted on the surface.
The following operations are available on images in the Surface Items list:
|
|
View and edit image details View details about the image including name, size, and capture time. The capture time can be modified to change the position of the image in the surface chronology. |
|
|
Delete image |
Displaying images stored in ArcGIS
When you select Imagery, all available imagery in ArcGIS will be overlaid in the surface model as a single image, regardless of the selected date and time. Therefore, no image file is shown in the Surface Items list
