Text2D
Text2D is 2D text that maintains a given size regardless of zoom level and camera orientation in the 3D view.
Text2D properties
Use the following properties to customise your Text2D object:
| Name | Description |
text
|
Use this property to set the content of your 2D text object. |
font_style
|
Use this enum property to set the font style of your 2D text object. You can set this property to the following values:
|
size
|
Use this property to set the size of your 2D text object. |
location
|
Use this property to set the location of your 2D text object in terms of X, Y, Z coordinates. |
colour
|
Use this property to set the colour of your 2D text object. |
horizontal_alignment
|
Use this enum property to set the horizontal alignment of your 2D text object. You can set this property to the following values:
|
vertical_alignment
|
Use this enum property to set the vertical alignment of your 2D text object. You can set this property to the following values:
|
Text2D examples
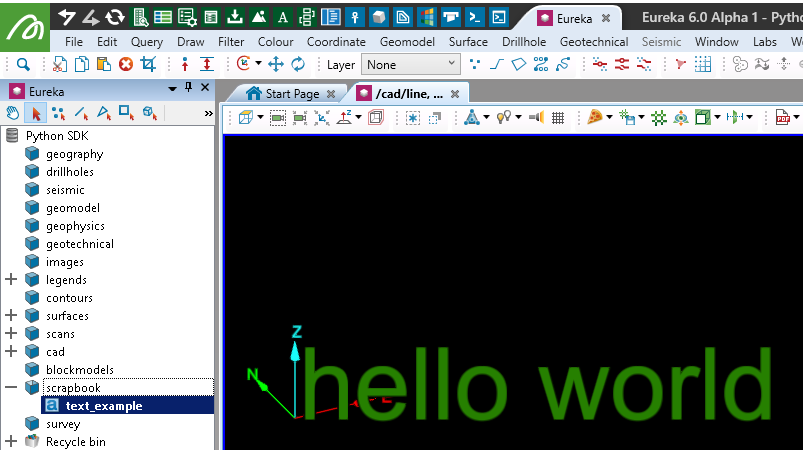
Creating a Text2D object
from mapteksdk.project import Project
from mapteksdk.data import Text2D
proj = Project() # Connect to default project

object_path = "scrapbook/text_example"

# Create Text
with proj.new(object_path, Text2D, overwrite=True) as text:
    text.text = 'hello world'
    text.location = [0, 0, 0]
    # Colours are R,G,B,A, where A is Alpha (255 = opaque)
    text.colour = [38, 128, 0, 255] # Light Green
    text.size = 100

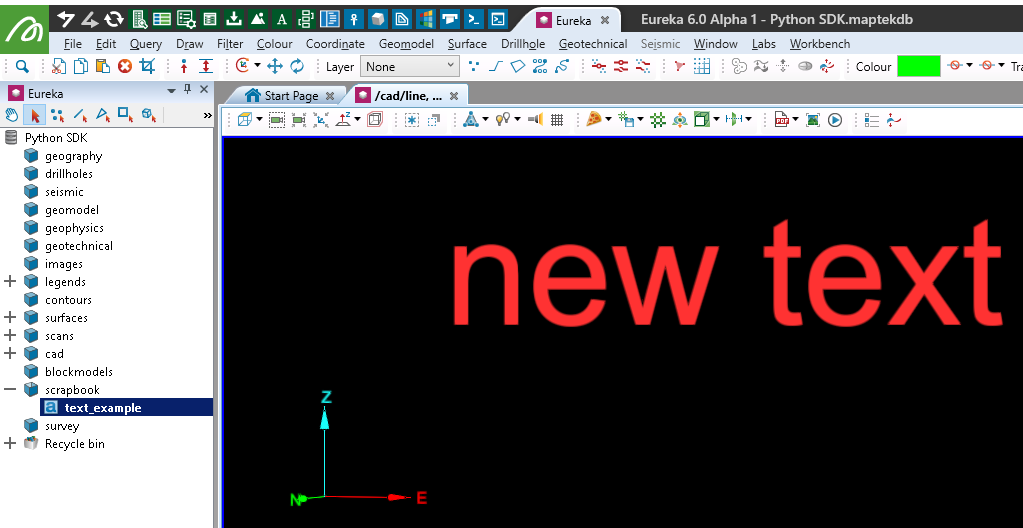
Editing Text2D properties
The following example will modify the colour, size, text, and position of the text object created in the last example.
from mapteksdk.project import Project
from mapteksdk.data import Text2D
proj = Project() # Connect to default project

object_path = "scrapbook/text_example"

# Create Text
with proj.edit(object_path) as text:
    text.text = 'new text'
    text.location = [50, 50, 50]
    # Colours are R,G,B,A, where A is Alpha (255 = opaque)
    text.colour = [255, 50, 50, 255]
    text.size = 150

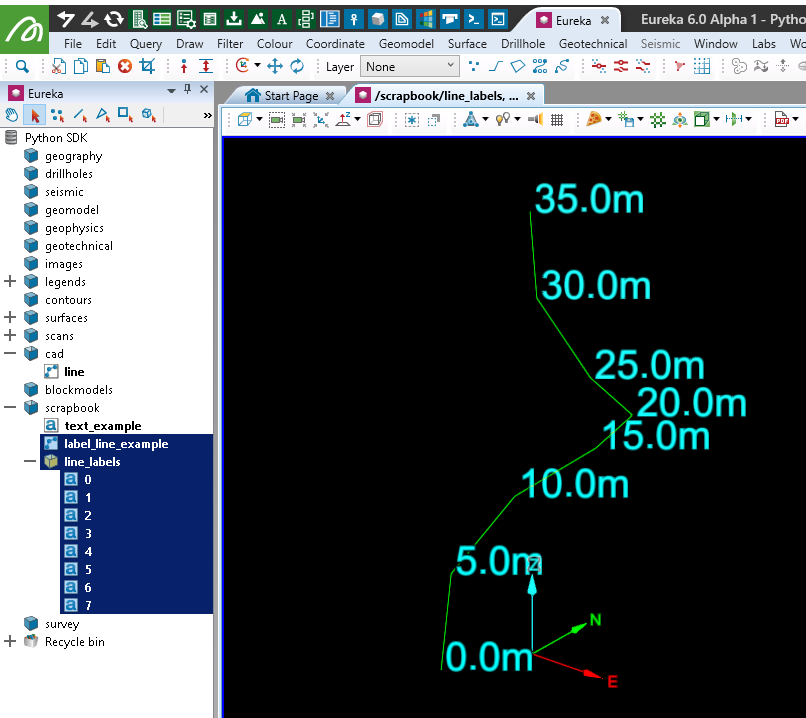
Labelling point heights along a line with text
The following example will add Text2D at each point in a 3D Polyline and label it with the height of the point.
from mapteksdk.project import Project
from mapteksdk.data import Text2D, Polyline
proj = Project() # Connect to default project

# Create a swirl line that rises in height
line_path = "scrapbook/label_line_example"
labels_path = "scrapbook/line_labels"

with proj.new(line_path, Polyline, overwrite=True) as line:
    line.points = [[10, 0, 0], [7, 5, 5], [9, 10, 10], [15, 12, 15],
                   [20, 10, 20], [20, 5, 25], [15, 5, 30], [12, 8, 35]]

# Delete labels container if it exists
proj.delete(labels_path)

with proj.read(line.id) as line:
    for label_id, point in enumerate(line.points):
        # Create text at point
        with proj.new(
          "{}/{}".format(labels_path, label_id),
          Text2D,
          overwrite=True) as text:
            text.text = "{}m".format(point[2])
            text.location = point
            text.colour = [point[2], 255, 255, 255]
            text.size = 40

