Marker
The Marker object provides a way of creating markers or signs at strategic locations in the 3D scene, with the extra capability of adding attachments which are relevant to these locations. The marker consists of a name (text), which is visible when zoomed out from the location. As you zoom in, the name fades away and a marker shape becomes visible.
Use the following properties to customise the look of your marker:
| Name | Description |
text
|
Use this property to set content of the |
text_size
|
Use this property to set the size of the |
marker_colour
|
Use this property to set the Marker colour. |
text_colour
|
Use this property to set the text colour. |
shape
|
Use this property to set the shape of the marker. Choose to set the marker shape to one of the following values:
|
location
|
Use this property to set the location of the marker as a point, [X, Y, Z]. |
Here is a list of code examples related to Markers.
Topics:
Create a Marker
from mapteksdk.project import Project
from mapteksdk.data import Marker
proj = Project() # Connect to default project

object_path = "scrapbook/marker_example"

# Create (or edit if it already exists) Marker
with proj.new_or_edit(object_path, Marker) as marker:
    marker.text = 'hello world'
    marker.location = [0, 0, 0]
    # Colours are R,G,B,A, where A is Alpha (255 = opaque)
    marker.text_colour = [38, 128, 0, 255] # Light Green
    marker.text_size = 200
    marker.marker_colour = [128, 128, 128, 255] # Grey

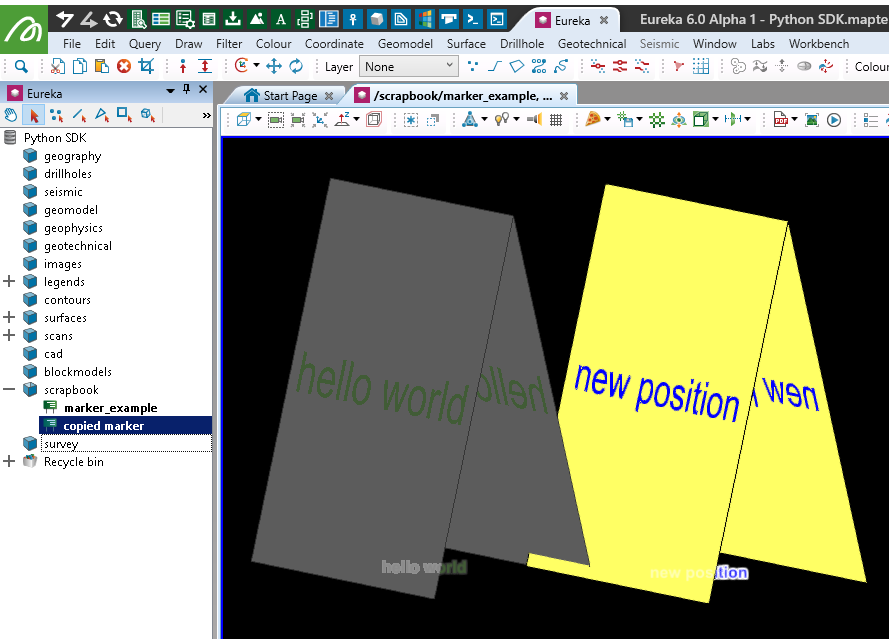
Edit Marker colour and position
This example will copy the Marker created above, translate it and change it's colours.
from mapteksdk.project import Project
from mapteksdk.data import Marker
proj = Project() # Connect to default project

old_path = "scrapbook/marker_example"
new_path = "scrapbook/copied marker"
old_marker = proj.find_object(old_path)
if old_marker and old_marker.is_a(Marker):
    # Copy the old marker to the new path
    new_marker = proj.copy_object(old_marker, new_path, overwrite=True)

    # Modify marker position and colours
    with proj.edit(new_marker) as marker:
        marker.text = 'new position'
        marker.location = [100, 100, 0]
        # Colours are R,G,B,A, where A is Alpha (255 = opaque)
        marker.text_colour = [0, 0, 255, 255] # Blue
        marker.marker_colour = [255, 255, 100, 255] # Yellow
else:
    print("Couldn't find an Marker at {}".format(old_path))
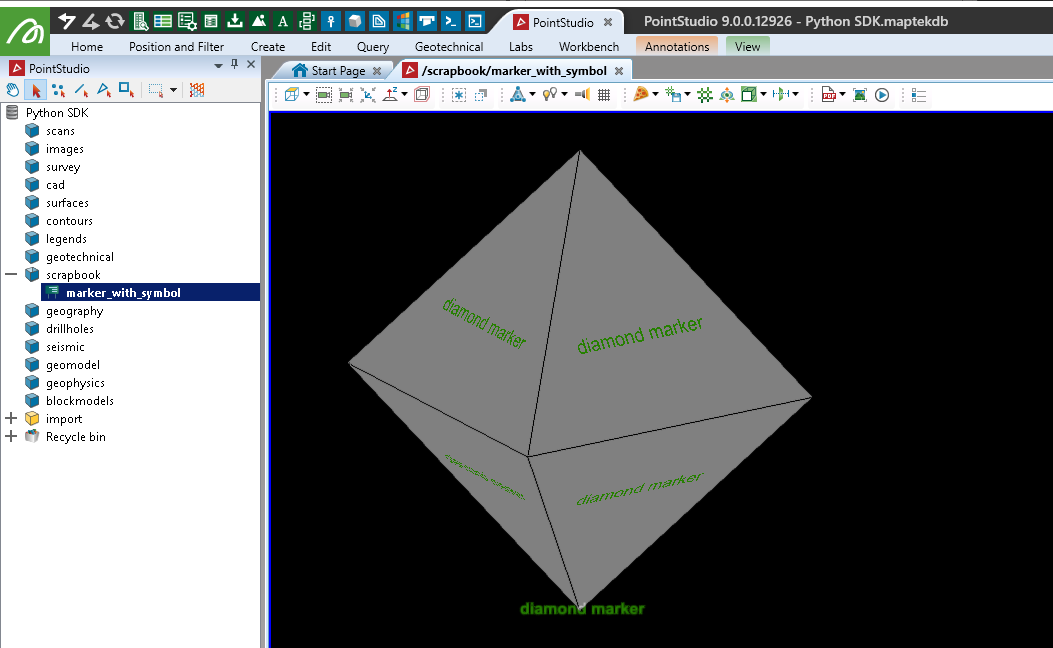
Set Marker shape
You can set the shape of a Marker using the Marker.Shape class.
from mapteksdk.project import Project
from mapteksdk.data import Marker
proj = Project() # Connect to default project

object_path = "scrapbook/marker_with_symbol"

# Create Marker (or edit if it already exists)
with proj.new_or_edit(object_path, Marker) as marker:
    marker.text = 'diamond marker'
    marker.location = [0, 0, 0]
    # Colours are R,G,B,A, where A is Alpha (255 = opaque)
    marker.text_colour = [38, 128, 0, 255] # Light Green
    marker.text_size = 200
    marker.marker_colour = [128, 128, 128, 255] # Grey

    marker.shape = Marker.Shape.DIAMOND
    # Set Marker shape/symbol. Options:
    # Marker.Shape.DIAMOND (diamond shape)
    # Marker.Shape.CUBE (cube shape)
    # Marker.Shape.VERTICAL_SIGN (vertical billboard)
    # Marker.Shape.A_FRAME_SIGN (Default)
    # Marker.Shape.THREE_SIDED_SIGN (solid triangulay prism)
    # Marker.Shape.HORIZONTAL_SIGN (billboard on X/Y plane)
    # Marker.Shape.ZEBRA_SCALE (striped scale bar)
    # Marker.Shape.CHECKERED_SCALE (checkered scale bar)
    # Marker.Shape.U_SCALE (u-shaped scale bar)
    # Marker.Shape.PRONE_HUMAN (horizontal human shaped marker)
    # Marker.Shape.UPRIGHT_HUMAN (vertical human shaped marker)
    # Marker.Shape.COMPASS_ROSE (compass rose)
    # Marker.Shape.CUSTOM (used for setting your own shape with Marker.custom_shape_object())
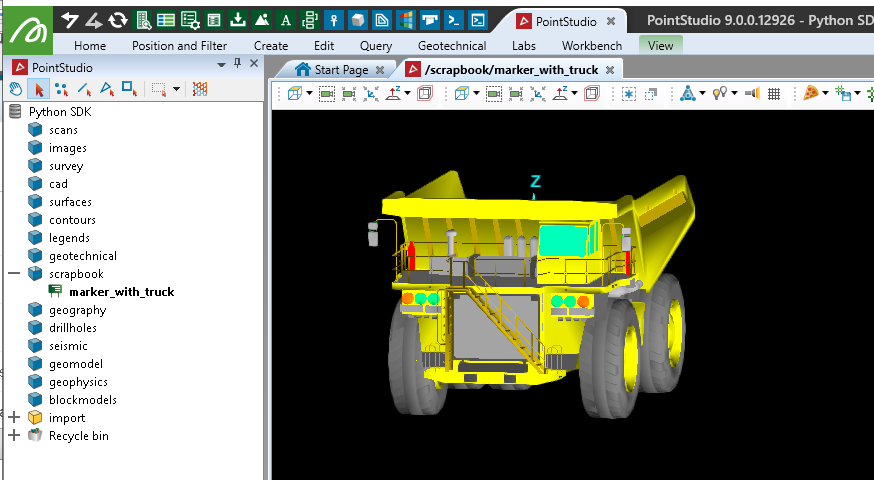
Assign a surface as a Marker shape
You can assign a surface to a Marker shape property. This is useful where several Markers are required that have the same object represented visually.
Note: The following example imports a maptekobj file containing a single surface to apply to the marker. It can be downloaded here: PythonSDK_SampleData_Truck.maptekobj
More comprehensive examples for importing maptekobj files are provided in Built-in IO (Input/Output) Examples
Important! When assigning a surface to a marker, it's 3D position will be offset relative to the Marker location. Surfaces used for Markers should be centred around or have reference point at 0, 0, 0 to be correctly displayed relative to the Marker's arbitrary position.
from mapteksdk.project import Project
from mapteksdk.data import io, Surface, Marker
proj = Project() # Connect to default project

# Use the path you have saved the example maptekobj file:
maptekobj_path = "F:\\Python SDK Help\\data\\PythonSDK_SampleData_Truck.maptekobj"
# Import the maptekobj, providing an ObjectID as a result
imported_data = io.import_maptekobj(maptekobj_path)

# Assuming the maptekobj contains only one object and it is a surface,
# it doesn't need to be stored with a path to assign it to the marker.
if imported_data.is_a(Surface):
    # Create a new marker and assign the surface as it's shape
    with proj.new("scrapbook/marker_with_truck", Marker, overwrite=True) as marker:
        marker.location = [0,0,0]
        marker.size = 2
        marker.custom_shape_object = imported_data

else:
    print("Imported object was expected to be a Surface but was not a Surface")
Rotate and move a Marker
This example builds on the last one to draw a simple track to move the translate and rotate the Marker around.
Note: This example directly manipulates the geometry within the custom object in the marker. If rotating Markers with standard shapes and not custom geometry, you can use rotate_2d(), rotate(), set_rotation_2d() and set_rotation().
from mapteksdk.project import Project
from mapteksdk.data import io, Surface, Marker
from mapteksdk.data.units import Axis
import time
import numpy as np
from scipy.spatial.transform import Rotation

def rotation_matrix_from_vectors(vec1, vec2):
    """ Find the rotation matrix that aligns vec1 to vec2
    vec1 3d source vector
    vec2 3d destination vector
    return: A transform matrix (3x3) which when applied to vec1, aligns it with vec2.
    https://stackoverflow.com/a/59204638/11841607
    """
    a, b = (vec1 / np.linalg.norm(vec1)).reshape(3), (vec2 / np.linalg.norm(vec2)).reshape(3)
    v = np.cross(a, b)
    c = np.dot(a, b)
    s = np.linalg.norm(v)
    kmat = np.array([[0, -v[2], v[1]], [v[2], 0, -v[0]], [-v[1], v[0], 0]])
    rotation_matrix = np.eye(3) + kmat + kmat.dot(kmat) * ((1 - c) / (s ** 2))
    return rotation_matrix

if __name__ == "__main__":
    proj = Project() # Connect to default project

    # Use the path you have saved the example maptekobj file:
    maptekobj_path = "F:\\Python SDK Help\\data\\RotateMoveMarker.maptekobj"

    # Import the maptekobj which is known to contain a container with objects used in this script
    imported_data = io.import_maptekobj(maptekobj_path)
    name = imported_data.name
    proj.rename_object(imported_data, "/{}".format(name), overwrite=True)

    input("Open the imported objects (in: /{}) in a view window and press any key to continue..".format(name))

    with proj.read("{}/follow_points".format(name)) as line:
        # Note: The Marker object supports .rotate_2d(), .rotate(), .set_rotation_2d(), .set_rotation()
        # however these are compatible with standard marker shapes. When using custom marker shapes
        # like this example, we can modify the underlying surface directly.
        # Unlike a usual rotation we do not need to adjust the origin while rotating as it will
        # always be relative to the marker location.

        # Place at first position on the line to follow
        with proj.edit("{}/marker_with_truck".format(name)) as marker:
            marker.location = line.points[0]
            with proj.edit(marker.custom_shape_object) as truck:
                min_ex = truck.extent.minimum
                # Lift the geometry to sit on the surface as its origin is the centroid
                if min_ex[2] < 0:
                    truck.points += [0, 0, -min_ex[2]]
                # Align the truck with the first line segment using an edge of it's
                # geometry bounding box
                max_ex = truck.extent.maximum
                v1 = np.asarray((min_ex[0], max_ex[1], 0)) - np.asarray((min_ex[0], min_ex[1], 0))
                v2 = line.points[1] - line.points[0]
                rot = rotation_matrix_from_vectors(v1, v2)
                r = Rotation.from_matrix(rot)
                # Apply the rotation to the points
                truck.points = r.apply(truck.points)

        # Move and rotate for each segment along the line
        for i in range(1, line.point_count - 1):
            with proj.edit("{}/marker_with_truck".format(name)) as marker:
                # Shift the marker to the next position
                marker.location = line.points[i]
                v1 = line.points[i] - line.points[i - 1]
                v2 = line.points[i + 1] - line.points[i]
                rot = rotation_matrix_from_vectors(v1, v2)
                r = Rotation.from_matrix(rot)
                with proj.edit(marker.custom_shape_object) as truck:
                    # Apply the rotation to the points
                    truck.points = r.apply(truck.points)
            # Pause for a moment to see the change
            time.sleep(0.1)
