Marker
Source file: create-a-marker.htm
With the Marker tool you can create markers or signs at strategic locations in the 3D scene, and add attachments relevant to those locations. The marker consists of a text label and a shape.
The attachments allow notes, reports, photographs, diagrams and video files to be easily accessed from a marker, which acts as a visual cue within a 3D scene.
To create the marker do the following:
-
On the Create ribbon tab, go to the Create group. From the Annotation drop-down list select
 Marker.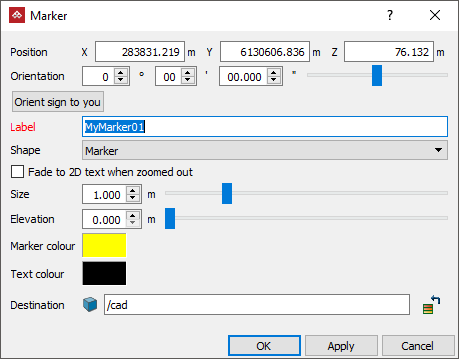
-
Enter the Position for the marker, or click in the view window.
-
Choose Orientation by entering values, dragging the slider or clicking Orient sign to you.
-
Enter the text to be displayed at the marker location in the Label field.
-
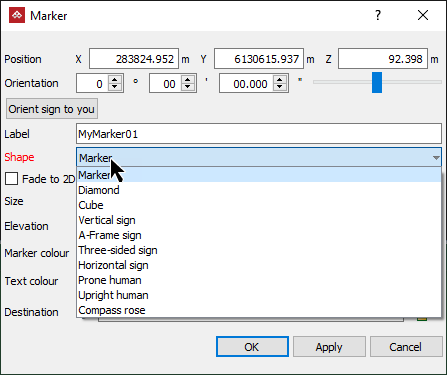
Choose the desired Shape for the marker:
- Marker
- Diamond
- Cube
- Vertical sign
- A-frame sign
- Three-sided sign
- Horizontal sign
- Prone human
- Upright human
- Camera
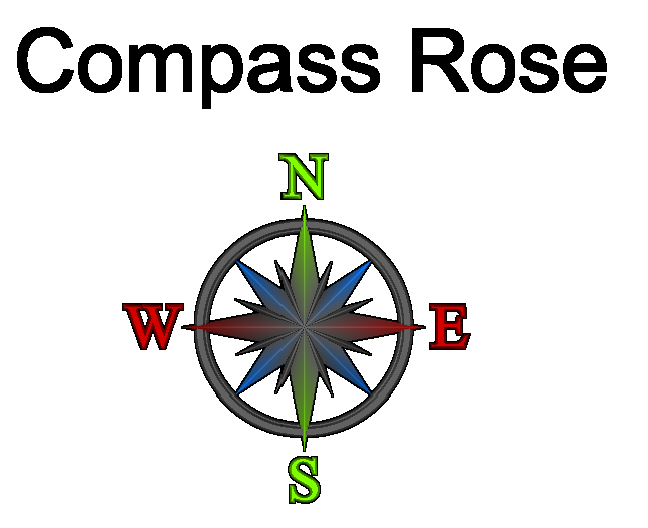
- Compass rose
- Custom
-
For Fade to 2D text or an image when zoomed out, select the preferred option according to the behaviour when zooming out:
-
None: The marker will diminish and disappear.
-
2D Text: The marker will be replaced with the same text as the marker label, in 2D.
-
Image: The marker will be replaced by the selected image.
Note: As you zoom in, the image or 2D text will disappear. There is a transition range in which both the marker and its replacement will be overlaid.
-
-
Enter a Size for the marker.
-
Enter an Elevation - this suspends the marker at a height above the selected position. Some markers have supporting 'poles', which will grow in height as you increase the elevation parameter.
-
Select the Colours for the marker and its text.
-
Click OK or Apply to complete the process.
The
marker is saved in the cad  container
by default and is displayed in the active view window.
container
by default and is displayed in the active view window.
Adding attachments
You can add attachments to a marker. An attachment can be any type of file. These attachments can also be opened and then viewed, provided Windows recognises the file type and has the appropriate viewer installed.
-
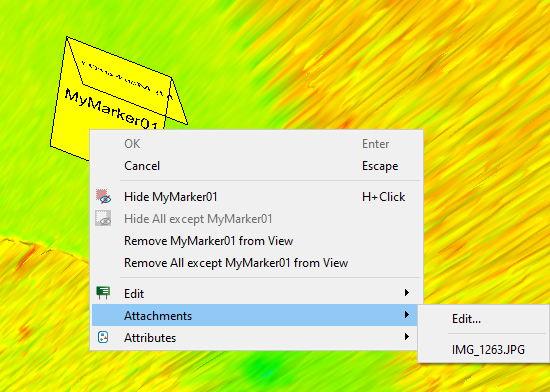
Add attachments by selecting the marker then clicking
 Attachments... in the Properties group of the Annotations ribbon, or by right-clicking
the marker and selecting Attachments > Edit....
Attachments... in the Properties group of the Annotations ribbon, or by right-clicking
the marker and selecting Attachments > Edit.... -
Click
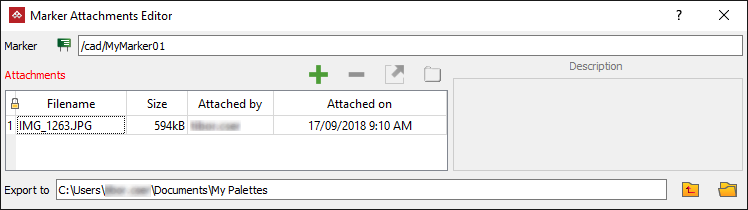
 to add attachments. The Marker attachments editor panel opens.
-
Select
 to browse for files to attach.
 -
Select the files and click Open in the Windows file explorer.
-
Click OK to attach the file to the marker.
-
Exit the Marker Attachment Editor.
The Marker Attachment Editor opens.
To edit the Marker properties
You can edit marker properties at any time.
-
Highlight the marker in the project explorer.
-
On the Edit ribbon tab, go to the Properties group and select
 Properties. The appropriate tab is automatically selected and ready for editing.
