Verify Bolts
Source file: rock-bolt-analysis-verify-rock-bolts.htm
Use the Verify Bolts tool to check the results from the automated rock bolt detection and remove any false positives. False positives may result from other objects inside the tunnel that resemble rock bolts.
To verify automatically detected rock bolts, follow these steps:
-
On the Query ribbon tab, go to the Rock Bolts group and select
 Verify Bolts. The Verify Bolts panel appears.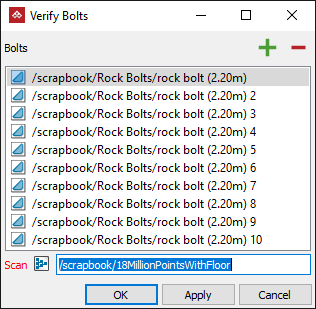
- Review and flag each rock bolt as follows:
-
In the Bolts list, select the rock bolts you want to analyse.
 Expand for detailed instructions
This field requires a rock bolt selection.
- To add items to the list, select individual rock bolts or containers of rock bolts in the project explorer, and click
 . Alternatively, drag and drop a selection of rock bolts from the project explorer into the list.
 - Click
 to remove items from the list.
- To add items to the list, select individual rock bolts or containers of rock bolts in the project explorer, and click
- In the Scan field, specify the source scan to verify the rock bolts against.
- Click OK or Apply. The Verify Bolts window will open and display a small section of the scan surrounding the rock bolt to analyse more closely.
- Inspect the bolts one at a time.
- Select Look along bolt to align the viewing angle with the bolt's axis. You can still maximise the window to full screen, zoom in or out and rotate the image to achieve the best viewing angle for your decision.
- Click Bolt type and select the correct type from the drop-down list. If it’s not listed click Manage...to create a custom bolt (see Creating a custom bolt).

- For a positive detection click
 or for a false positive detection click
  . The next bolt in the list will be displayed.
 Click Next or press Ctrl+↓ to move to the next bolt, leaving the current one unflagged.
Click Previous or press Ctrl+↑ move to the previous bolt, leaving the current one unflagged.
Press Ctrl+→ to flag the current bolt and move to the next bolt.
Press Ctrl+← to flag the current bolt and move to the previous bolt.
- Click Send bad bolts to Recycle Bin to remove the bolts flagged as bad from the list.

You can step through the list either flagging bolts or leaving them unflagged, as follows:
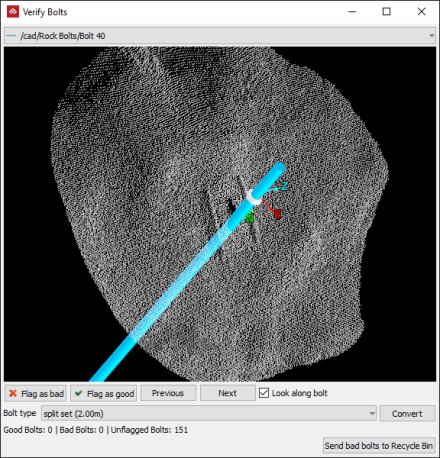
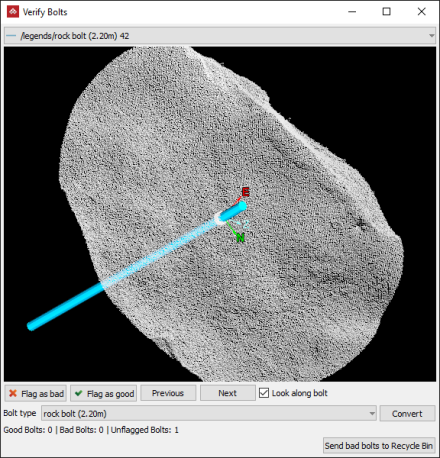
A positively detected rock bolt (left) compared to a false positive detection (right).
