Matching Point Pairs
Source file: register-by-matching-point-pairs.htm
Register matching point pairs is used to position data by using targets, reflectors
or common features. Multiple fixed points are used to tie the data to
be registered and the reference data together. Reflectors
are usually used as the tie points. This option can be used in conjunction with ![]() Locate reflectors.
Locate reflectors.
Note: This tool is useful for registering scans acquired from scanners that are reliant on targets to reference scans.
-
On the Position and Filter ribbon tab, go to the Register group. From the Register drop-down list select
 Matching Point Pairs.
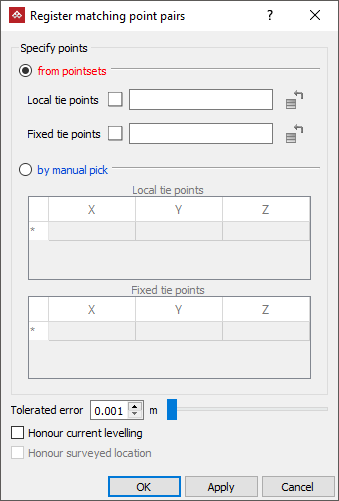
- Local tie points are points to be moved to line up with the Fixed tie points. They can be defined using the Create menu or Locate reflectors option.
- Fixed tie points are the known reference points that have been created on the base data, which can also be a survey station database of reflectors.
The Tolerated error field specifies the final tolerated distance error of acceptable pair matches.
Note: Both Local ties and Fixed ties must contain at least three points.
Note: It is essential that at least 50% of local points have corresponding pairs in the fixed set, though point sets do not require an identical number of points within them.
-
If the data is level, select the Honour current levelling checkbox to move the data in the X, Y, and Z direction and to only rotate around the Z-axis.
-
If the data requires rotation, but not translation, select the Honour surveyed location checkbox.
-
Next, choose either from pointsets method or by manual pick method to enter locations for Local tie points and Fixed tie points.
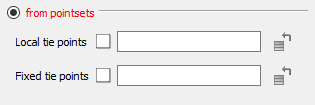
FROM POINTSETS
-
To use pointsets, select from pointsets.
-
Drag the container containing the located reflectors (or equivalent) into the Local tiepoints field.
-
Drag the container with the reference points into the Fixed tie points field.
-
Highlight the scans to be registered in the project explorer.
-
Click OKorApply. The data will move to its correct location.
OR
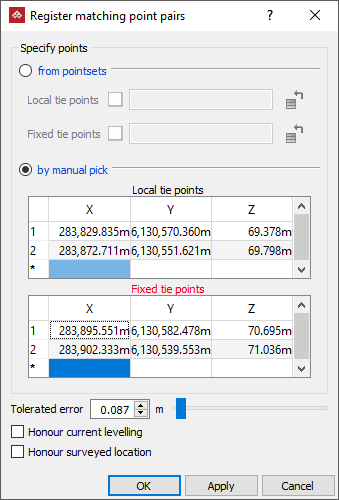
BY MANUAL PICK
-
To manually select points, select by manual pick.
-
Either, enter values into the cells for X,Y,Z coordinates of local and fixed tie points and/or click in the view window at the locations.
-
Highlight the scans to be registered in the project explorer.
-
Click OK or Apply.
The data will move to its correct location.
Note: As well as Local and Fixed tie points being in the same view, by manual pick allows the Local tie points and Fixed tie points to be located on separate views. However, all points of Local must be in one view and all points for Fixed must be in the other view.
