Saved Views
Source file: saved-cameras-and-views.htm
Views and cameras are used to return to a commonly used or important working area. Saving a view records the objects currently loaded in a view window so they can be recalled later. Saving a Camera records the current camera angle.
Similarly, action planes can be stored and retrieved for specific setups.
Saved Views
To quick save a view
-
Load the required objects in a view window.
-
Set the view position and orientation as required.
-
On the Home ribbon tab, go to the View group. From the
 Saved Views drop-down list select
  Save View.
Or
Right-click in the view window hover over Saved Views then click Save View.
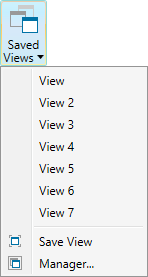
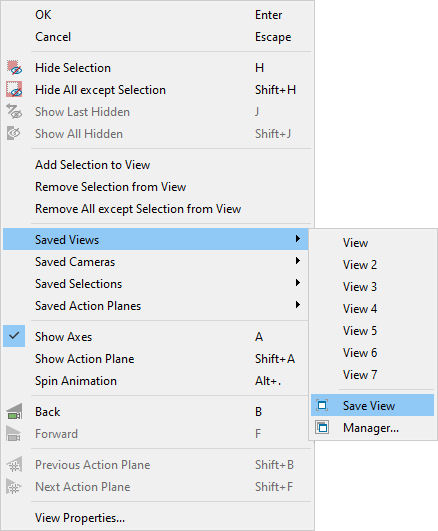
Saved views are listed under the Saved view menu.
Views saved in this manner are named View, View 2, View 3 etc.
Loading a saved view
To load a saved view, do either of the following:
-
On the Home ribbon tab, go to the View group. From the
Saved Views drop-down list select a view from the list.Or
-
Right-click in the view window hover over Saved Views then select a saved view from the list.
A new view
window
will be opened containing the objects stored in the View object.
To manage saved views
-
Load the required objects in a view window.
-
On the Home ribbon tab, go to the View group. From the
Saved Views drop-down list select  Manager....
Or
Right-click in the view window hover over Saved Views then select
Manager.... -
Enter a name for the saved view in the Name field.
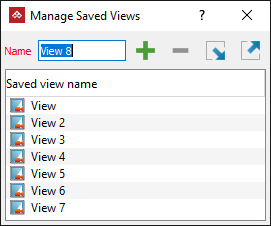
-
Click the
 button to save the View. The new
view object will be added to the Saved
Views name list.
button to save the View. The new
view object will be added to the Saved
Views name list. -
Click the
 button to remove the selected saved view from the list.
Tip: Views
can be imported or exported using the 
 buttons. Click
either button to open a browser window. Browse to the save location. Views are saved with the extension
buttons. Click
either button to open a browser window. Browse to the save location. Views are saved with the extension *.vwr.
Saved Cameras
To quick save a camera
-
Load the required objects in a view window if necessary, and position the camera as required.
-
On the View ribbon tab, go to the Camera group. From the
 Saved Cameras drop-down list select a Save Camera.
Or
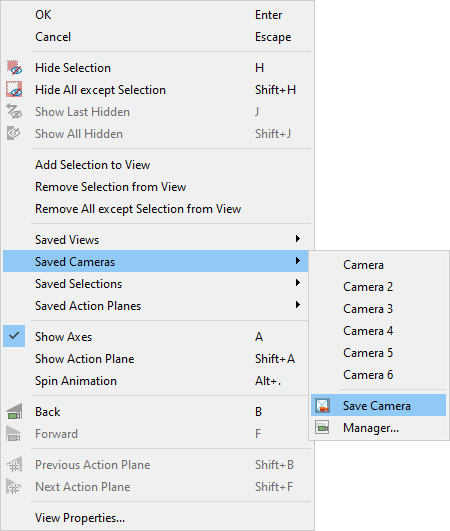
Right-click in the view window, hover over Saved Cameras then click
 Save Camera.
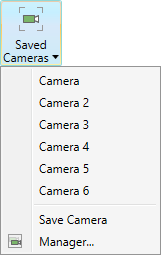
Saved cameras are listed under the Saved Cameras menu.
Cameras saved in this manner are named Camera, Camera 2, Camera 3
etc.
Loading a saved camera
To load a saved camera view point do one of the following:
-
On the View ribbon tab, go to the Camera group. From the
Saved Cameras drop-down list select a camera from the list.Or
-
Right-click in the view window, hover over Saved Cameras then select a saved camera.
Or
-
On the View ribbon tab, go to the Camera group and select
 Camera Back to cycle through views in reverse order, or
  Camera Forward to cycle through views in the forward order.
The current camera position will be changed to the saved camera position.
To manage saved cameras
-
Load the required objects in a view window, and position the camera as required.
-
On the View ribbon tab, go to the Camera group. From the
Saved Cameras drop-down list select  Manager....
Or
Right-click in the view window, hover over Saved Cameras then select
Manager....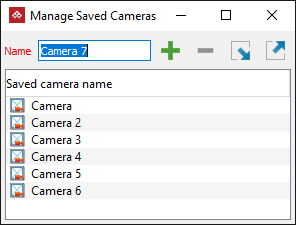
-
Enter a name for the saved camera in the Name field.
-
Click the
button to save the Camera. The new
camera object will be added to the Saved
Cameras name list. -
Click the
button to remove the selected saved camera from the list.
Tip: Cameras
can be imported or exported using the buttons. Click
either button to open a browser window. Browse to the save location. Cameras are saved with the extension *.cmr.
Saved Action Planes
To quick save an action plane
-
Load the required objects in a view window.
-
On the View ribbon tab, go to the Action Plane group. From the
 Saved Planes drop-down list select Save Action Plane.
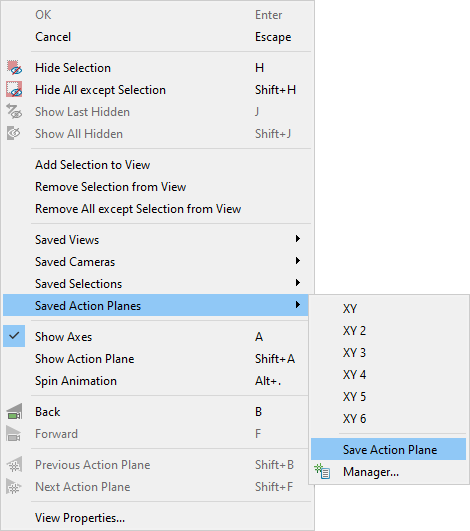
Or
Right-click in the view window hover over Saved Action Planes then click Save Action Plane.
-
Saved planes are listed under the Saved planes menu. Planes saved in this manner are named
XY,XY 2,XY 3etc.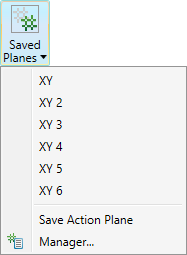
Loading a saved action plane
-
On the View ribbon tab, go to the Action Plane group. From the
Saved Planes drop-down list select an action plane.Or
Right-click in the view window hover over Saved Action Planes then select an action plane.
Or
On the View ribbon tab, go to the Camera group and select
 Previous Action Plane to cycle through views in reverse order, or
  Next Action Plane to cycle through views in the forward order.
 -
The current action plane position will be changed to the new action plane position.
To manage saved action planes
-
Load the required objects in a view window.
-
On the View ribbon tab, go to the Action Plane group. From the
Saved Planes drop-down list select  Manager....
Or
Right-click in the view window hover over Saved Action Planes then select
Manager....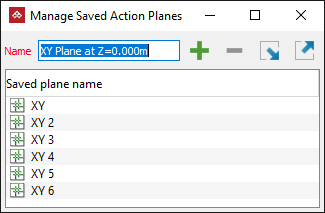
-
Enter a name for the saved action plane in the Name field.
-
Click the
button to save the Plane. The new
action plane object will be added to the Saved
Action Planes name list. -
Click the
button to remove the selected saved plane from the list.
Tip: Planes
can be imported or exported using the buttons. Click
either button to open a browser window. Browse to the save location. Planes are saved with the extension *.pln.
Saved Selections
To quick save a selection
-
Load the required surface in a view window.
-
Right-click in the view window, hover over Saved Selections then click Save Selection.
-
Saved selections are listed under the Saved planes menu. Planes saved in this manner are named
topo,topo 2,topo 3etc.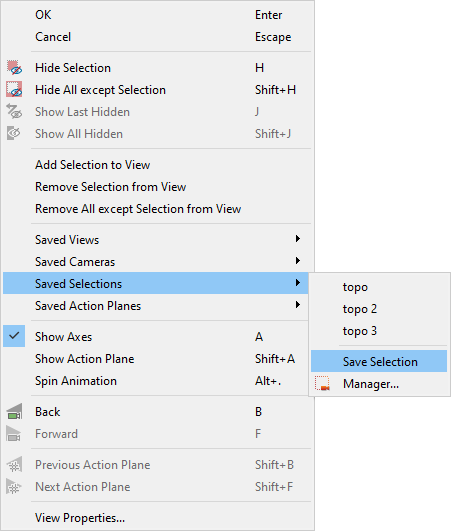
To manage saved selections
-
Load the required objects in a view window, and position the camera as required.
-
Right-click in the view window, hover over Saved Selections then select
 Manager....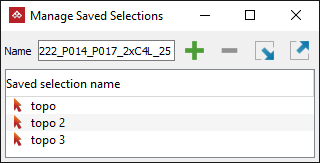
-
Enter a name for the saved selection in the Name field.
-
Click the
button to save the Selection. The new
selection object will be added to the Saved
Selections name list. -
Click the
button to remove the selected saved selection from the list.
Tip: Selections
can be imported or exported using the buttons. Click
either button to open a browser window. Browse to the save location. Selections are saved with the extension *.sel.
