Animation Editor
Source file: display-the-animation-editor.htm
Animations are created by defining a sequence of keyframes, which contain information regarding camera locations and timing.
Note: Keyframes are not tied to the data displayed in the view window, but to the geographic location of the camera view point when they are created. Thus, keyframes can be used to animate more than one type of data that is in the same geographic location.
To create an animation, proceed as follows:
-
On the View ribbon tab, go to the Export group and select
 Animation Editor.
 The animation editor will appear below the active view window.

Tip: You can also access the animation editor from the view window toolbar.
-
Identify a start position in the view window and set the camera to that location.
Tip: You can use several different methods for setting the camera viewpoint.
-
Click Create first keyframe in the Animation editor window. An animation object is immediately created and stored in a new container called animations.
-
Subsequent keyframes are spaced at five second intervals by default. If you require a different interval, change the value in the Keyframe length field. For example, a large number of keyframes may produce an animation that is too long. If so, reduce the interval.
-
Move the camera in the view window to the next position then click Append keyframe.

-
Repeat step 5 until you have reached the end of the animation path.
-
Click Play to preview the animation in the view window. Select Loop playback to run the animation preview on a loop until paused.
The playback head is indicated by a blue vertical line moving across the play bar.
-
With the playback head at the end of the animation, you can add new keyframes using the Append keyframe button. If the playback head is not at the end, the Append keyframe button label changes according to the playback head’s position as follows:
-
Prepend keyframe: At the beginning of the play bar you can place a new keyframe at the start of the animation.
-
Insert keyframe: Anywhere between keyframes you can insert a new one at that time reference.
-
Overwrite keyframe: When on an existing key frame, you can replace it with a new one.
-
- From the Advanced... options you can adjust the following:
- Smoothing factor will change the degree of smoothing applied to the camera path.
- Show frame markers will display the path and keyframe position of the object during the animation process.
- Show look vectors will display the camera look direction at each frame.
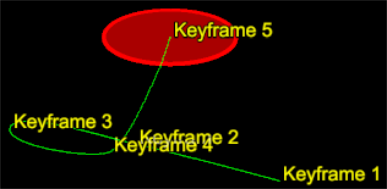
Example of Frame markers being displayed
The key frames are displayed as vertical red lines on the play bar. The time between key frames can be increased or decreased by dragging the key frame to the right or left, respectively.

To Export the animation, proceed as follows:
-
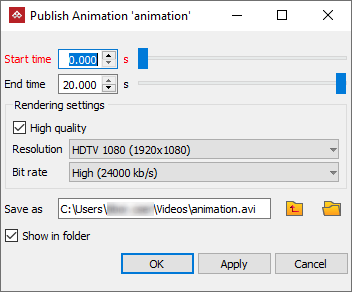
Click Publish to create the AVI file output. The Publish animation panel opens.
-
Select a start and end time for the animation if applicable. If left unchanged, the full animation will be exported.
-
The Rendering settings determine the quality and format of the output AVI file. Select the appropriate settings for the intended playback device.
Important: Do not select Raw (uncompressed) as the video quality unless post-processing will be performed. Standard video players cannot play this type of file.
-
Select a location to save the animation to.
-
Click OK or Apply.
Note: The data appearing in the animation will be the data displayed in the current view.
