Displaying the Animation Editor and Creating Animations
Animations are created by first defining a sequence of frames, which contain information regarding camera locations and timing.
To display the Animation Editor:
-
On the View ribbon tab navigate to the Export group and select
 Animation Editor. Tip! Alternatively it can also be found in the view window toolbar.

-
Position the data in the view window to a desired start position then click Create first keyframe in the Animation editor window. The animation file is stored in a new container called Animations.
-
Move the data in the view window to the next position then click Append keyframe. Key frames are created at the current location of the play head and continue at 5 second intervals. The key frames are displayed as vertical red lines on the playbar. The time between key frames can be increased or decreased by clicking and dragging the key frame.

-
Each time you move the data to the next position in the view window then click Append keyframe. Key frames are created at the current location of the play head and continue at 5 second intervals. The key frames are displayed as vertical red lines on the playbar.

-
Click Play to preview the animation in the view window. Loop playback runs the animation preview continually.
- From the Advanced... options you can adjust the following:
- Smoothing factor—will change the degree of smoothing applied to the camera path.
- Show frame markers—will display the path and keyframe position of the object during the animation process.
- Show look vectors—will display the camera look direction at each frame.
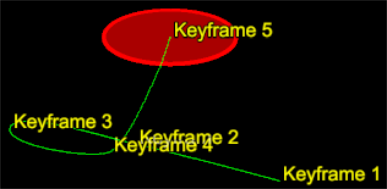
Example of Frame markers being displayed
The time between key frames can be increased or decreased by clicking and dragging the key frame.
-
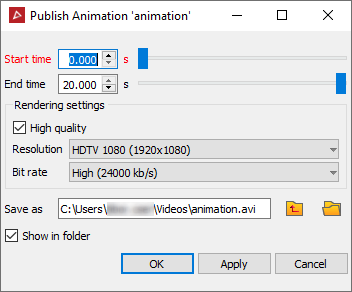
Click Publish to create the AVI file output. The Publish animation panel opens.
-
Select a start and end time for the animation if applicable. If left unchanged, the full animation will be exported.
-
The Rendering settings determine the quality and format of the output AVI file.
Note: Do not select Raw (un-compressed) as the Video quality unless post-processing will be performed. Standard video players cannot play this type of file. -
Select a location to save the animation to.
-
Click OK or Apply.