Style
Source file: create-line-style.htm
The Style group is a quick-selection panel for setting the appearance of the newly created CAD objects that can be displayed by using sequences of dots, dashes, and spaces, thickness and colour.

Set the look of your CAD lines from the following options:
Thickness
-
To change the thickness of a line
 , select the line, then open the
  (Line Thickness) drop-down list and select the required thickness, between 1 and 10 pixels.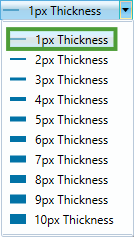
Line style
Apply different styles to your lines.
Predefined pattern
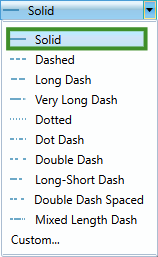
To apply a predefined line pattern, select a line , then open the  (Line Style) drop-down list and select the required pattern.
Custom pattern
To create your own pattern:
-
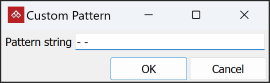
Click the Custom... option at the bottom of the Line Style drop-down list.
-
Type in the new custom pattern.
Note: The tool produces a linear On-Off pattern along a line. Characters equate to On, or visible segments, taking the assigned line colour. Spaces equate to Off segments or gaps between the visible segments.
-
Click OK.
Colour
Set the line colour by one of the following methods:
-
Select a standard colour. See below.
Or
-
Create a custom colour. See Create a custom colour.
Select a standard colour
-
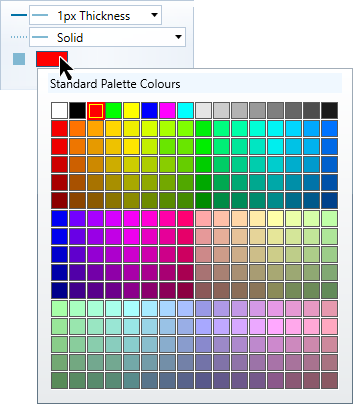
Single click the colour swatch.
To set a standard colour:
The Standard Palette Colours panel will open.
-
Select the preferred colour.
Create a custom colour
To create a custom colour:
-
Double-click the colour swatch.
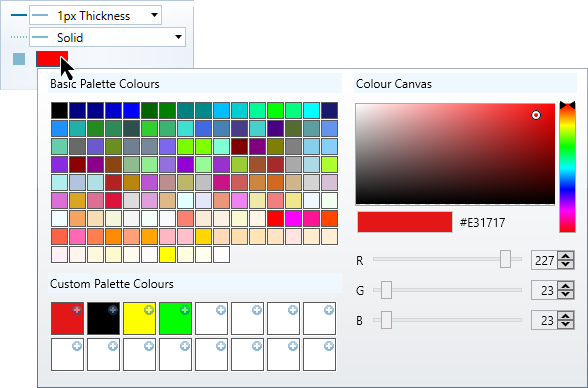
The advanced colour selector panel will open.
-
Select one of the basic palette colours.
-
Adjust the shade on the Colour Canvas by manoeuvring the circle, or enter a specific RGB colour code.
-
Choose one of the empty Custom Palette Colours and click its
 button to add the colour to the list.
 -
Repeat to create more colours.
-
Select the appropriate custom colour from the custom palette colours when required.
The line style with the chosen colour will be applied when new CAD objects are created.
