Line
Source file: line-group.htm
The Line group tools enable you to modify line objects in several ways, as required.

|
|
Extend Extend a line to another line, a facet or a point. |
|
|
Simplify Reduce detail on a line. |
|
|
Smooth Create a smoother representation of a line. |
|
|
Corner Shape corners as fillet, chamfer or scallop. |
|
|
Divide Divide a line into equal length segments. |
|
|
Split Segment a line at the intersection of another line. |
|
|
Trim Trim a line to the intersection of another line. |
Extend
The Extend tool allows you to extend a segment to a facet, line or point.
Note: The plane must not be parallel with the line segment.
-
To extend a line:
-
On the Edit tab, in the Line group, click
 Extend.
 -
Select the line
 segment to be extended.
 -
Click on the defining facet, line, or point. The line segment is extended.
-
Click OK or Apply to finish.
-
|
|
|
|
Selecting a line segment. |
Selecting a facet to extend to. |

Simplify
The Simplify tool enables you to remove excess points while retaining the shape of a line. This
is helpful for editing lines created using the ![]() Smart Line tool. See Smart Line.
Smart Line tool. See Smart Line.
-
To simplify a line:
-
On the Edit tab, in the Line group, click
 Simplify.
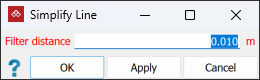
-
Enter a Filter distance. This specifies a maximum distance between points on the original line and the simplified line. The smaller the filter distance, the more points are retained and the more detailed the simplified line.
-
Select the line
from the cad container.
 -
Click OK or Apply to finish.
-
|
|
|
|
Before (left) and after (right) simplifying a line. |
|
Note: Simplified objects can be restored by clicking
![]() (Undo) or pressing Ctrl+Z.
(Undo) or pressing Ctrl+Z.
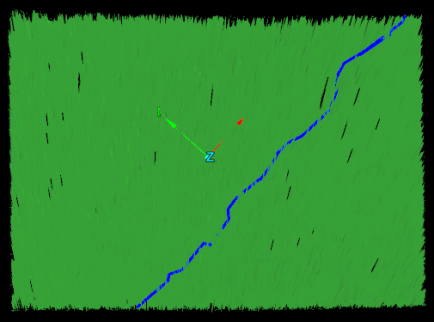
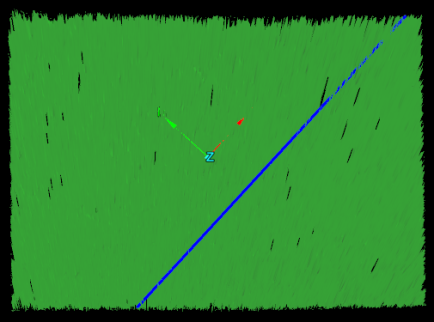
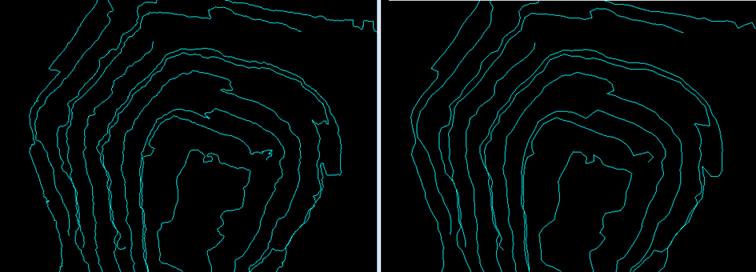
Smooth
The Smooth tool allows you to smooth a line containing many edges, such as those produced
by the ![]() Smart Line tool. See Smart Line.
Smart Line tool. See Smart Line.
-
To smooth a line:
-
On the Edit tab, in the Line group, click
 Smooth Lines.
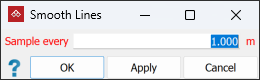
- Select the line to be smoothed.
- Enter a sampling interval in the Sample every field. This determines how detailed the smoothed lines will be; the smaller the number the more detailed the lines, the higher the number the less detailed.
-
Click OK or Apply to finish.
-
|
|
|
An example from an open pit mine. Before (left) and after (right). |
Corner
Source file: line-group.htm
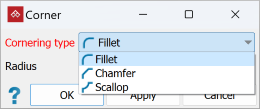
The Corner tool allows you to select and change corner shapes where lines or edges connect. The available corner types include:
- Fillet
- Chamfer
- Scallop
-
To change the shape of a corner:
-
On the Edit tab, in the Line group, click
 Corner.
The Corner panel will open. -
Select the Cornering type required.
-
Use
 (Selection points)
to select one or more corners, then set the radius using either of the Radius controls. You will see a preview of the modified corners as you adjust the radius.
(Selection points)
to select one or more corners, then set the radius using either of the Radius controls. You will see a preview of the modified corners as you adjust the radius.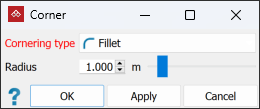
Tip: Use
 (Selection objects) to modify all corners simultaneously.
 - Click OK or Apply to complete the action.
-
|
|
|
|
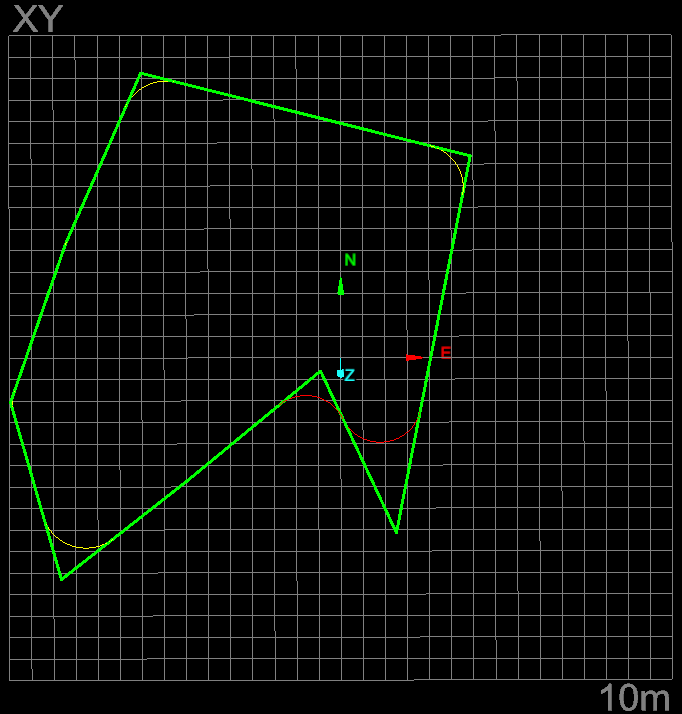
Example of a shape with corners being modified.(Preview stage) |
Example of a shape with corners being modified. (Completed stage) |

Divide
The Divide tool enables you to divide an edge into a number of smaller, equal-length segments.
A line can comprise one or more edges. Each edge will be evenly subdivided
by a nominated value.
-
To divide an edge:
-
Use
 (Select edges) to select
the line segment to be subdivided.
(Select edges) to select
the line segment to be subdivided. -
On the Edit tab, in the Line group, click
 Divide.
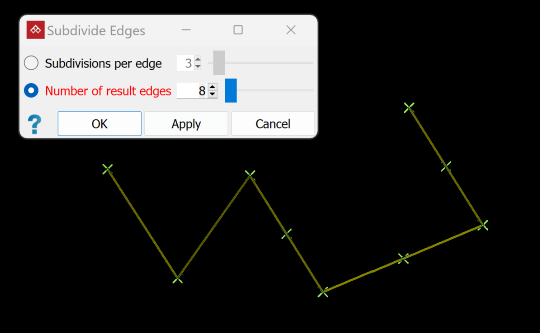
The Subdivide Edges panel will open.
-
Select one of the options as follows:
-
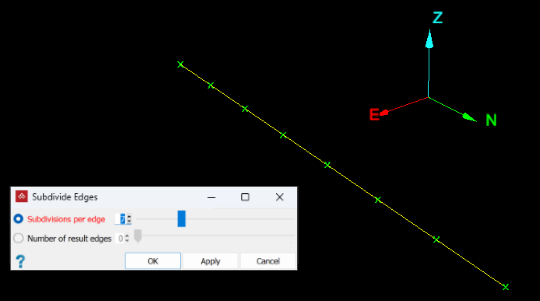
Subdivisions per edge. Enter the number of required subdivisions needed on each edge.
Or
-
Number of result edges. Enter the total number of required edges.
NoteAs the number is incremented:
- Subdivisions per edge divides all edges of the selected objects simultaneously.
- Number of result edges iteratively divides edge segments in half until the specified number of edges is reached.
-
-
Press OK or Apply to complete the tool.
-
Tip: Use the action plane and snap modes to simplify accurate point selection. See Action Plane and Snap Modes.
|
|
|
|
A line consisting of 1 edge, divided into 7 equal sections indicated by green crosses. |
|
|
|
|
|
A line comprising 5 edges, divided into 8 sections indicated by green crosses. |
|
Split
The Split tool enables you to break a line segment where it intersects with another line segment. The line segments can be parts of more complex objects and can have multiple edges.
-
To split an edge:
-
On the Edit tab, in the Line group, click
 Split.
-
Select the line
or object
to be split. -
Click on an overlapping line or object.
The line segment will be split at the points of intersection.

-
-
Continue applying the tool, or press
 in the status bar to finish.
Tip: Use the action plane and snap modes to simplify accurate point selection. See Action Plane and Snap Modes.
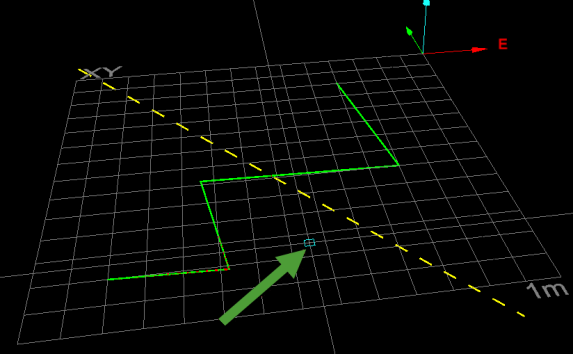
Example - splitting a straight line by a polygon
|
|
|
|
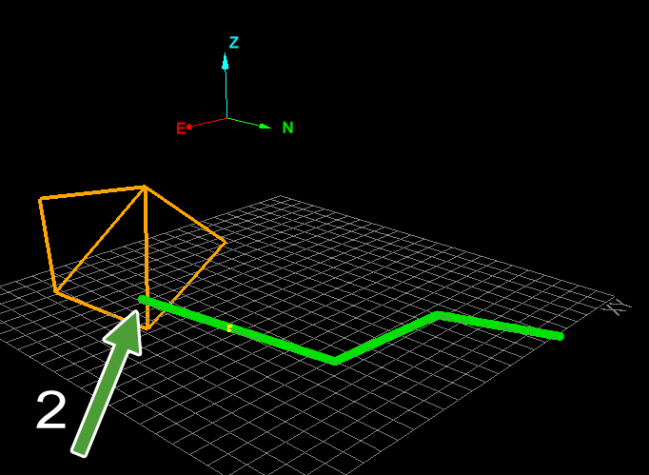
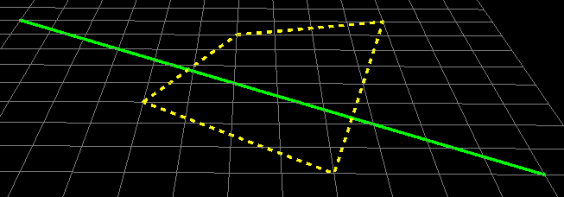
A line with a polygon positioned over it. The line will be split where it intersects the polygon. |
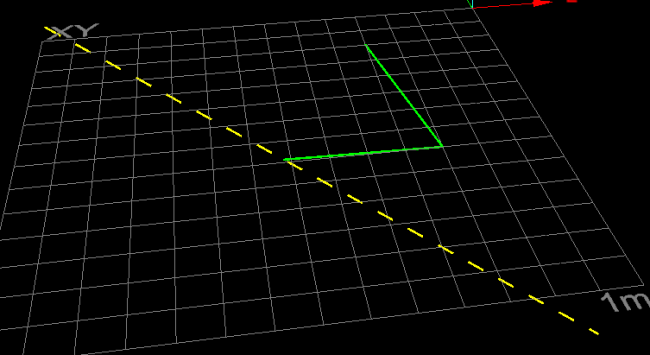
The line split into three sections by the polygon. The sections were later given different colours. |

Example - splitting complex objects
|
|
|
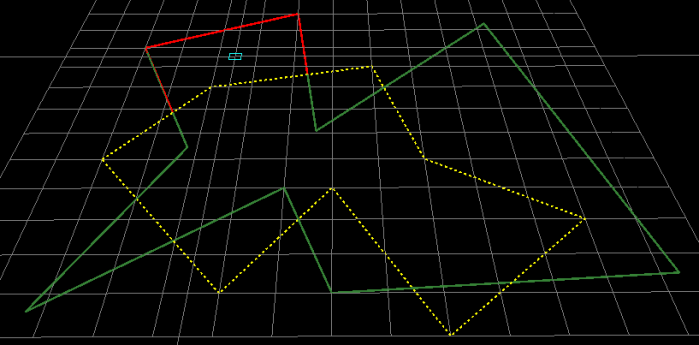
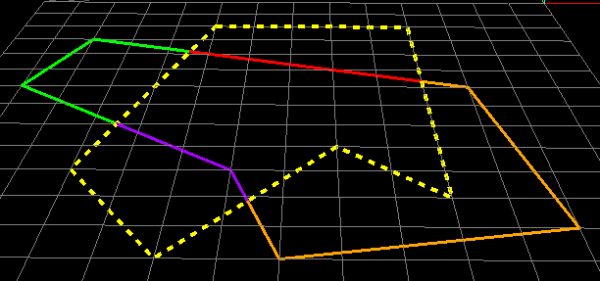
A polygon (multicoloured lines) split by a different polygon (yellow dotted lines). |
Trim
The Trim tool enables you to cut a line segment at its intersection with another line segment, removing the trimmed end. The line segments can be parts of more complex objects and can have multiple edges.
-
To trim a line:
-
On the Edit tab, in the Line group, click
 Trim.
Trim. -
Select the line
or object to be trimmed,
or drag or enter details into the status bar field at the bottom
of the screen.
-
Click on an overlapping line or object, or drag or enter details into the status bar field at the bottom of the screen.

-
Select the section of the line or object to be deleted.
Tip: The section to be deleted depends on the cursor position and is highlighted in red. Move the mouse to highlight a different section. Click when the correct selection is highlighted for deletion.
Note: It is not necessary to select a point on the original line or object.
The original object or line will now be trimmed of the section selected during the process.

-
Continue applying the tool or click
in the status bar to exit.
-
Tip: Use the action plane and snap modes to simplify accurate point selection. See Action Plane and Snap Modes.
Example - trimming with a straight line
|
|
|
|
|
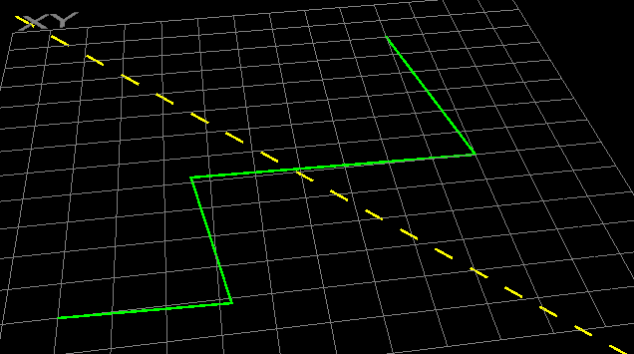
A complex line (solid) with a trim line (dashed) positioned over it. |
Click on the side to be trimmed (deleted). |
The complex line trimmed of the section to the left of the trim line. |
Example - trimming with complex objects
|
|
|
|
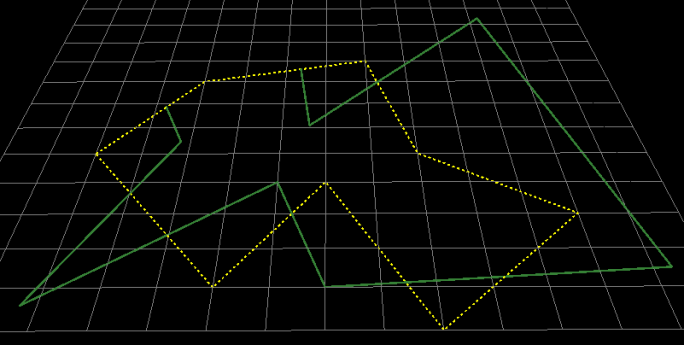
A polygon to be trimmed (solid) to another polygon (dashed). The section to be trimmed is highlighted red. |
The section has been trimmed. |