Remove Object
Source file: remove-object.htm
This tool will remove a single person, tree, vehicle or similar object on fairly flat ground, or several nearby objects if they are on the same fairly flat surface. It isn’t useful for automatically removing objects across large areas where the ground surface has large changes in slope and height.
-
Using the points selection tool, select a small point selection in which the ground is relatively flat, but contains the object to be removed.
Note: This tool needs a high proportion of 'ground' points to work reliably. We recommend having at least as many points in the selection from a flat area of ground around the object as there are from the object.
-
On the Position and Filter ribbon tab, go to the Filter group. From the Filters drop-down list select
 Remove Object. Based on the points selection, the Remove Object tool will:
- identify points belonging to the flat surface.
- identify points belonging to the object to be removed.
- model the flat surface.
- display a preview of the points and modelled surface in the tool panel.
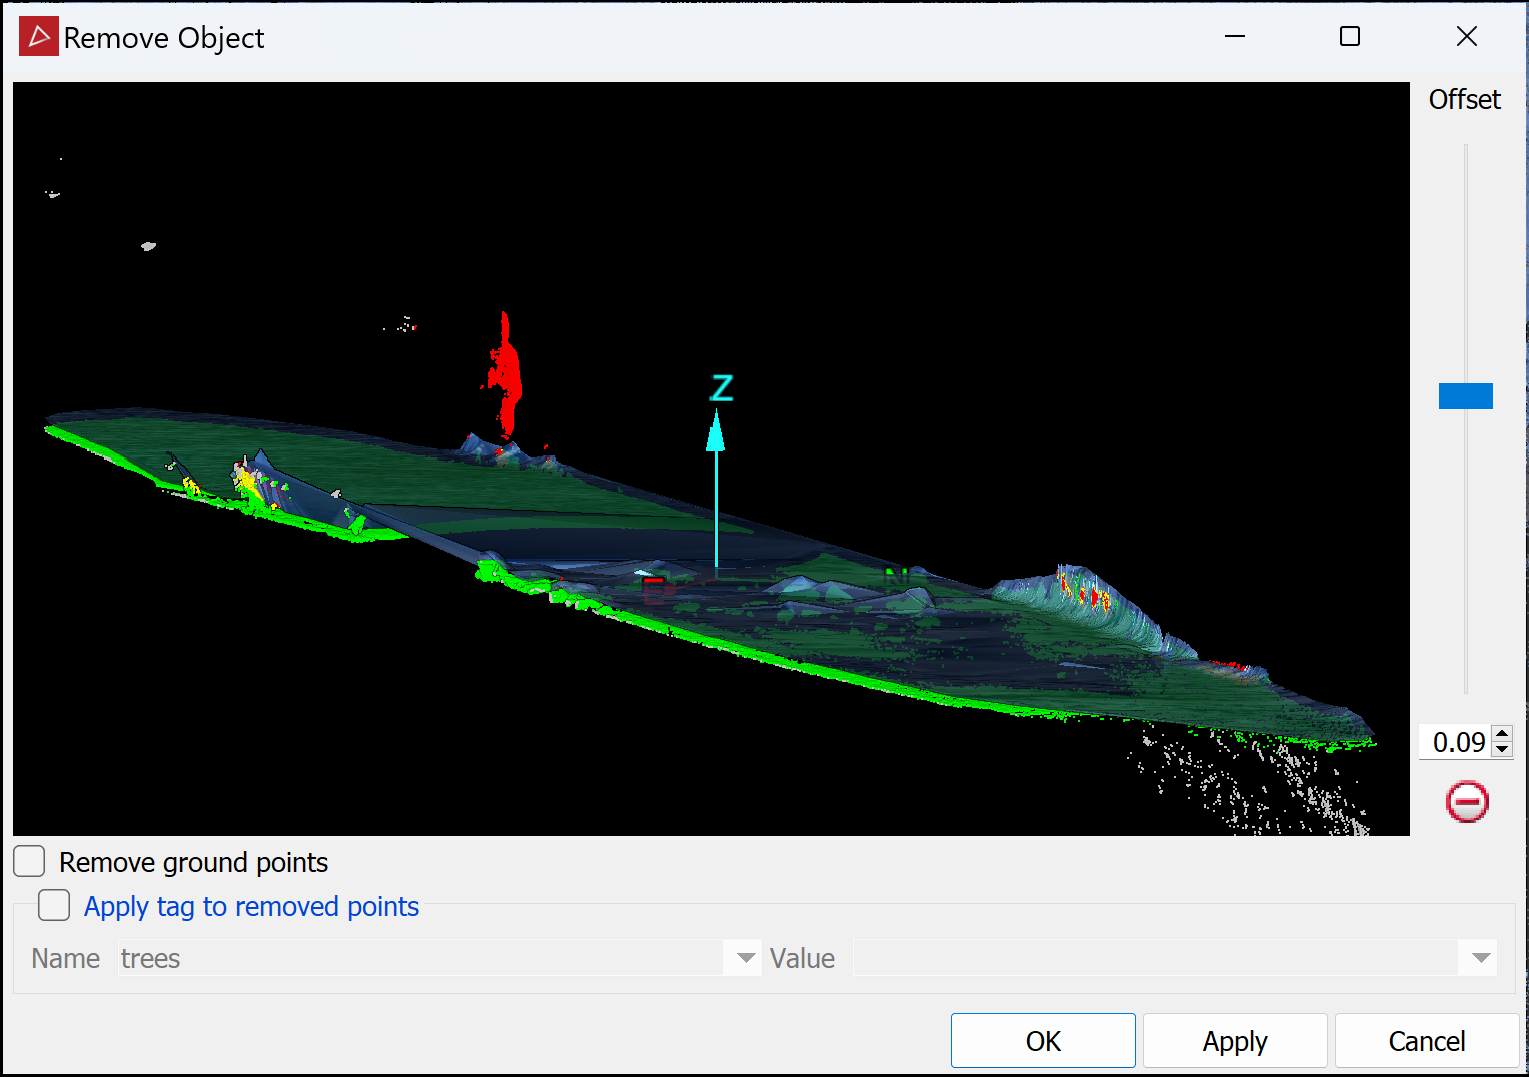
Red points are to be removed and green points are to be retained. Yellow points are object points between the modelled surface and ground. These will also be removed. White points are not included in the modelling and will be retained.
The modelled surface will be displayed, offset from the ground points by the distance set with the Offset slider.
Tip: You can zoom, pan and rotate the preview using the mouse buttons, as with manipulating the view window, except you don't need to hold down Alt.
-
It is possible that some points are wrongly identified for removal or retention. Adjust the Offset slider up or down to move the modelled surface and optimise ground point retention and object point removal.
-
If you want to retain the object and delete the surrounding surface points, select the Remove ground points checkbox.
Note: In this case green red colours are swapped in the previewer and only the new red (formerly green) points are removed, while all others are retained.
-
If necessary, apply tags to removed points.
-
Select Apply tag to removed points.
-
Select a tag from the Name drop-down list. If there isn't a suitable tag in the list, create one by typing a new name in the Name field.
-
Select a value for the tag from the Value drop-down list or type a new value in the Value field.
-
-
Click OK or Apply.
The specified points will be hidden from view.
Tip: You can redisplay the points
hidden by the filter using the ![]() Show All option. See Show All.
Show All option. See Show All.
