Surface Volume
Source file: query-surface-volume.htm
The surface volume query calculates the volume enclosed by two surfaces, or the volume from one surface to a plane at a fixed elevation.
-
On the Query ribbon tab, go to the Surface group and select
 Surface Volume.
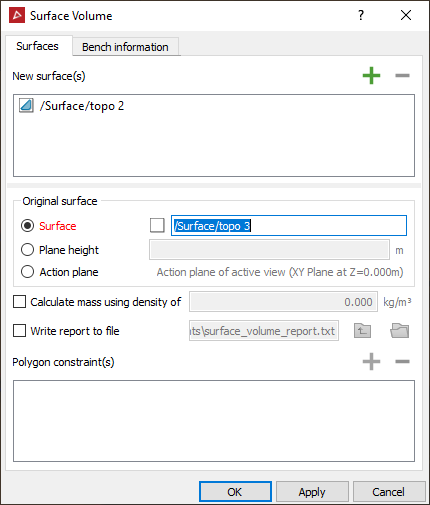
-
Drag the surface to be measured into the New surface(s) field.
-
In the Original surface area, select one of the following as a reference for calculating the volume of the new surface:
- Surface: Drag the reference surface in from the project explorer.
- Plane
height: Enter the height of the reference plane.
Note: If a reference plane height is being used, a Reduced Level (RL) can be typed in manually or a point selected directly from the model in the view window. A horizontal plane at that RL will be created.
- Action Plane: Uses the XY plane as the action plane of the active view.
Note: The volume is only computed in the areas where the two surfaces overlap, when viewed from above, or in the Z direction. The original surface should be a base model.
-
Select Calculate mass using density of and enter a density value if you require the results reported as mass.
-
Select Write report to file to save the results to a text file.
Tip: Alternatively, you can copy this information from the report window and paste it into a document.
-
To constrain calculations within certain boundaries, draw the boundaries as polygons (see Polygon) then add them to the Polygon field.
-
Go to the Bench information tab and select Surface volume by bench to generate a bench-by-bench breakdown of cut, fill and volume differences.
-
Define the Bench height as the distance between bench levels.
-
Specify the required upper and lower extents for the contours if different from the automatically calculated values.
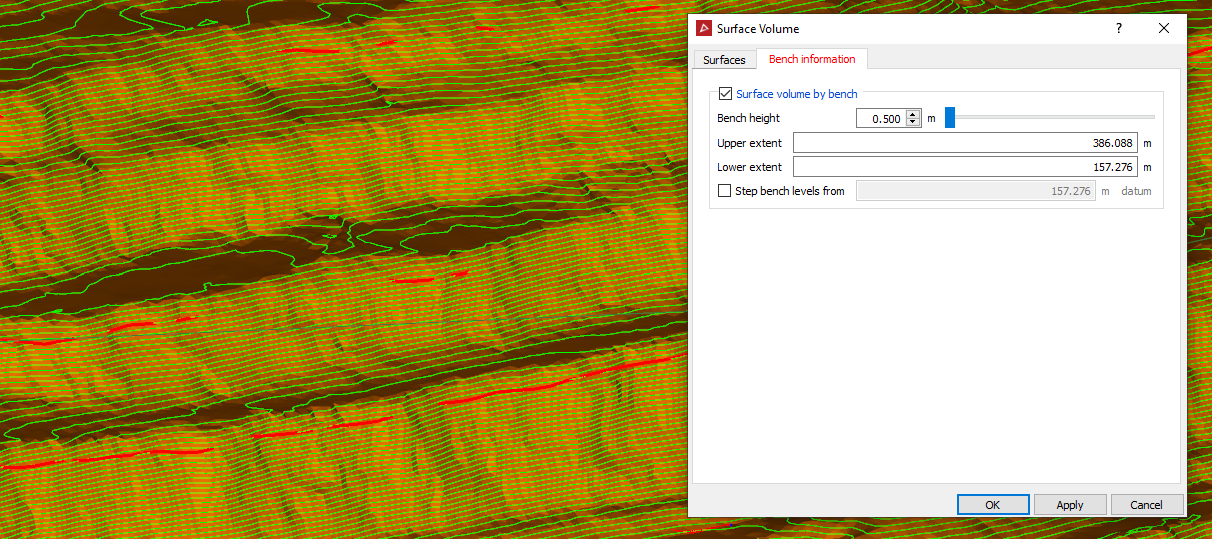
In the above example, the green lines represent the specified benches between which the volumes will be calculated.
-
Select Step bench levels from and enter the required starting bench height to step the bench levels from. Clearing this option will step the bench levels from the zero RL.
-
Click OK or Apply.
Note: The volume reporting units can be changed via the PointStudio Preferences in the Units tab.
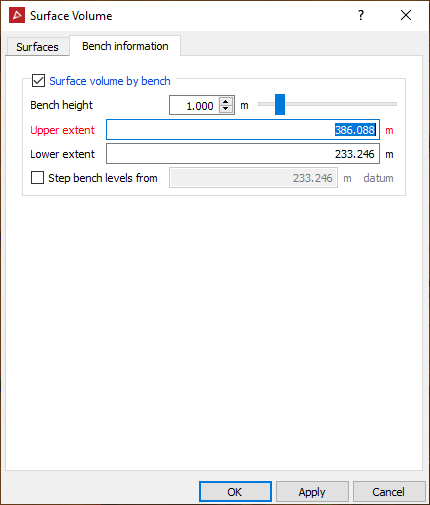
The Bench
information tab enables
the volumes to be broken down by bench.
The results are displayed in the report window.
