Attributes
Source file: attributes.htm
The Attributes tools enable you to add tags to any selection of points or objects. These can be used to sort data according to different characteristics, to improve analysis and understanding of the data.

|
|
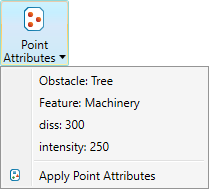
Point Attributes Create and apply attributes to points. |
|
|
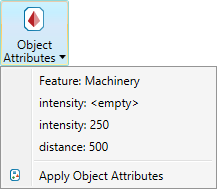
Object Attributes Create and apply attributes to objects. |
Create Attributes
Attribute creation is identical for both point and object attributes.
To create attributes follow these steps:
-
Select objects or primitives to be assigned an attribute.
-
On the Position and Filter tab, either:
-
From the Filter group, click
 Edit Attributes.
The Edit Attributes tool will open.
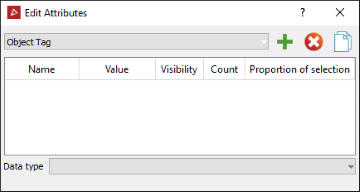
Note: If you select an object that already has tags, those tags will be displayed in the tool panel.
-
Select the appropriate <Primitive type> Tags from the drop-down list.
Note: Options called <Primitive type> Properties may appear in the drop-down, depending on the selection. These are only available for viewing and filtering primitives.
-
Click the
 button.
Or
-
From the Attributes group, click either
 Point Attributes or
  Object Attributes
 -
Select
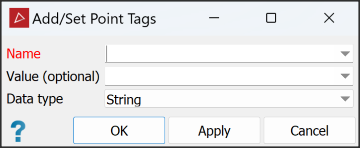
Apply Object/Point Tags from the drop-down.Either an Add/Set Point Tags or an Add/Set Object Tags panel will open.
 Note
NoteThese panels are also accessible from the context menu. Right-click a point or object, hover over Attributes and select either Object Attributes... or Point Attributes....

-
-
Enter a name for the attribute in the Name field, or select an existing one from the drop-down list.
-
If required, enter a value for the attribute in the Value (optional) field, or select an existing one from the drop-down list.
-
Select a data type from the Data type drop-down list.
-
Click OK or Apply.
Tip: See Attribute rules, below for more information.
The attribute will be created and applied to the selected data.
Note: User created attributes are saved in the Windows registry, so are available to use in other PointStudio projects.
Tip: You can create a new tag by copying an existing one. Select the existing tag, then click ![]() , enter a name for the duplicate and click OK. Make any necessary adjustments to the duplicate. See Edit Attributes, below.
, enter a name for the duplicate and click OK. Make any necessary adjustments to the duplicate. See Edit Attributes, below.
Assign Attributes
Attributes that have already been created can be applied to other data from the Point Attributes and Object Attributes tools.
-
To assign an attribute, select the data then click either Point Attributes or Object Attributes and select a pre-made attribute from the list.
Note: A list of up to the ten most recent Point Attributes and ten Object Attributes will be available for a quick selection.
You can also assign attributes from the context menu. Right-click a point or object, hover over Attributes and select either Object Attributes... or Point Attributes....
Edit Attributes
To edit attributes, follow these steps:
-
Select the object with the tags to be edited.
-
On the Position and Filter tab, in the Filter group, click
Edit Attributes.Note: You can also access the Edit Attributes tool from the property editor. Click Edit.. next to Object Attributes.
-
Select the appropriate <Primitive type> Tag from the drop-down list.
Note: The tag types listed will depend on the types of objects that are selected.
-
Make any necessary changes to the attributes. See Attribute rules, below for more information.
Tip: Remove a tag from an object or primitive by selecting the tag, then clicking
 .
. -
Close the panel when finished.
|
|
|
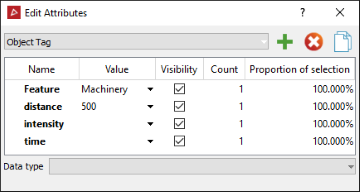
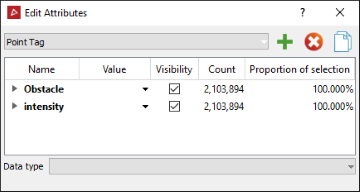
|
A set of object attributes (left) and point attributes (right) |
|
If you select <Primitive type> Properties from the drop-down list, the properties of all points in the selection will be displayed.
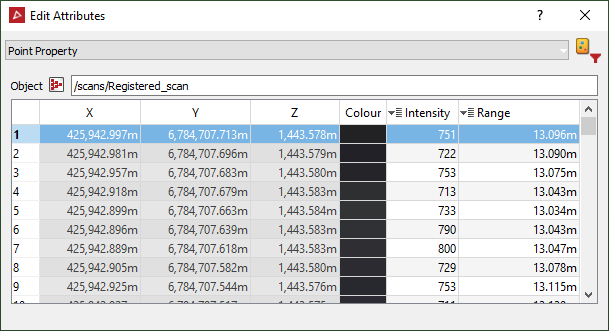
In this case, the ![]() ,
, ![]() and
and ![]() buttons are replaced with the
buttons are replaced with the ![]() button. Click
button. Click ![]() to open the Filter by Attribute tool.
to open the Filter by Attribute tool.
Attribute rules
Expand below for details on relevant attribute types.
Tags can be applied to objects or primitives, in which case they are specifically referred to as object tags or point, edge, facet or surfaces tags.
When applying tags to objects as object tags:
- The object tag specifies a value of a particular type for the entire object, not just the primitives of the object.
- Applying a value to an object tag is optional.
- The value of an object tag can have different data-types across objects.
When applying tags to primitives of an object as a point/edge/facet/surfaces tag:
- A primitive tag can only be applied to a specific primitive type. For example, a point tag can only be applied to points, but not to edges.
- A primitive tag can be applied to a subset of primitives. You can use attributes to specify a point tag on only some of the points of a scan, while the other points of the scan remain untagged.
- Applying a value to a primitive tag is optional.
- The associated values of a primitive tag can have different data-types across the whole primitive. For example, one point with a point tag can have an integer value such as
17, and a different point on the same object with the same point tag can have the string value such asore deposit, yet another point on the same object with the same point tag can be without a value.
- Properties attributes can only be applied to primitives, and are specifically referred to as point, edge, facet or surfaces properties.
- Properties attributes must be applied to every primitive of the object.
- Properties attributes must have a value specified for every primitive of the object.
- Property data types between primitives of the object cannot be changed.
- If there is a
 in the top left-hand corner of the properties table, the properties cannot be edited.
Note: If the selection does not have any attributes available to it, you will need to create the attributes first.
