Loop Surface
Source file: loop-surface-group.htm
The Loop Surface group provides tools for creating surfaces from underground tunnels and voids.

|
|
Fit Loops (F12) Create a polygon around a point selection. |
|
|
Loop Surface (Alt+Z) Create a surface from a selection of loops. |
Fit Loops
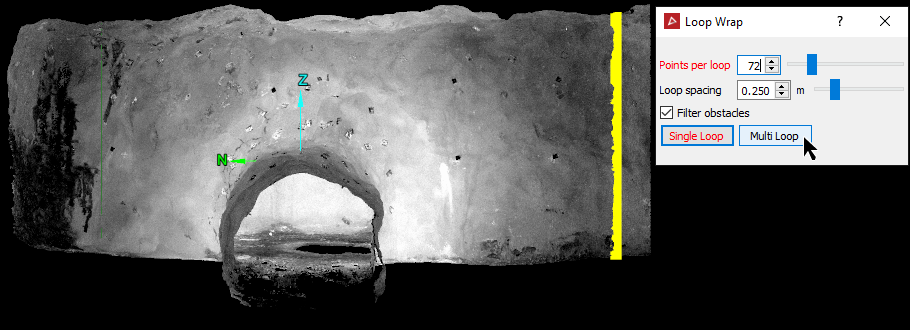
The Loop Wrap tool (F12) allows you to create closed polygons (loops) around the tunnel or void from point data, in a plane of best fit. Create loops in two stages, as described below.
Creating a single loop
Create a single loop ![]() first, to define the starting point, as follows:
first, to define the starting point, as follows:
-
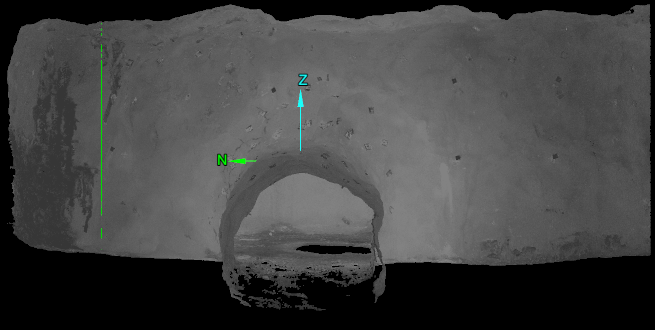
Select the tunnel in the project explorer and load it in a new view window.
-
On the Underground tab, in the Loop Surface group, click
 Fit Loops.
 -
(Optional) Select Filter obstacles to exclude unwanted points from the loop caused by obstacles in the way of the surface being scanned. This option compares all points of a selection with a lower resolution loop to determine which points to exclude. Typical objects may include vehicles, machinery, people, pipes, or other services which are present between the surfaces being scanned and the scanner.
Tip: Use the
 Services Filter tool to remove obstacles before creating loops.
 -
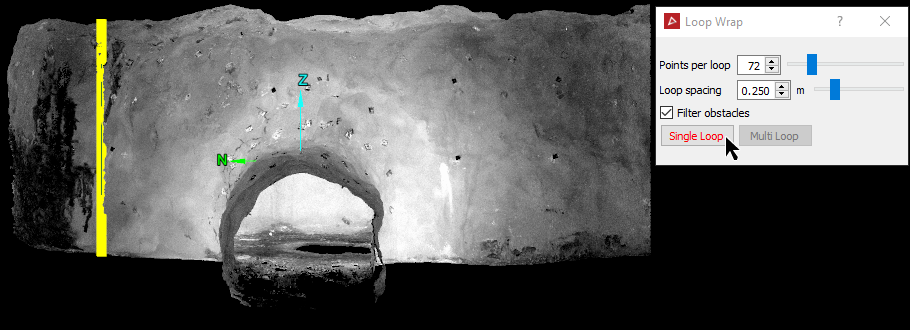
Using the point selection type
 , select
points in the area for the first loop polygon.
, select
points in the area for the first loop polygon. -
Click the Single Loop button. A single loop wrap polygon is created.
The loop wrap polygon is saved in the
cad container.
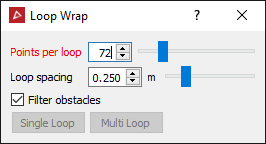
Note: The Loop Wrap tool creates a polygon through a number of points, evenly spaced around the centre of the selection. The number of points is set by the Points per loop field and becomes more accurate as the number of points increases.
Important: Do not close the Loop Wrap panel until after the next stage.
Creating multiple loops
After creating a single loop ![]() , create multiple loops
, create multiple loops ![]() along the tunnel, as follows:
along the tunnel, as follows:
-
Select points further along the tunnel for the end of the loop wraps or polygons.
-
Click the Multi Loop button. Multiple loop wraps or polygons are created, separated by the Loop spacing distance back to the first loop.
Note: You can click Single loop again to create another single loop from this selection.
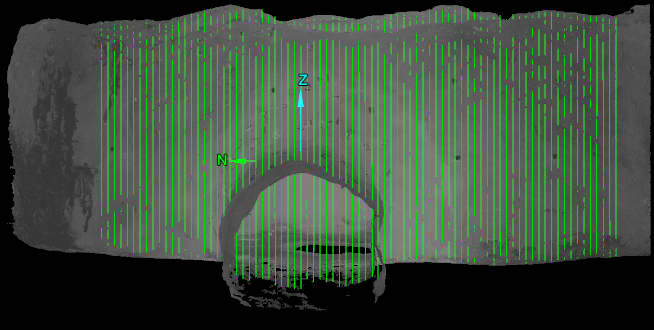
The loop wraps are saved in the cad ![]() container. Close the tool when finished.
container. Close the tool when finished.
Loop Surface
The Loop Surface tool (Alt+Z) enables you to create a tubular surface from a selection of loops or surfaces.
To create a surface ![]()
![]() with loop polygons, proceed as follows:
with loop polygons, proceed as follows:
-
Select the tunnel loops in the project explorer and load them in a new view window.
-
On the Underground tab, in the Loop Surface group, click
 Loop Surface.
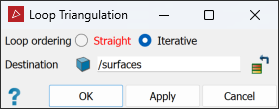
-
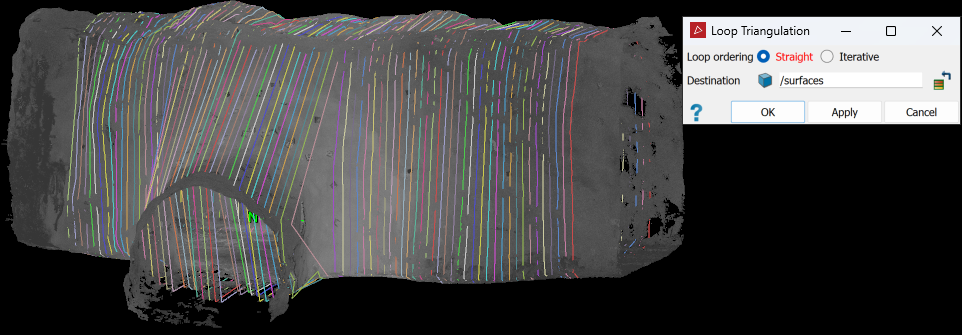
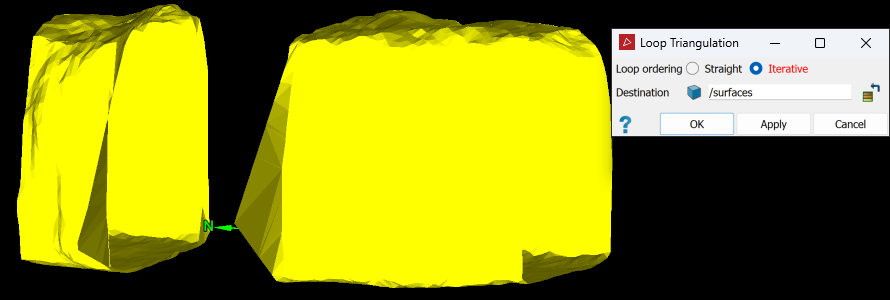
Select the preferred Loop ordering method.
- Straight: Creates a single surface with the loops ordered along a straight line, based on their orientation.
- Iterative: Automatically extracts the boundary polygons of the surfaces and intelligently
joins nearby loops of similar orientation.
This is helpful where there are two or more parts of a tunnel separated by small gaps. This can create multiple surfaces and wrap around corners if needed.Note: This may ignore loops if it can't find others nearby to join them.
-
Click Apply or OK.
A new surface called loop surface <number> is created and placed in the surfaces container.
|
|
|
|
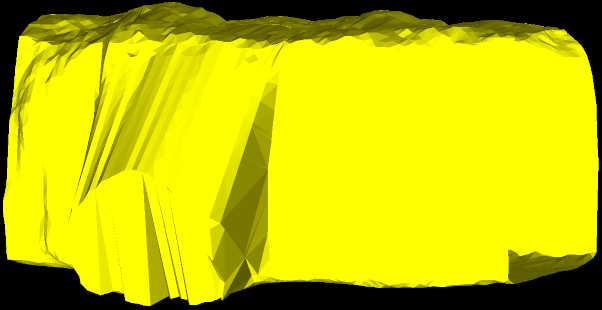
Data (points) with loops made using |
|
|
|
|
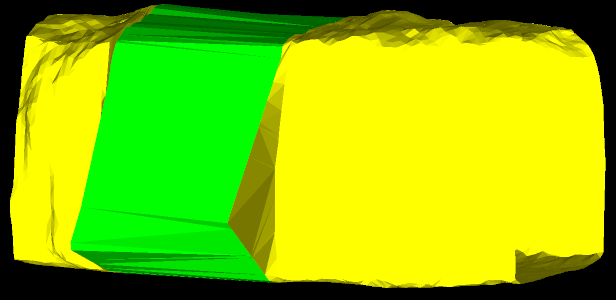
A resultant single ‘tubular’ surface. |
|
|
|
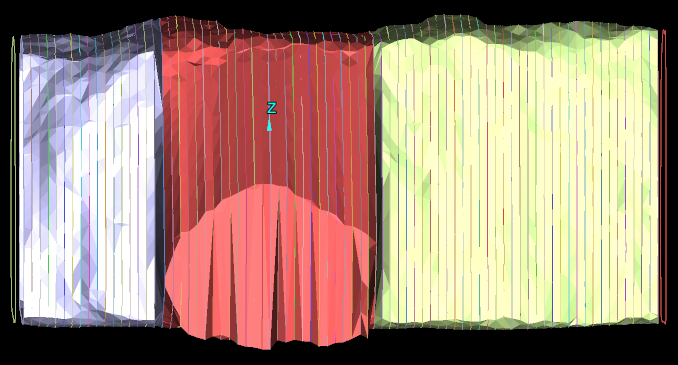
Loop Surface run three times on different selections of polygons. |
|
|
|
Sections hidden with the visibility editor so that displayed surfaces can be examined in closer detail. |
|
|
|
|
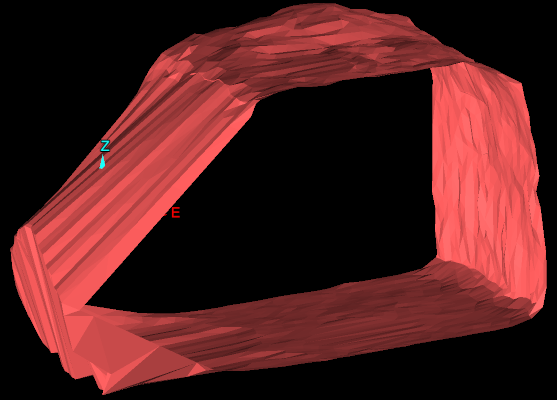
Two separate loop surfaces: select both and apply a loop surface to create a new loop surface in the gap. |
|
|
|
|
New loop surface created between the original two surfaces. |