Viewing Data
Load data into a view window so that you can work with it. Modify views so that you can more easily see the areas and data that you are working on.
Loading objects into a view
-
To view an object Any entity stored in a project explorer container., double-click it in the project explorer.
-
Double-click a container to load all the objects in the container.
Objects will be loaded into the current view or, if no views are open, into a new view.
Alternative ways of viewing objects are as follows:
-
Select the objects or containers and press Ctrl+Alt+N.
-
Right-click on an object or container and select View <object name> in Current View or View Selection in Current View.
-
Drag objects from the project explorer into the view.

Tip: You can drag-and-drop unselected objects. Any other objects that were selected will remain selected.
Manipulating the view
Manipulate the view to get the best look at data for operations to be performed.
-
To change manipulation mode, click
 Set Manipulation Mode on the view window toolbar to cycle through the options.
|
|
Z Up Mode (Z) Constrains the Z axis to moving vertically in your viewing direction, regardless of camera location. |
|
|
Look from Mode (K) Fixes the viewpoint. View rotates around the viewpoint. |
|
|
Plan View Mode (P) Sets the view to look down on the data. |
|
|
Screen Mode (S) Enables unconstrained view rotation. |
-
To set the centre of rotation, click the
 (Set Centre of Rotation) button on the view window toolbar (or press C), and then pick a location in the view.
Note: In z-up and screen manipulation modes, the axes appear at the centre of rotation. They will follow the centre of rotation.
-
To change the view orientation and magnification, operate the mouse as follows:
Operation Combination  Rotate
Alt+left mouse button drag
 Pan
PanAlt+middle mouse button drag
 Zoom (to the view window centre) Zoom (to the mouse pointer location)
Alt+right mouse button drag
Alt+scroll
Tip: Hold down Shift when manipulating the view to slow the movement to 10% of normal speed. This will enable you to control the manipulation more precisely.
Tip: If you select
 (Hands-free manipulation) on the selection toolbar, you can manipulate the view without holding the Alt key.
Note: While hands-free manipulation is active, you cannot make selections in the view window. For this reason, we recommend not using hands-free manipulation unless unavoidable.
Changing the appearance of data
To make it easier to work with your data, you can change its colouring in the view window, as follows:
-
Select the data in the project explorer.
-
On the Home tab, in the Colour group, click
 Colour Scheme and select from the drop-down.
You can also adjust the data appearance with one of the other tools from the Colour group. For more detail, see Colour Group Overview.
Hiding and showing objects
You can hide objects from view without unloading them.
-
To hide an object in the view, right-click on it and select Hide from the context menu.
The visibility editor enables you to control the visibility of objects loaded into the view.
-
To open the visibility editor, press V, or click the
 button on the view window toolbar or the View tab.
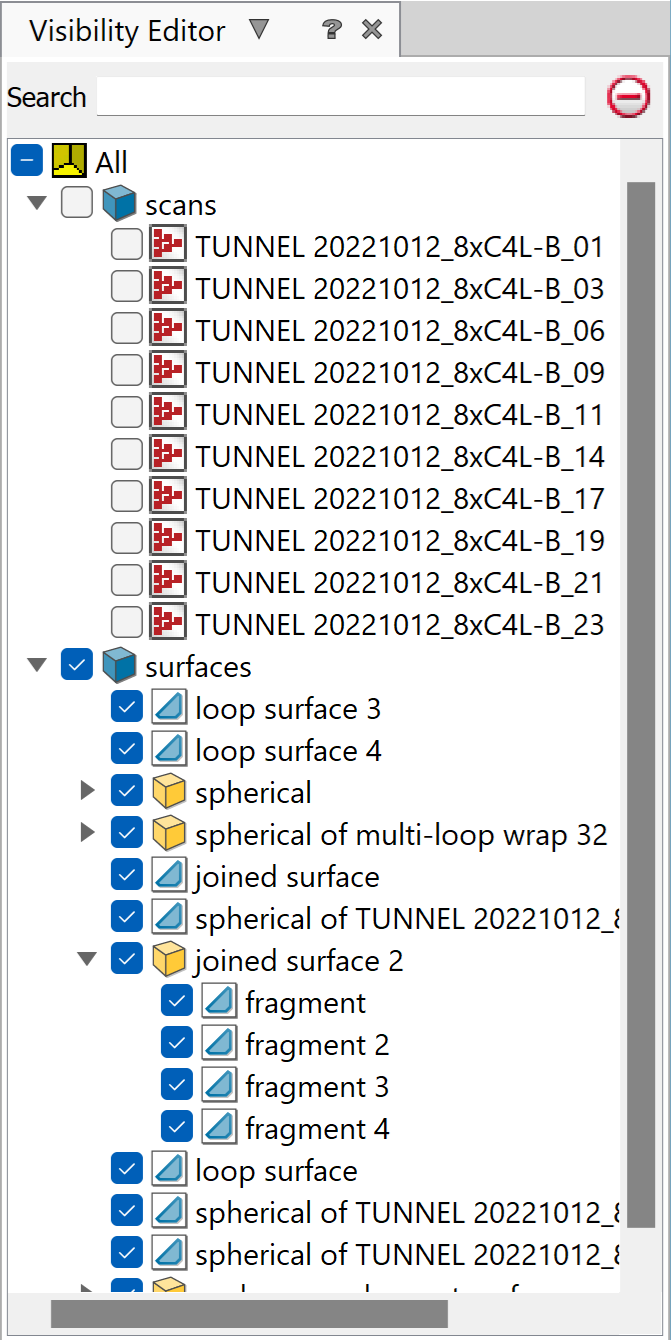
-
Click the check boxes next to listed objects or groups to manage their visibility.
The table below summarises the keyboard shortcuts for object visibility actions.
| Action | Keyboard shortcut |
|---|---|
|
|
V |
|
|
H |
|
|
H+click |
|
|
Shift+H |
|
|
J |
|
|
Shift+J |
Viewing sections
Define a section view quickly using the Quick Section options in the view window toolbar.
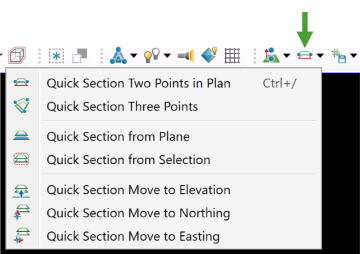
-
To control the section, use the keyboard and mouse combinations summarised in the table below:
Operation Combination  Move section plane
Ctrl+Alt+left mouse button click and drag
 Change strip thickness
Ctrl+Alt+right mouse button click and drag
Tiling and tying views
You can tile views loaded with different objects side-by-side to compare objects in the same scene.
Note: Tile and tie tools are only available when at least two view windows are open.
-
To tile views, on the Workbench tab, in the Tile group, select
 Tile.
Tile.PointStudio will rearrange all open view windows in the user interface side-by-side.
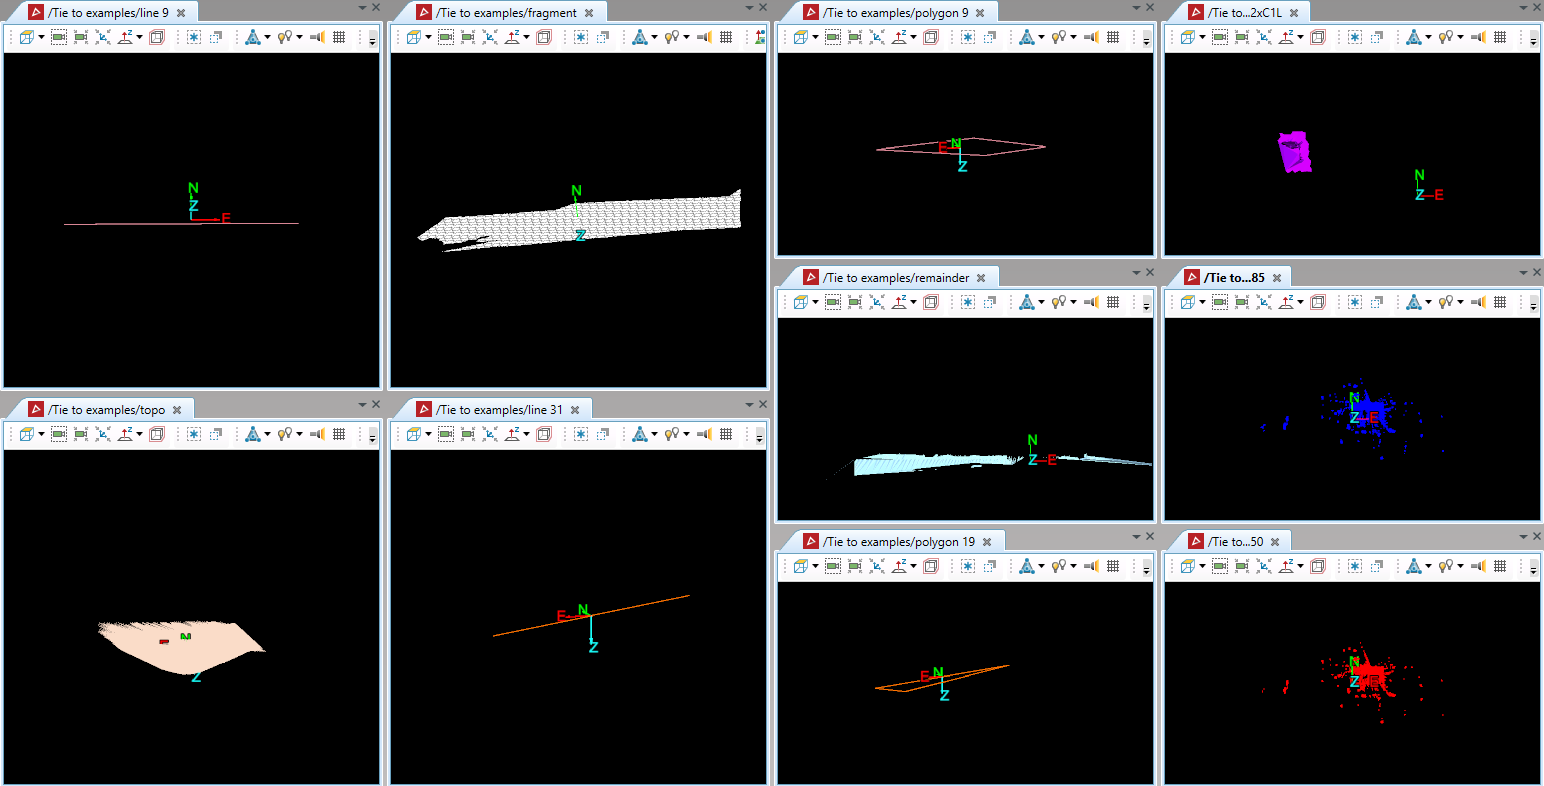
You can also tie views together so that they will all be viewed from the same direction and orientation. When you manipulate one view window, any windows tied to it respond identically.
-
To tie views together, on the View tab, in the Camera group, from the
 Tie to drop-down, select a view window to tie to the current view window. Repeat to tie more windows.
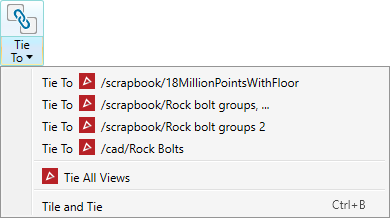
The selected windows will tie together without rearranging.
Tip: You can also find
Tie to on the view window toolbar.Note: Tied views have colour-coded Tie to icons to distinguish between groups of tied views.
-
To tile and tie views in one step, select Tile and Tie from the
Tie to drop-down.All open views that are docked will be tiled and tied.
-
To untie views, select a view to untie or Untie All Views from the
 Tie to drop-down.
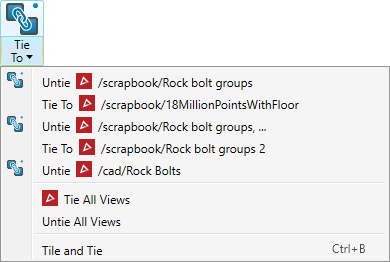
Views will be untied, but will remain tiled.
For more detail, see Tying View Windows Together.
