Export Orthophoto
Source file: export-orthophoto.htm
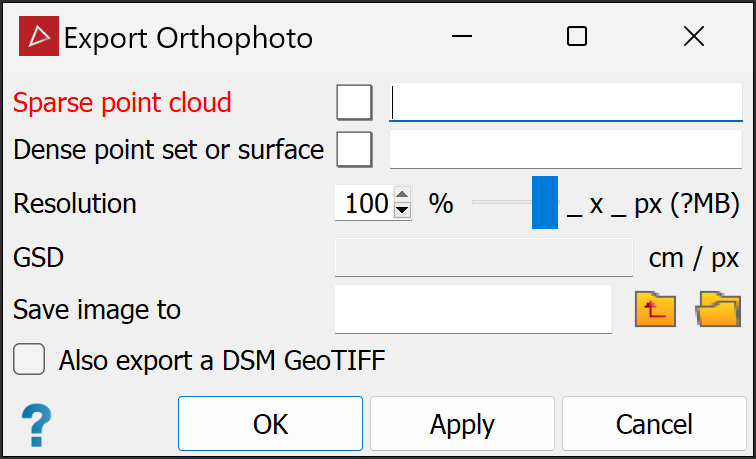
The Export Orthophoto tool enables you to generate and export an image of a photogrammetry project.
To create an orthographic image, click ![]() Export Orthophoto on the Photogrammetry tab, then follow the steps below.
Export Orthophoto on the Photogrammetry tab, then follow the steps below.
-
Select the required sparse point cloud
 and dense point cloud
  or textured surface
  in the project explorer. The corresponding fields will populate automatically.
Note: It is not necessary to create a textured surface to export an orthophoto. A dense point set created with the photogrammetry tools is sufficient. This will save processing time.
-
Set the required Resolution with the slider. The dimensions, file size and GSD will be calculated and auto-populate.
-
Choose the Save image to location. Click the
 button and navigate to the required location. Click the
  button to navigate up one folder level.
 -
(Optional) Select Also export a DSM GeoTIFF if you need a the data in a Digital Surface Model GeoTIFF file.
Note: The DSM GeoTIFF file only contains height values. It can be used in drone flight control software for optimising the drone height during future flights, and can be viewed in GIS software such as QGIS.
-
Click OK or Apply.
The orthophoto will be created in the chosen location as a .tiff file along with a .tfw file containing coordinate data. The orthophoto will also be automatically imported into the current PointStudio project and displayed in the active view window at zero elevation .
