Find Objects
Locate Design Objects
Use the Find Objects option to find and highlight design objects that match a given set of conditions. The details for each object can then be reported to a Microsoft Excel spreadsheet.
Instructions
Click the ![]() Find Objects button on the Analyse toolbar.
Find Objects button on the Analyse toolbar.
OR
On the Analyse menu, point to Details, then click Find Objects.
The Find/Report panel consists of two tabs, Find and Report to Excel, each of which are described in detail below. The Find/Report panel is first displayed as a floating window, which can be docked by dragging the window to the edges of the Primary Window (a preview of its docked position displays).
Find tab
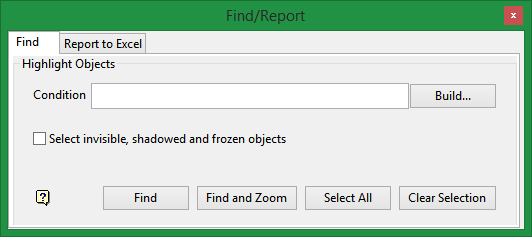
Use the Find tab to highlight the design objects that match a given set of conditions.
Enter the Condition and click Build... to display the Build Expression panel.
Click Find to highlight design objects that match the specified conditions.
Click Find and Zoom to view all highlighted objects.
Click Select All button to highlight all objects.
Click Clear Selection to clear object highlighting.
Follow these steps:
-
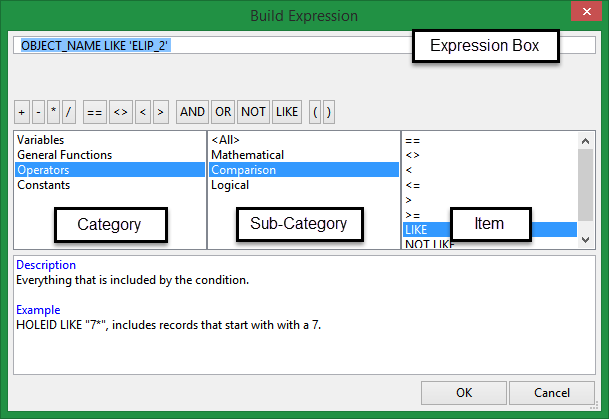
Build an SQL expression one term at a time by selecting a category from the first column, a sub-category from the middle column, then double-clicking an item from the third column. This will become the term in the expression.
Note: The choice you make will affect the selection available in the second column's sub-category menu. Similarly, the selection made in the sub-category column will affect the items made available in the third column.
As you select your terms, the SQL conditional statement will be displayed in the Expression Box. You can type terms directly into the Expression Box. If the syntax is incorrect the conditional statement will be coloured red to indicate there is an error.
| Operator Button Bank | ||
|---|---|---|
| Button | Description | Notes |
|
== |
Equal to |
|
|
<> |
Not equal to |
|
|
< |
Less than |
Adding a '=' symbol after the '<' will allow you to match conditions that are less than or equal to. |
|
> |
Greater than |
Adding a '=' symbol after the '>' will allow you to match conditions that are greater than or equal to. |
|
>= |
Greater than or equal to |
|
|
<= |
Less than or equal to |
|
|
AND |
Joins two or more conditions and displays the data that satisfies ALL specified conditions |
|
|
OR |
Joins two or more conditions and displays the data that satisfies ANY of the specified conditions |
|
|
NOT |
Not like a specified pattern |
An asterisk ( * ) can be used to match any possible characters that might appear before or after the characters specified, while the underscore (_) is used to match any single character that may appear before or after the characters specified. |
|
LIKE |
Like a specified pattern |
An asterisk ( * ) can be used to match any possible characters that might appear before or after the characters specified, while the underscore (_) is used to match any single character that may appear before or after the characters specified. |
|
( ) |
Should be used to enclose any field names that contain spaces or to enclose identifiers that match SQL reserved words |
|
To highlight all design objects that contain a maximum of 4 points.
Figure 1: Specifying the conditions
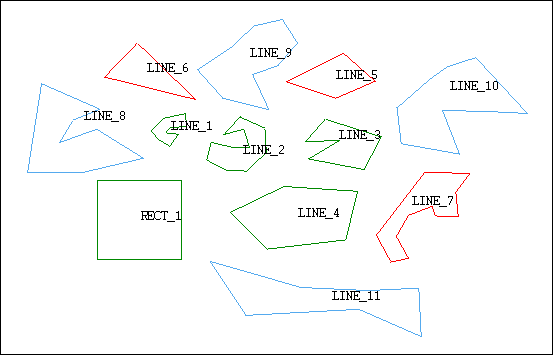
Figure 2: The design objects

Figure 3: The matching design objects
To highlight the design objects that have object names starting with the word LINE_ AND contained more than 5 points.
Figure 4: Specifying the conditions
Figure 5: The design objects
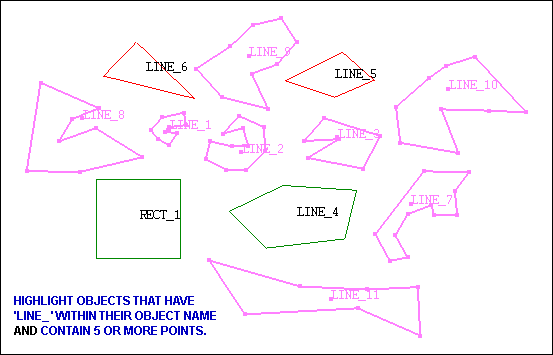
Figure 6: The matching design objects
Report to Excel tab
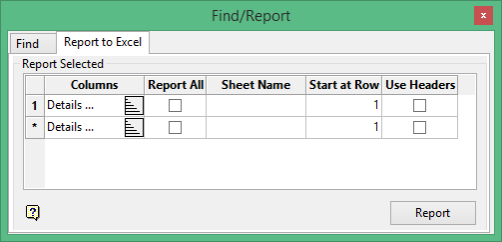
Use the Report to Excel tab to report on the highlighted design objects. The details for each object are sent to a Microsoft Excel spreadsheet.
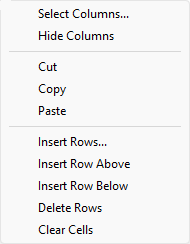
The panel utilises grid controls to manage the grid information, i.e. right-click context menus, that allow you to perform options such as hiding columns, cutting, copying, and pasting cells, and inserting and deleting rows. Right-click in the grid area to display the context menu. Descriptions of the available options are listed below.
-
Use the Select Columns option to choose which grid columns to display in the panel, and optionally save the selection to a template for future use. Alternatively, select cells and click Hide Columns to hide the respective columns directly.
-
Select cells and use the Cut, Copy, and Paste options to duplicate or move cell entries.
-
Select a cell in a row of interest and use the various insert and delete row options to manage the records in the grid.
-
Click Clear Cells to clear the contents of a selection.
Report Selected
Columns
This column to select the object attributes on which to report. Click ![]() to display the Columns panel.
to display the Columns panel.
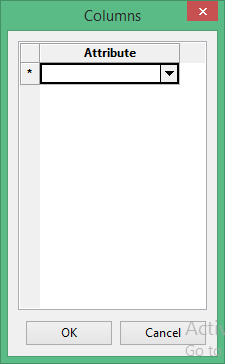
Select an attribute from the drop-down list. Once an attribute is chosen, a new row is added to the panel.
Click OK to return to the tab.
Report All
Select this check box to report on all available object attributes. If this check box is selected, the Columns section for the entire row is disabled (unavailable).
Sheet Name
Enter the name of the Excel worksheet that will be used to store the reported information.
Start at Row
Enter the row at which to write the information. To append information to an existing and currently open spreadsheet file, enter the row number of the next available row.
Use Headers
Select this check box to include a header, which will be used as a brief description on which attributes are being reported. The row specified through the Start at Row field will be used to store the header information.
Click the Report button to output the results to the Microsoft Excel application. You will need to save the spreadsheet file through Microsoft Excel in order to retain the information.

