Tritronics Export
Create a Tritronics Mapfile
Use the Tritronics Export option to export blast information to a nominated Tritronics mapfile (.map). The resulting file can be used with Tritronics equipped holes.
Instructions
Click the Tritronics Export button on the Drill and Blast toolbar.
or
On the Drill and Blast menu, point to Analysis and Reporting, and then click Tritronics Export.
Select the blast that you want to export. Once selected, the applicable blast information is retrieved and you will be prompted to select another blast. Cancel with the mouse when you have finished selecting blasts to display the Tritronics mapfile export panel.
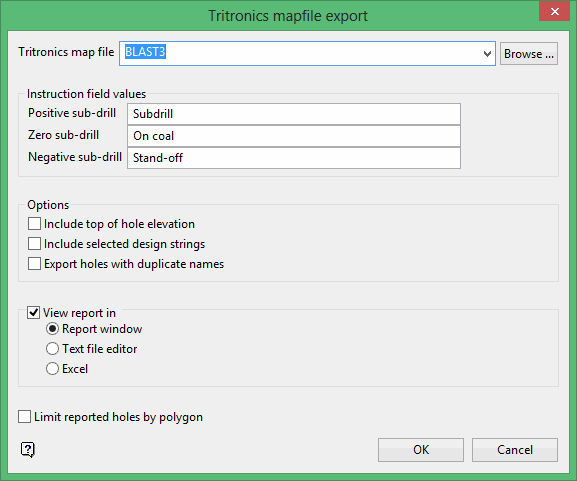
Tritronics map file
Specify the name of the file that will be used to store the exported blast information.
The drop-down list contains all .map files found in your current working directory. Click Browse to select a file from another location. To create a new file, enter the file name and file extension.
Instruction field values
Enter the instruction field values for the positive sub-drill, zero sub-rill and negative sub-drill. These text entries displays in the instruction field section of the resulting mapfile.
Options
Include top of hole elevation
Select this check box to include the collar elevation as column in the resulting mapfile. If this check box is not checked, then a standard map file will be produced, that is, the resulting file will contain the Easting and Northing values for the drill collar as well as the elevation for the bottom of the hole.
Include selected design strings
Select this check box to export string coordinates to the resulting mapfile. If this check box is checked, then you will be required to select the design strings from the screen once the Tritronics mapfile export panel has been completed.
Export holes with duplicate names
Select this check box to export holes from multiple blasts that happen to share the same name. If this check box is not checked, then holes with the same name will be flagged as an error and omitted from the resulting export file.
View report in
Select this check box to view the resulting report once it has been generated. The report can be sent to the Report Window, a text editor or Microsoft Excel.
Note: Notepad is the default text editor for Windows. Use the ENVIS_EDIT environment variable to reference a different text editor.
The resulting report will still be displayed through the Report Window even if you have chosen to view it through a text editor or Excel.
Limit reported holes by polygon
Select this check box to only report on the holes that are located inside or outside an indicated polygon. Once the Tritronics mapfile export panel has been completed you will have the choice of either digitising the polygon onscreen or using an existing polygon object. If you plan on using an existing polygon object, then the necessary object must be loaded or, if applicable, created prior to running the Tritronics Export option.
Click OK.
The mapfile is then generated and displayed through the chosen application, that is, the default text editor or Microsoft Excel, as well as the Report Window.
If you checked the Limit reported holes by polygon check box, then you will be required to indicate the limiting polygon before the report can actually be generated. The limiting polygon can either be digitised onscreen or you can use an existing polygon. Once the polygon has been digitised/chosen, you will need to specify whether to report on the holes located inside or outside of the nominated polygon.
If you checked the Include selected design strings check box, then the Multiple Selection box displays before the mapfile is generated.
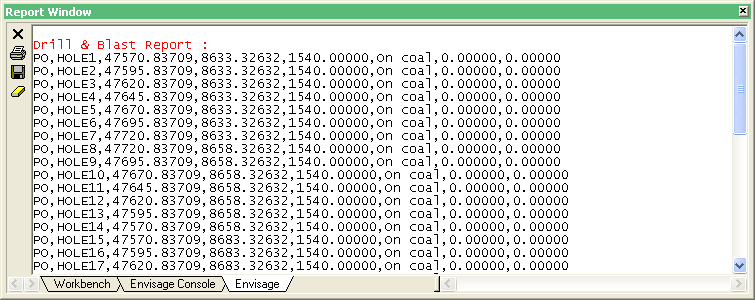
Figure 1: Report Window Output

