Delete Holes by Polygon
Delete Holes By Polygon
Use the Delete Holes by Polygon option to delete all holes that fall inside or outside a nominated polygon. You can either use an existing polygon, which needs to be loaded prior to selecting the Delete Holes by Polygon option, or you can interactively digitise one.
Use the Delete Holes option to individually delete the holes.
Instructions
Click the Delete Holes by Polygon  button on the Drill and Blast toolbar.
or
On the Drill and Blast menu, point to Edit, and then click Delete Holes by Polygon.
Specify whether you want to use an existing polygon or digitise the boundary polygon onscreen.
If you choose to use an existing polygon, then you will be required to select the loaded object. Once selected, you will need to confirm your selection.
If you choose to digitise the boundary polygon, then you will be required to digitise a polygon onscreen. Use the Backspace key to undo the last digitised point, and the C key to centre the screen on the last digitised point.

Figure 1: The Original Holes and the Boundary Polygon
The resulting polygon won't be saved in the current layer and will be removed from the screen once the desired holes have been deleted.
Specify whether to delete the holes located in or outside of the chosen polygon. Upon confirmation, the Select holes dialog box displays.
By Row
Select this option if you only want to delete the holes contained in a nominated row. Once this option has been selected, you will be required to select a hole from the screen.
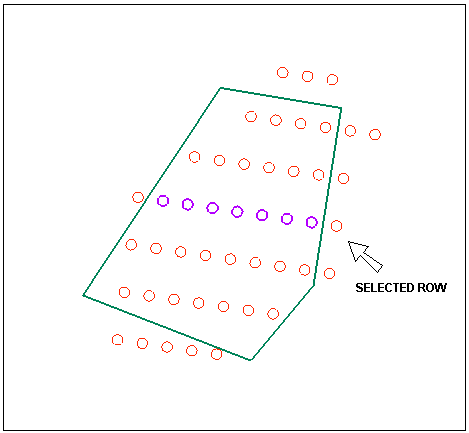
Figure 2: Deleting the Holes that Fall Within the Boundary Polygon
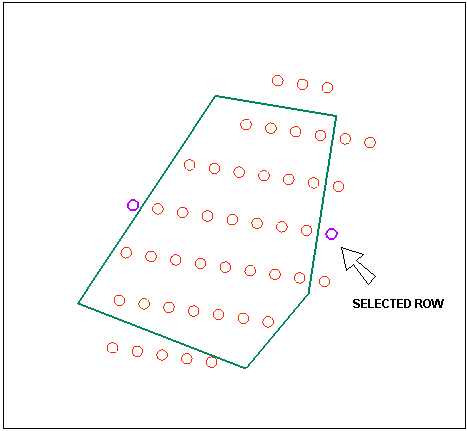
Figure 3: Deleting the Holes that Fall Outside of the Boundary Polygon
All holes
Select this option to delete all holes of the same blast name. Once this option has been selected, you will be required to select a hole from the screen.
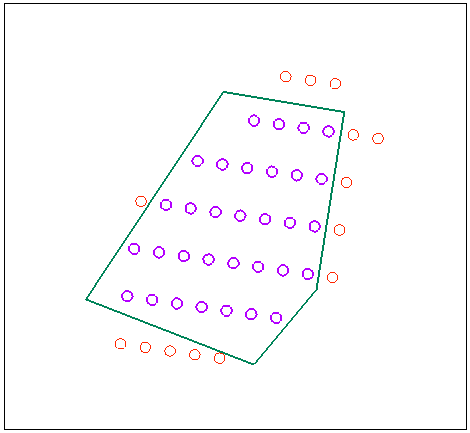
Figure 4: Deleting the Holes that Fall Within the Boundary Polygon
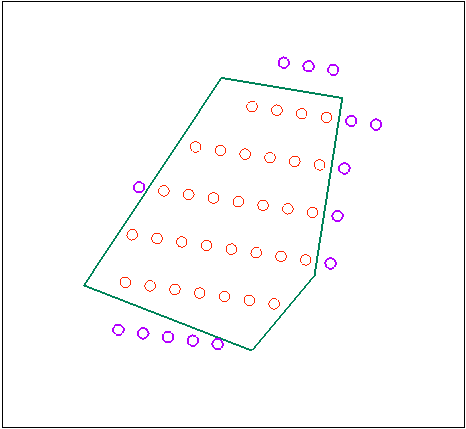
Figure 5: Deleting the Holes that Fall Outside of the Boundary Polygon
Once the desired holes have been selected, you will be prompted as to whether or not you want to update the hole names for the remaining holes. If you have chosen to use echelon naming, then the holes will be deleted and the remaining holes will retain their naming as per their original echelon.
In the following example, holes A2 and A3 have been deleted. Choosing to update the hole names would result in the names for the remaining holes being updated to reflect the change (as shown in Diagram 7). Choosing to maintain the hole names, however, would result in the remaining holes retaining their original hole names (as shown in Diagram 8).
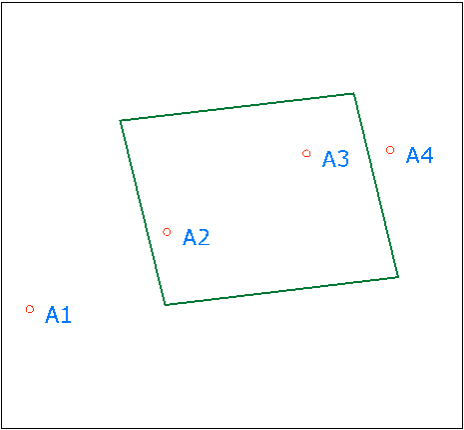
Figure 6: The Original Hole Layout
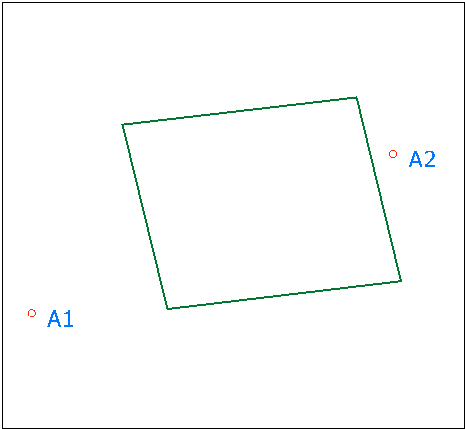
Figure 7: Updating Hole Names
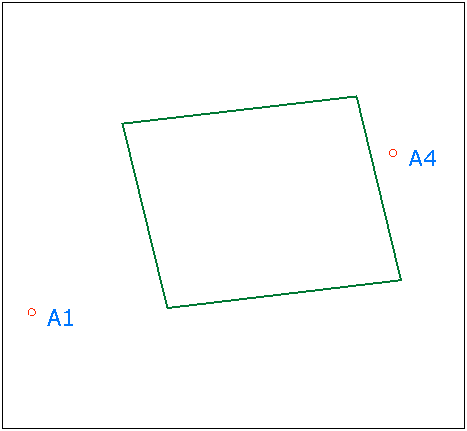
Figure 8: Retaining Hole Names
Use the Undo option (under the Design menu) or select the Undo button on the Standard toolbar to undo the changes. Select the Save button on the Standard toolbar to save your changes.

