Explosives Library
Use this option to enter explosives information into a library and to assign explosives attributes to individual holes. These attributes include the manufacturers of the explosive, the name of the explosive, costs, delays, etc. The explosives library definitions are stored in the Drill and Blast specification file (specifications.dab).
Instructions
Click the  Explosives Library button on the Drill and Blast - Files toolbar.
Or
On the Drill and Blast menu, point to File, then click Explosives Library.
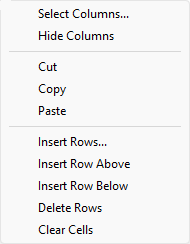
The panel utilises grid controls to manage the grid information, i.e. right-click context menus, that allow you to perform options such as hiding columns, cutting, copying, and pasting cells, and inserting and deleting rows. Right-click in the grid area to display the context menu. Descriptions of the available options are listed below.
-
Use the Select Columns option to choose which grid columns to display in the panel, and optionally save the selection to a template for future use. Alternatively, select cells and click Hide Columns to hide the respective columns directly.
-
Select cells and use the Cut, Copy, and Paste options to duplicate or move cell entries.
-
Select a cell in a row of interest and use the various insert and delete row options to manage the records in the grid.
-
Click Clear Cells to clear the contents of a selection.
Lead Ins
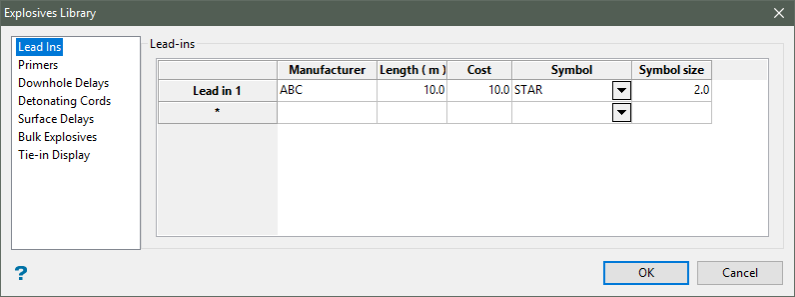
Lead in lines refer to the detonators that are used to signal transmission devices in order to initiate an explosive event. Use the Lead Ins section of the Explosives Library interface to define manufacturer name, lead in line length, cost, and the symbol and symbol size.
Follow these steps:
-
Enter the Manufacturer of the explosives to be used.
-
Enter the Length of the lead in line (in metres).
-
Enter the Cost per lead in line.
-
Specify the Symbol that will be used when displaying the lead in line on screen. The drop-down list contains all of the symbols found in your symbols database (
symbols.dgd.isis). -
Enter the Symbol size.
Primers
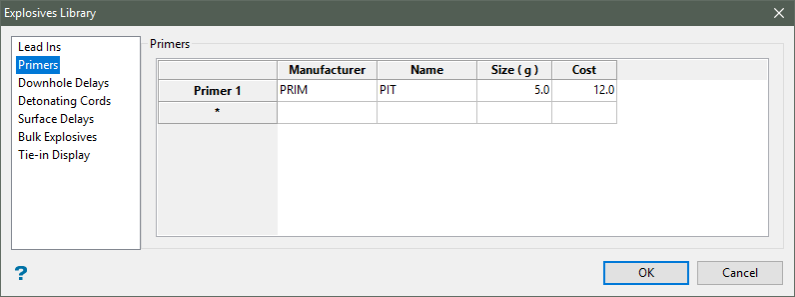
Use the Primers section to define primer information including the manufacturer name and the primer name, size, and cost.
Follow these steps:
-
Enter the Manufacturer of the primer.
-
Enter the Name of primer to be used.
-
Enter the Size of the primer (in grams).
-
Enter the Cost of the primer.
Downhole Delays
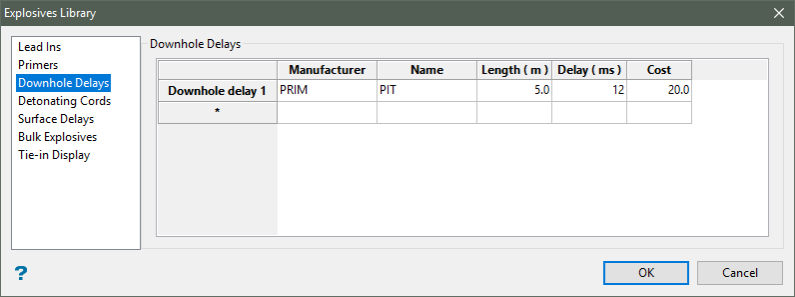
Use the Downhole Delays section to define the downhole delays information including the manufacturer name and the downhole delay name, length, delay time, and cost.
Follow these steps:
-
Enter the Manufacturer of the downhole delay.
-
Enter the Name of the downhole delay to be used.
-
Enter the Length of the downhole delay (in metres).
-
Enter the Delay time (in milliseconds).
-
Enter the Cost per delay.
Detonating Cords
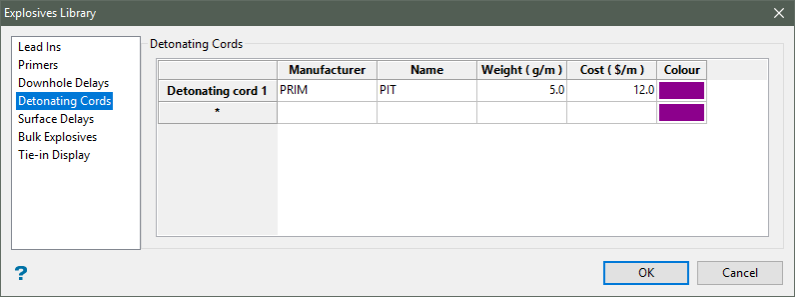
Use the Detonating Cords section to define the detonating cords information including the manufacturer name and the detonating cord name, weight, cost, and colour.
Follow these steps:
-
Enter the Manufacturer of the detonating cord.
-
Enter the Name of the detonating cord to be used.
-
Enter the Weight of the detonating cord (grams per metre).
-
Enter the Cost per detonating cord (dollars per metre).
-
Specify the Colour that will be used when displaying the detonator cord on screen. Nominate a colour from the current colour table.
Surface Delays
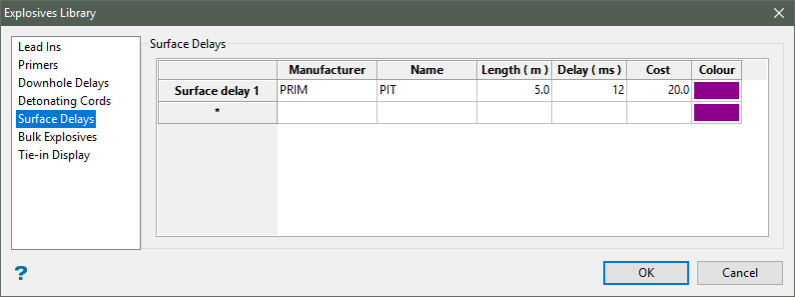
Use the Surface Delays section to define the surface delays information including the manufacturer name and the surface delay name, length, delay time, cost, and colour.
Follow these steps:
-
Enter the Manufacturer of the surface delay.
-
Enter the Name of the surface delay to be used.
-
Enter the Length of the surface delay (in metres).
-
Enter the Delay time (in milliseconds).
-
Enter the Cost per surface delay.
-
Specify the Colour that will be used when displaying the surface delay on screen. Nominate a colour from the current colour table.
Bulk Explosives
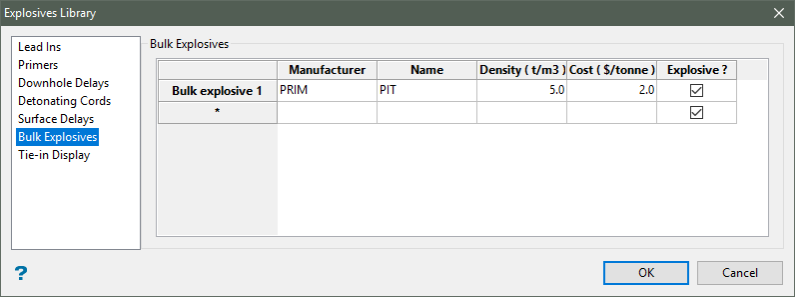
Use the Bulk Explosives section to define bulk explosives information including the manufacturer name and the bulk explosive name, density, cost, and whether to include the bulk explosive in explosive and powder factor calculations.
Follow these steps:
-
Enter the Manufacturer of the bulk explosive.
-
Enter the Name of the bulk explosive to be used.
-
Enter the Density of the bulk explosive (tonnes per metres cubed).
-
Enter the Cost of the bulk explosive (dollars per tonne).
-
Select the Explosive ? checkbox to identify the item as an explosive material and include it in the explosive and powder factor calculations. If this checkbox is not checked, then the item will be treated as stemming material rather than included in the explosive and powder factor calculations.
Tie-in Display
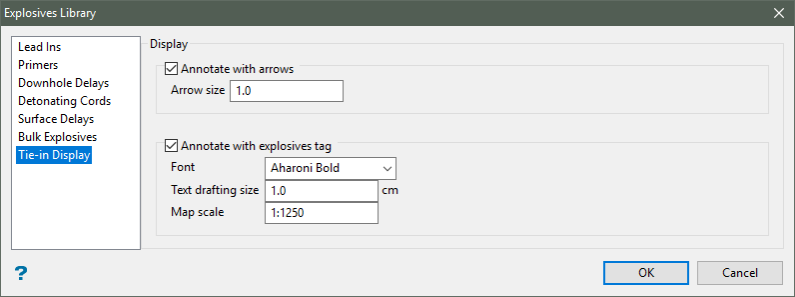
Use the Tie-in Display section to define how the blast tie-in will be displayed.
Follow these steps:
-
Select the Annotate with arrows checkbox to display directional arrows along the lines that represent the blast tie-in. If this checkbox is selected, then you will need to specify the Arrow size of the displayed arrows.
Note: The tie-in arrows will be drawn as non-filled arrows.
-
Select the Annotate with explosives tag checkbox to annotate each line with the explosive type being used. If this checkbox is selected, then you will need to specify the font, text drafting size, and map scale.
-
Font: Select the desired font from the drop-down list.
-
Text drafting size: Enter the size, in plotter units, of the text. This will be the size of the text on the print out. If the font is a transformable font, that is, a scaled font, then the size will be in relation to the map scale. Annotations lie in a straight line, that is, the text does not curve.
Note: The font used for the annotations is specified in Settings > Preferences > Defaults : 2D Text.
-
Map scale: Enter the map scale for the annotations.
If the text size is set to 0.30 and the map scale to 1:100, then the text will appear on the screen the same size as an object that is 30 units tall. Changing the scale, in either this option or the File > Plot > Plot All option, to 1:1,000 results in the text size appearing as 300 units. Changing the scale to 10,000 results in a text size of 3,000 units, and so forth.
-
Select OK to save your changes to the Explosives Library panel.

