Drafting Sheet Editor
Instructions
On the File menu, point to Drafting Sheets, then click Drafting Sheet Editor to display the following interface.

Drafting sheet units
Select whether to design in inches or centimetres.
Load sheet
Select from a list of sheet formats that have already been created.
New sheet
Enter the name of a new sheet format to create a new format.
Click OK
View pane
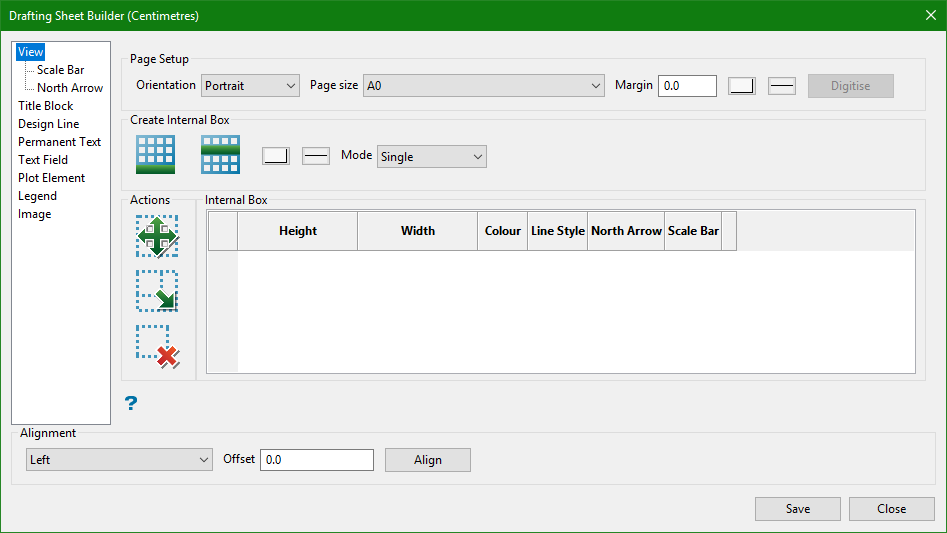
The title bar indicates the units selected. In this example, centimetres was selected.

Common controls available on all panes: Alignment, Save, and Close
Alignment
- Select the direction of alignment from the drop-down list.
- Enter the amount of offset.
- Click the Align button to initiate the alignment.
- In the design screen, select a reference object from which the offset will be based. In this example, the vertical line on the left was selected.
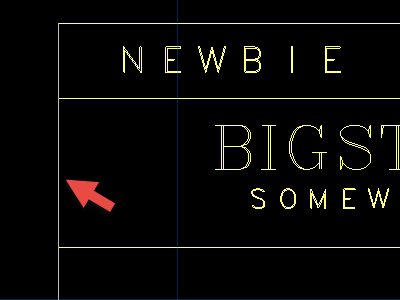
- Next, select the object that needs to be aligned. In this example, the text was selected.

Save
Click Save at any time to save changes to the settings.
Close
Click Close to exit the Drafting Sheet Editor.
Page Setup
Orientation
Select between Portrait or Landscape.
The Drafting Sheet Editor will determine whether a sheet is portrait or landscape, so there is no need to design a separate sheet for each orientation. For example, if you designed a sheet that was 20cm wide by 40cm high and wanted to display those dimensions in landscape mode, you would not need to design a separate sheet that was 40cm wide by 20cm high and label it as a landscape design. The Drafting Sheet Editor would automatically determine which side was longest and make that horizontal, and make the shorter side vertical.
Page size
The initial page sizes are determined by the units that were chosen, either inches or centimetres. The list will also show any custom sized sheets that have been created.
Margin
Enter the amount of margin you want to have around the outside of the sheet.
Colour and Line style
Define the colour and line style of the margin.
Create Internal Box

|
Append. Click this icon to create an internal box within the design sheet. The new object will be shown in the Internal Box table. Each new object will appear at the bottom of the list. |

|
Insert Above. To insert an object into the table list above an object already listed, highlight the table row, then click this icon. |
Mode
Single
Allows you to design a single box.
Multiple
Allows you to design multiple boxes.
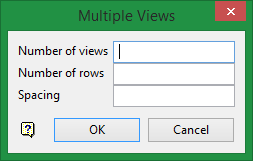
Number of views
This is the number of boxes that will be drawn.
Number of rows
This is the number of rows that will be drawn.
Spacing
This is the spacing between each row.
Actions

|
Move. Select an row from the table first, then click on the Move icon to move a box on a sheet. |

|
Resize. Select an row from the table first, then click on the Resize icon to change the size of a box on a sheet. |

|
Delete. Select an row from the table first, then click on the Delete icon to delete a box on a sheet. |
Internal Box
Parameters of the boxes in the design sheet. You can adjust the height, width, colour, and line style. You can also chose whether to display the North Arrow and Scale Bar for each box.
Scale Bar
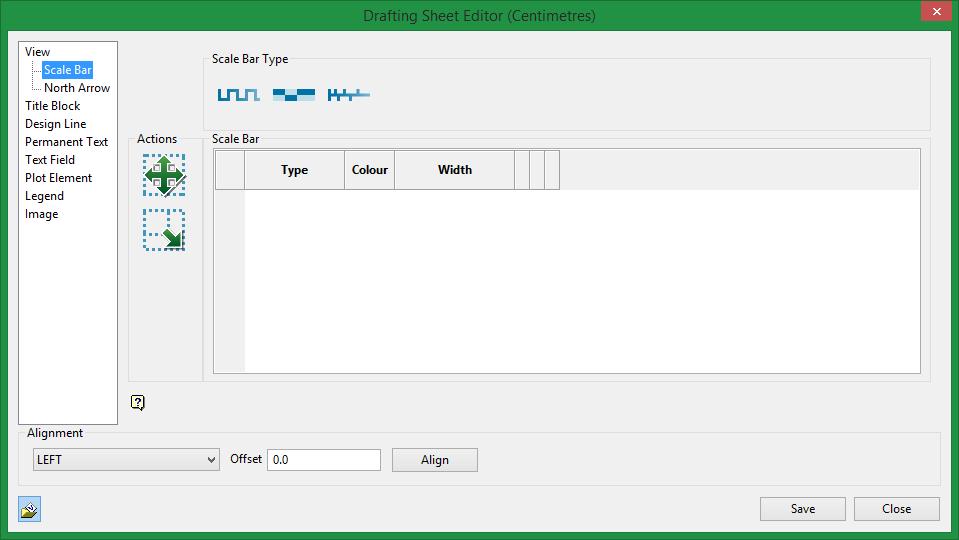
Scale Bar Type
This shows the three types of scale bars available.
Actions
|
|
Move. Select an row from the table first, then click on the Move icon to move a Scale Bar on a sheet. |
|
|
Resize. Select an row from the table first, then click on the Resize icon to change the size of a Scale Bar on a sheet. |
Scale Bar table
You can select different colours for each scale bar, and adjust the width.
North Arrow
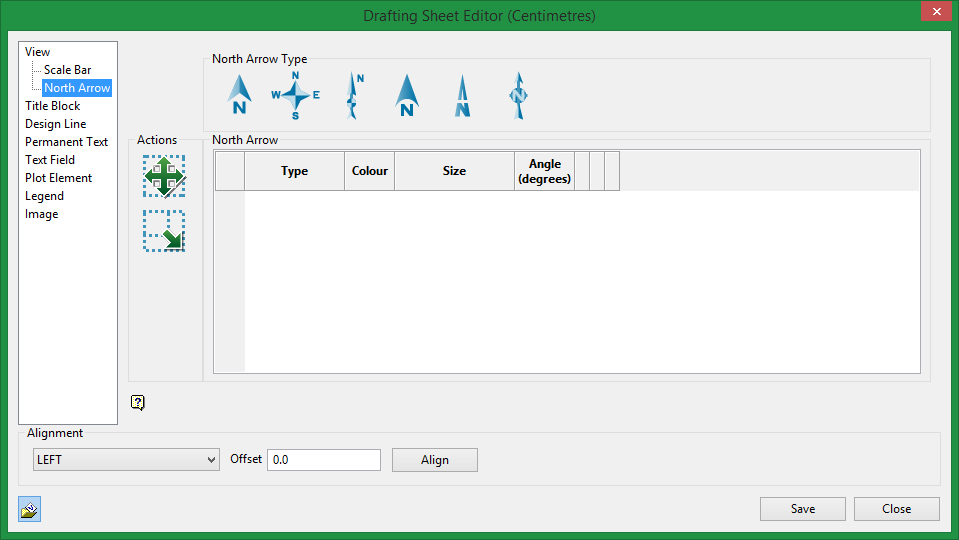
North Arrow Type
This shows the six types of North arrows available.
Actions
|
|
Move. Select an row from the table first, then click on the Move icon to move a North arrow on a sheet. |
|
|
Resize. Select an row from the table first, then click on the Resize icon to change the size of a North arrow on a sheet. |
Scale Bar table
You can select different colours for each North arrow, adjust the width, and adjust the angle at which it will be plotted.
Title Block
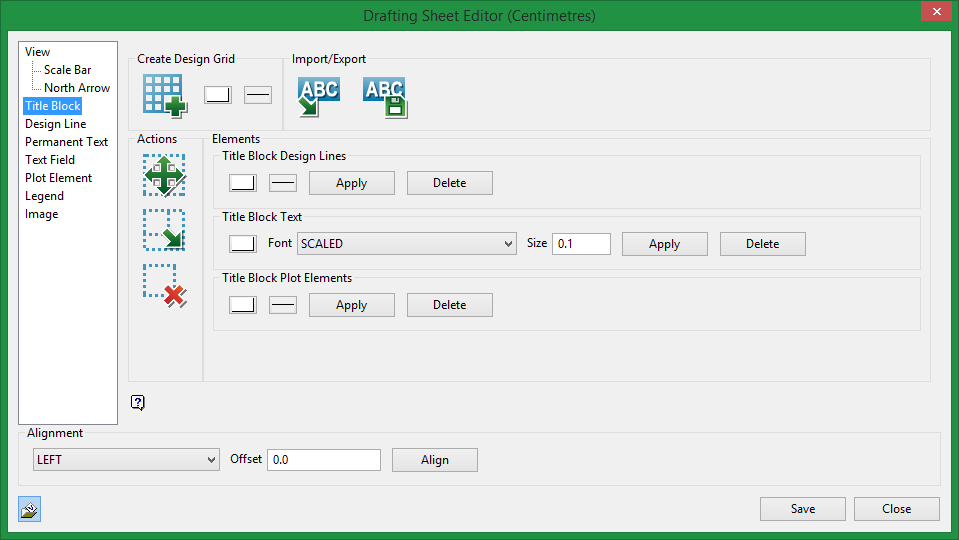
Create Design Grid

|
Create Design Grid. Click this icon, then click in the design sheet to indicate the lower left corner of the title block outline. |
Once the outline has been defined, the following pane displays:

Enter the number of rows and columns of text you want to have.
Equal sizes
By default, the rows and columns are created equal in size. However, if you want to adjust the proportional size of a cell, then deselect Equal sizes and make adjustments to the appropriate cell. All adjustments can be seen in real-time on the screen.
Click OK when you are finished.
Import / Export

|
Import a saved title block to the current design sheet. |

|
Save the current title block. |
Actions
|
|
Click on the Move icon to move a box on a sheet. |
|
|
Click on the Resize icon to change the size of a box on a sheet. |
|
|
Click on the Delete icon to delete a box on a sheet. |
Elements
Title Block Design Lines
Allows you to make adjustments to all design lines at the same time.
Title Block Text
Allows you to make adjustments to all title block text at the same time.
Title Block Plot Elements
Allows you to make adjustments to all title block plot elements at the same time.
Design Line

Create Design Line

|
Create a design line. |
Actions
|
|
Click on the Move icon to move a box on a sheet. |
|
|
Click on the Resize icon to change the size of a box on a sheet. |
|
|
Click on the Delete icon to delete a box on a sheet. |

|
Click on Select Line to graphically select a line or set of lines instead of selecting from the table. |
Design Line table
When you digitise a line it will automatically show up in the table. To make it straight up and down, make sure the X Dimension is set to 0.0.
You can adjust the colour and line style.
Include with Title Block
Select this option if you want to link the selected object to the title block and save it as part of a group. All items can be linked to a title block and reused as templates once they have been saved.
Permanent Text
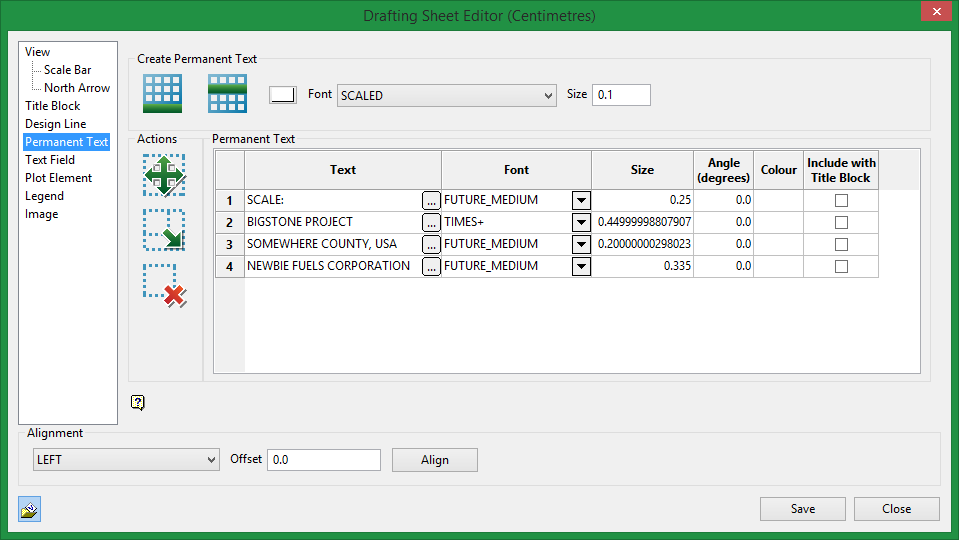
Create Permanent Text
|
|
Append. Click this icon to create a permanent text placeholder within the design sheet. The new object will be shown in the Internal Box table. Each new object will appear at the bottom of the list. |
|
|
Insert Above. To insert an object into the table list above an object already listed, highlight the table row, then click this icon. |
Font
Select the desired font.
Size
Select the font size.
Actions
|
|
Click on the Move icon to move a text placeholder on a sheet. |
|
|
Click on the Resize icon to change the size of a text placeholder on a sheet. |
|
|
Click on the Delete icon to delete a text placeholder on a sheet. |
Text Field table
Prompt
Type the actual permanent text that will appear on the sheet.
Font
Select the font type.
Size
Select the font size.
Angle
Make any adjustments in angle.
Colour
Select the font colour.
Include with Title Block
Select this option if you want the permanent text to be included as part of the title block template that can be saved and imported into other drafting sheets.
Text Field
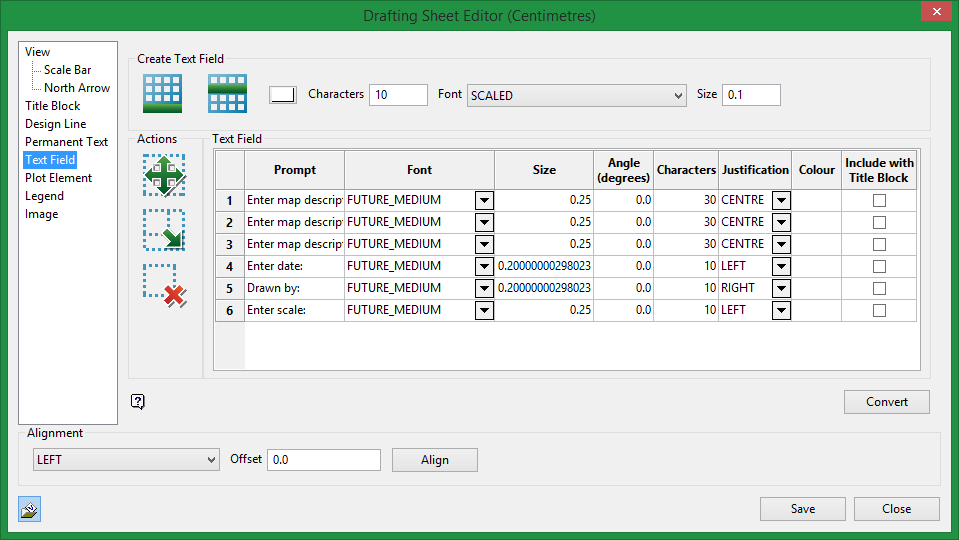
Create Text Field
|
|
Append. Click this icon to create a text placeholder within the design sheet. The new object will be shown in the Internal Box table. Each new object will appear at the bottom of the list. |
|
|
Insert Above. To insert an object into the table list above an object already listed, highlight the table row, then click this icon. |
Characters
Enter the number of characters the text field will hold. The default is 10 characters, and the maximum is 132.
Font
Select the desired font.
Size
Select the font size.
Actions
|
|
Click on the Move icon to move a text placeholder on a sheet. |
|
|
Click on the Resize icon to change the size of a text placeholder on a sheet. |
|
|
Click on the Delete icon to delete a text placeholder on a sheet. |
Text Field table
Prompt
Type the actual text that will appear on the sheet.
Font
Select the font type.
Size
Select the font size.
Angle
Make any adjustments in angle.
Characters
This is the number of characters for the text field.
Justification
Select between left, right, or centre justification.
Colour
Select the font colour.
Include with Title Block
Select this option if you want the permanent text to be included as part of the title block template that can be saved and imported into other drafting sheets.
Post Element
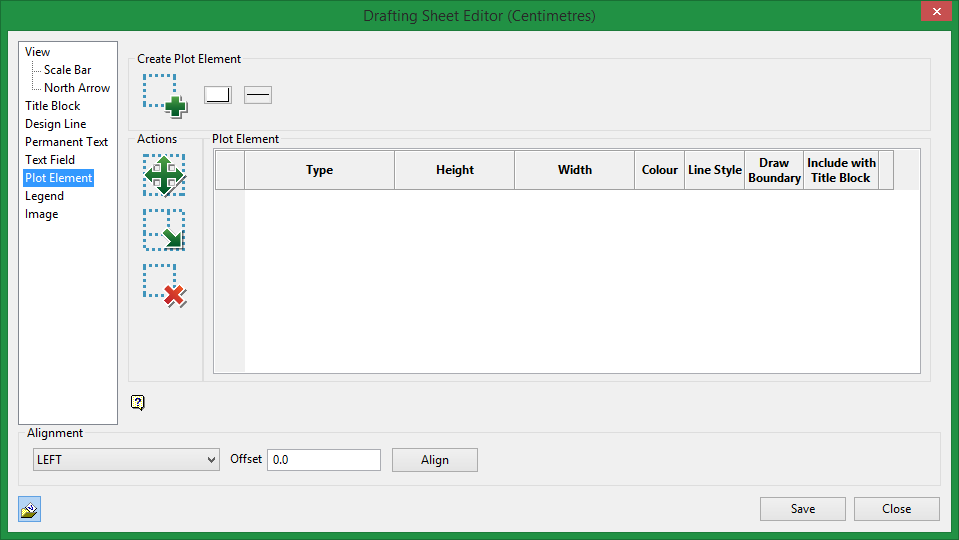
Create Plot Element

|
Create Plotting Element. Click this icon to create a clipping element in the design sheet. |
You can adjust the colour and line style of each item created.
Actions
|
|
Click on the Move icon to move a text placeholder on a sheet. |
|
|
Click on the Resize icon to change the size of a text placeholder on a sheet. |
|
|
Click on the Delete icon to delete a text placeholder on a sheet. |
Plot Element table
Type
There are six types of elements to select from:
-
Rectangle
-
Clipping (Default setting)
-
Plotting Notes
-
Dynamic Title Block
-
Explosives Report
-
Drilling Report
Height / Width
Make adjustments to height and width.
Colour / Line style
Make adjustments to colour and line style.
Draw Boundary
This option is available only if the type selected is a clipping box. Select this option if you want to see the boundary to be plotted.
Include with Title Block
Select this option if you want the permanent text to be included as part of the title block template that can be saved and imported into other drafting sheets.
Legend
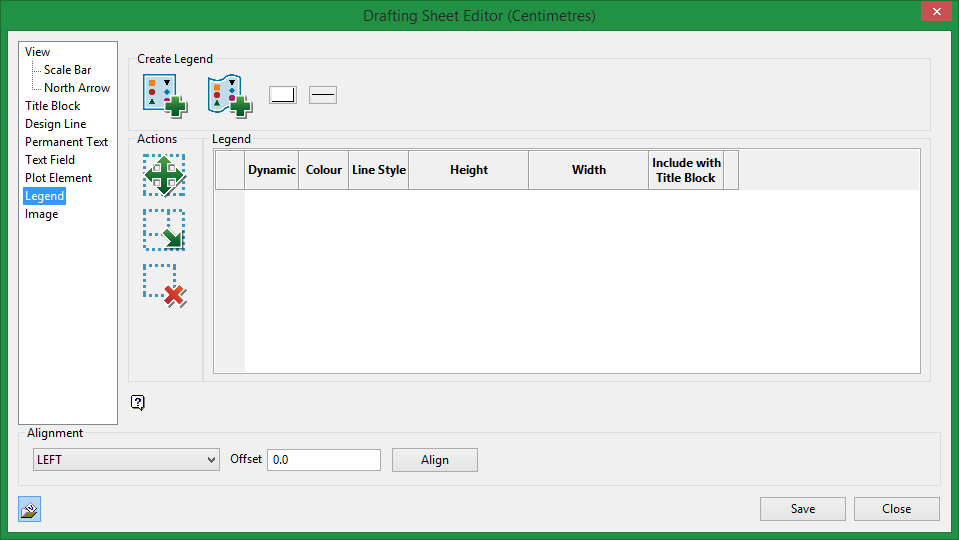
Create Legend

|
Create Static Legend. |

|
Create Dynamic Legend. |
Static Legend
When digitising the static legend you will only have control over the height, so you will only see a vertical line when you draw in the drafting sheet.
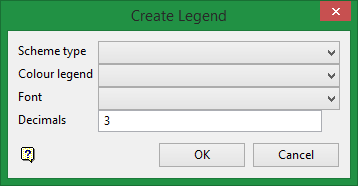
Select the Scheme type, Colour legend, Font, and number of Decimals for the legend.
Legend table
In the Legend table, you will only have control over the height of the legend and the choice to include it with the Title Block or not.
Dynamic Legend
When digitising the dynamic legend you will have control over the height and width, so you will see a rectangle instead of a vertical line when you draw in the drafting sheet.
You will also have full control to edit the entries of the Legend table.
Actions
|
|
Click on the Move icon to move the legend on a sheet. |
|
|
Click on the Resize icon to change the size of the legend on a sheet. |
|
|
Click on the Delete icon to delete a legend on a sheet. |
Image
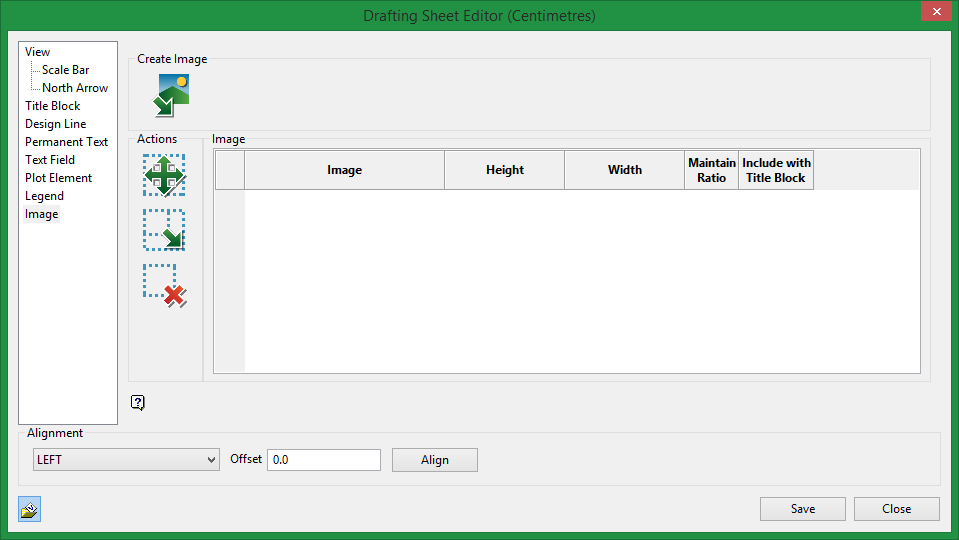
Create Plot Element

|
Import an image. |
Actions
|
|
Click on the Move icon to move an image on a sheet. |
|
|
Click on the Resize icon to change the size of an image on a sheet. |
|
|
Click on the Delete icon to delete an image on a sheet. |
Image table
Image
This will list the current image selected. The drop-down list will display all available images found in the current working folder that can be used.
Height / Width
Make adjustments to height and width.
Maintain Ratio
Select this option to lock the ratio between height and width.
Note: When this option is selected, the ability to adjust Height and Width are disabled.
Include with Title Block
Select this option if you want the permanent text to be included as part of the title block template that can be saved and imported into other drafting sheets.

