Import Optech Triangulations
Instructions
On the File menu, click Export to display the Export panel.
Click Optech in the File Format column on the left.
Select Triangulations from the File Type field on the right side of the panel.
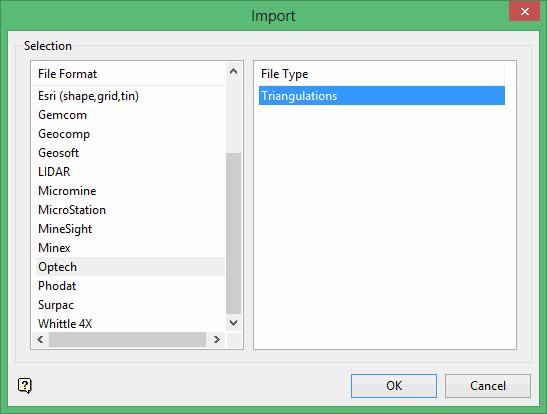
Click OK to display the Import Optech Triangulation panel.
This option supports two types of Optech files: the .asc file and the .xyz file. The .asc file is an ASCII file containing the polar coordinate style of output, that is rotation angle 1, rotation angle 2, distance to each reading, and instrument setup information. The .xyz file consists of points in XYZ space, representing the path taken by the instrument across the cavity surface. These points form polygons if connected into strings.
The Import Optech Triangulation interface consists of two tabs:
Selection tab
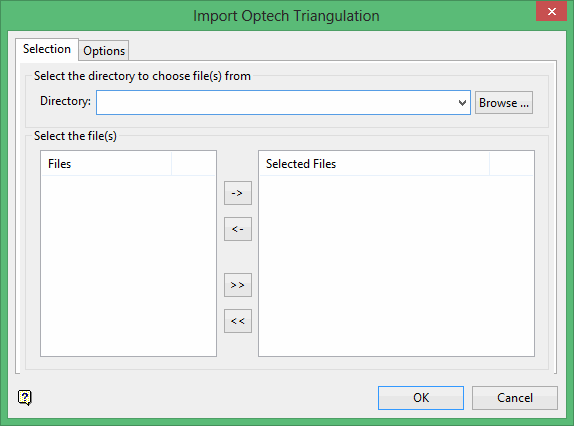
Select the Optech file that you want to convert into a Vulcan triangulation. The drop-down list contains all .asc and .xyz files found in the current working directory. Click Browse to select a file from another location.
Select the files you want to import.
- Click the > button to move the highlighted file(s) to the selection list on the right.
- Click the >> button to move all files to the selection list.
- To highlight multiple files that are adjacent in the list, hold down the Shift key while you click on the first and last file names in the list.
- To highlight multiple non-adjacent files, hold down the Ct rl key while you click on the file names.
- To remove files from the selection list, highlight the file name(s) and click the < button or click the << button to remove all files from the selection list.
Options tab

The resulting triangulations are stored in the default triangulation folder set in preferences, unless you have defined an alternate path.
Save points to layer
Select this check box to save the points from the file into a new or existing layer. If you select this option, you must specify a layer name by selecting the name of the layer from the Layer drip-down list or entering a new layer name. You can also add a description of the layer, if desired.
Connect points
Check this box to connect the points in the specified layer to create a closed polygon. This option uses the same functionality as Design : Object Edit : Connection.
Use file name as layer name
Select this option if you want the layer to inherit the file name. For example, if your file is named 'surface.3d', the resulting file will be named 'surface.00t'.
Load objects into a single layer
Select this option is you want all objects to load to a single layer. If you choose this option, select the layer from the drop-down.
Triangulation options
Use the options in this section to view the triangulations and/or the triangulation properties after they are loaded.
Click OK.
Once the data is imported, the Load Triangulation panel displays. Use this panel to specify display parameters, such as colour and shading, for the triangulation.

