Installing Vulcan
Prior to installing Vulcan
- You must have administrative privileges
- Ensure that the Windows Installer service is enabled
- System requirements
If you need to install a network licence, which involves setting up a FlexNet server, you would have been notified by Maptek when you were sent your licence file. Use the Install Network Licence option available from the Install Vulcan Autorun panel to set up the FlexNet server. Refer to Installing a Network Licence for more information.
tcsh Configuration
The file system is not configured to generate 8dot3 names which Vulcan tcsh requires.
-
Running the command (as Admin) ' fsutil 8dot3name query C: ' can tell us the state on volume C: if that's where Vulcan is installed. It is likely to be 1 if this problem is encountered
-
Running the command (as Admin) ' fsutil 8dot3name set C: 0 ' sets it correctly on volume C:
-
Running the command (as Admin) ' fsutil 8dot3name set 0 ' sets it correctly on all volumes
Set Environment Variables
If this is the first installation of Vulcan, prior to the installation, set the following environment variables and allocate the correct amount of swap space/virtual memory. Refer to the Environment Variables section for information on how to add or edit environment variables.
If you have an existing version of Vulcan, you may need to copy the etc/resources directory from the existing Vulcan version prior to installing Vulcan. Refer to the information on the ENVIS_RESO environment variable.
Set the following environment variables. When you are finished, you can begin the Vulcan installation.
TEMP and TMP
These environment variables/directories are used by Vulcan to create the temporary files needed during the program's execution, and should be set as system variables.
-
There should always be at least 200Mb (although we recommend 400Mb) of free space on the disk that contains the
tempdirectory. -
The value of these two variables should be the same, and it should be the full path to the directory.
-
We recommend using
C:\Temp. This directory must already exist and the directory path should not contain any spaces.
ENVIS_RESO
During installation you have the option to accept default locations (for example $Vulcan), or specify locations for standardised Vulcan system files and templates. Therefore, the ENVIS_RESO variable does not need to be set. Vulcan will run properly using the defaults that are automatically set during installation. However if required by site management, these environment variables can be set to point to specific areas on your hard drive or on a shared network drive where resource files (fonts, lines, symbols, plotting templates, etc.) can be located. This customised option is especially helpful to centrally locate files so that multiple users are able to easily access them.
These resource files are not your working files, nor are they resident in your working directory.
There are two main areas for the resource files: the System Data and the Client. Additionally, we recommend you create an area external to the Vulcan files where you can keep a copy of the external resource files for backup purposes, and if desired, a site-wide directory for those systems using a network.
System Data Files
This area houses the following system data items: symbols library (symbols.dgd.isis); line styles library (lines.dgd.isis); and drafting sheet library (drafting.dgd.isis). This location may be set to a specific location of your choosing. If not customised, the system will give the directory the location $VULCAN/etc/resources/ by default.
Client Area
The client area initially contains straight copies of default files, such as perif.setup, patterns, and plot.setup. These copies may be changed from the original however necessary to suit your organisation's requirements. As with the system data files, the client area can be set to a specific location of your choosing. If not customised, the initial default file copies will be put into $VULCAN/etc/resources/client.
External Resource Backup
Resource files can be lost when updating your version of Vulcan. Therefore, we recommend that you create a directory external to the Vulcan files where you can save a copy of your resource files as a backup.
Site Wide Directory
If possible, we recommend a site-wide directory be created, as this requires that the directory can be seen from all machines that will be running Vulcan.
Setting the ENVIS_RESO
- If you are installing Vulcan for the first time, once the installation has finished copy the
Vulcan_<version>/etc/resourcesdirectory to the location where the resource files will be stored.
OR
If you have an existing version of Vulcan and have not already set up anENVIS_RESOarea, copy theetc/resourcesdirectory from the existing Vulcan directory (for exampleVulcan_<version>/etc/resources) to the location where the resource files will be stored.
-
If you are using the newly created
resourcesfolder as yourENVIS_RESOarea, you must have write permissions to the folder and its sub-folders. -
Set the value of the environment variable
ENVIS_RESOto be the full path to the newly createdresourcesfolder.
Swap Space/Virtual Memory
750Mb or more of virtual memory is recommended, with a minimum of 500Mb necessary for Vulcan to run properly.
To change the size of the virtual memory, you must be logged in as an Administrator or have administrative privileges.
-
Select Settings > Control Panel from the charms bar.
-
Click on System and Security from the Control panel.
-
Click on System from the System and Security panel.
-
Click on Advanced system settings from the tree menu on the left.
-
Select the Advanced tab, then click the Settings button in the Performance section. Once selected, the Performance Options panel displays.
-
Select the Advanced tab, then click the Change button in the Virtual memory section.
-
Select the Custom size option. (If necessary, clear the Automatically manage paging file size for all drives check box.)
-
Edit the size of the virtual memory available to the computer in the Initial size (MB) and Maximum size (MB) fields.
-
Select the OK button to save the changes.
-
Click the Apply button on the Performance Options page to apply the changes.
Graphics Card Configuration
Always download the latest driver for your graphics card. Visit the computer or video card manufacturer's website or contact your IT department for the latest drivers.
NVIDIA Graphics Cards
Maptek Vulcan is sensitive to some driver settings. The following instructions are primarily for the Quadro models. For optimal performance, please complete the setup described in this section if you are using one of these cards.
If a panel or option is not available for your graphics card, disregard these instructions.
-
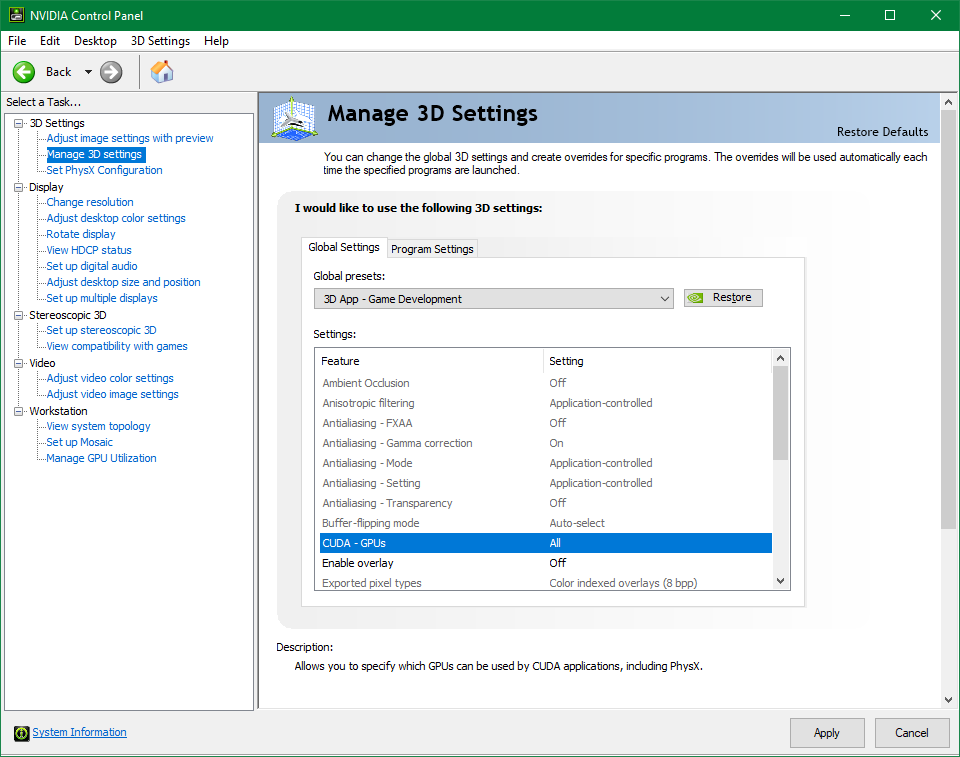
- Right-click on your desktop and select NVIDIA Control Panel. Click Manage 3D Settings.
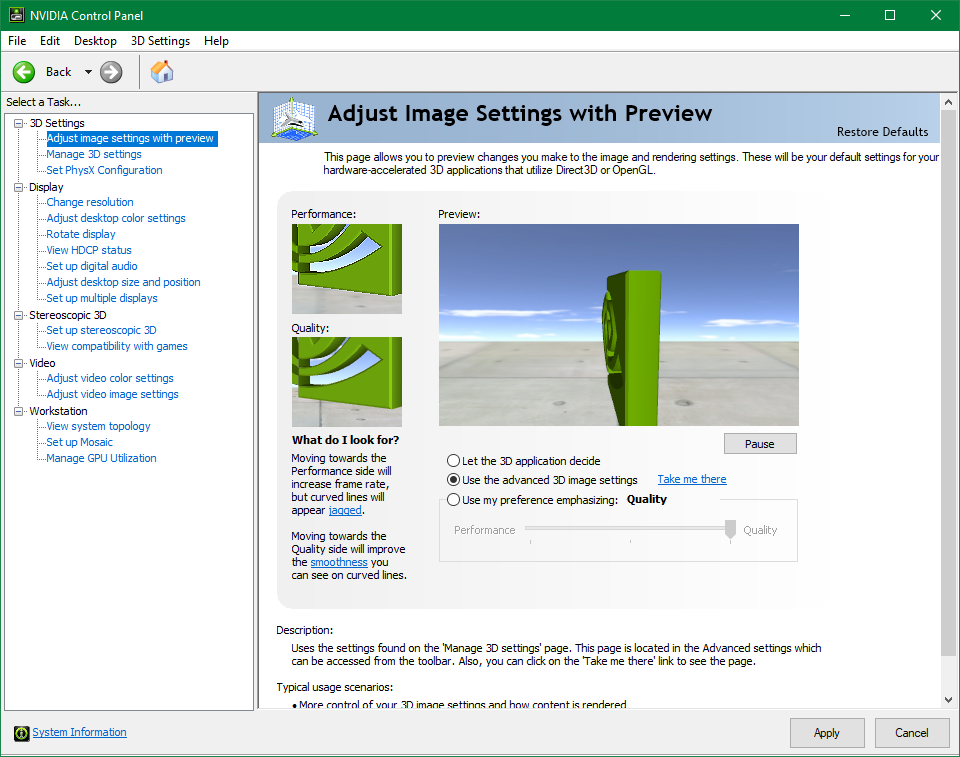
- On the Global Settings tab, select the 3D App - Game Development.
- For Geforce graphic cards: On the Global Settings tab, select High-performance NVIDIA processor.
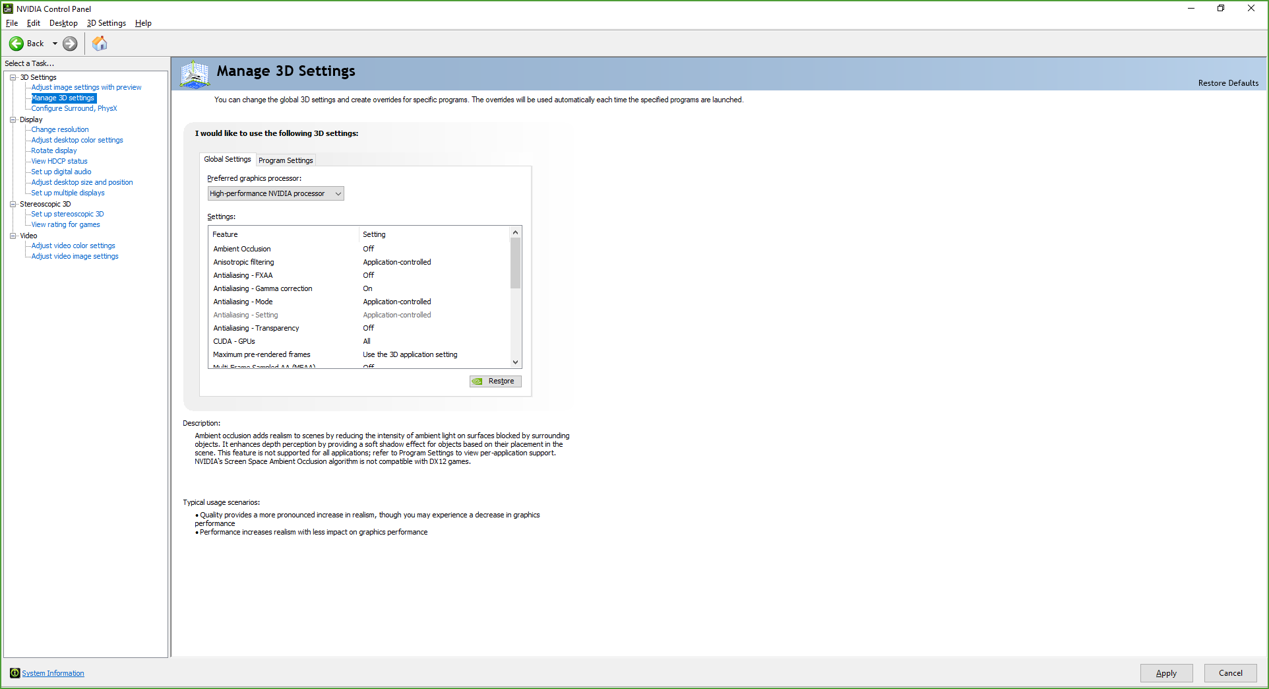
- Right-click on your desktop and select NVIDIA Control Panel. Click Manage 3D Settings.
Install Vulcan
Prior to installing Vulcan:
-
If you have an existing version of Vulcan, do not install a newer version of Vulcan into the same directory. Instead, specify a different directory when prompted for the location.
- Do not rename any existing Vulcan directories.
- If you need to install a network licence (set up a FlexNet server), use the Install Network licence option from the autoplay Install Vulcan panel. Refer to the Installing a Network Licence section for more information.
-
Administrator rights are required for Vulcan installation. See your IT staff if you do not have administrator rights on your computer.
-
Close any programs that are running, including any startup programs.
Installation instructions
- Open the installer that comes with your licence purchase. For first-time installations, it's best recommended to use the
.exeinstaller. - A dialog appears asking permission to allow the program to make changes to the computer. Click Yes to continue.
-
Read the licence agreement. If you agree to the terms of the licence agreement, check I accept the terms of the licence agreeement.
-
The Options button allows you to change the installation folder. However, this is optional. If you need to install Vulcan in a different folder, browse a location and click OK.
- Click Install to begin the installation. The installer automatically checks for all the updates and installs the bundled versions of Vulcan, Workbench, Maptek Shared Plugins (MSP), Maptek Account Broker (MAB), and all prerequisites.
-
Once the installation is finished, you might be prompted to restart the computer. A system restart can be helpful but not necessarily required if you already have Vulcan installed on your system.
Refer to Starting Vulcan for information on how to begin using Vulcan.
If you are borrowing a licence and need to set up a FlexNet server, use the instructions in the Installing a FlexNet Network Licence document before trying to run Vulcan.

