Update with Points
The Update with Points option allows you to adjust the vertex of triangulations using digitised or existing points. Existing points may be imported from a layer or database.
Instructions
On the Model menu, point to Triangle Edit, and then click Update with Points.
Update with Points
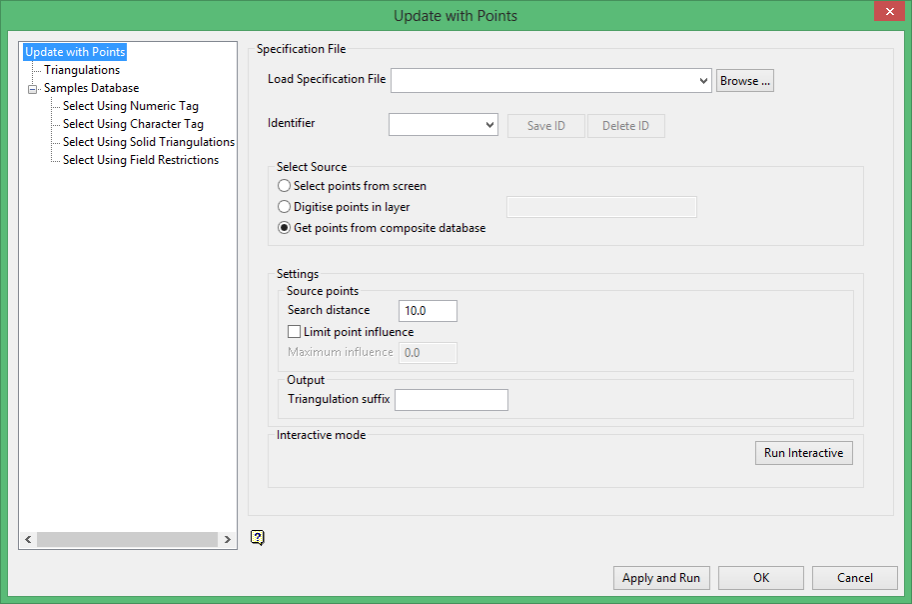
Specification File
Load Specification File
Select a specification file from the drop-down list or enter the name of a new one.
Identifier
Select an identifier from the drop-down list or enter the name of a new one. If you enter a new identifier, click the SaveID button. You can have many identifiers in a single specification file.
Select Source
Select from three locations where the points will be coming from.
-
Select points from screen. These are points that already exist in a layer.
-
Digitise points in layer. These are points that you will create and will be saved into a layer that you name.
-
Get points from composite database.
Settings
Search distance
This determines the points to be taken into account based on the distance between the vertices of the triangulations and digitised points.
Limit point influence
This indicates the maximum distance that a vertex in the triangulation will move.
Output
Triangulation suffix
Enter a prefix with which the resulting triangulations will named. For example, if you choose to edit a triangulation called ' p6.00t' and choose a prefix of ' extended', the updated triangulation will be named ' p6extended.00t'.
Run Interactive
By clicking the button, the you will be guided through the necessary sections of the specification panels as you work your way through them on the screen. The screens that are presented to the user depend on the choices made.
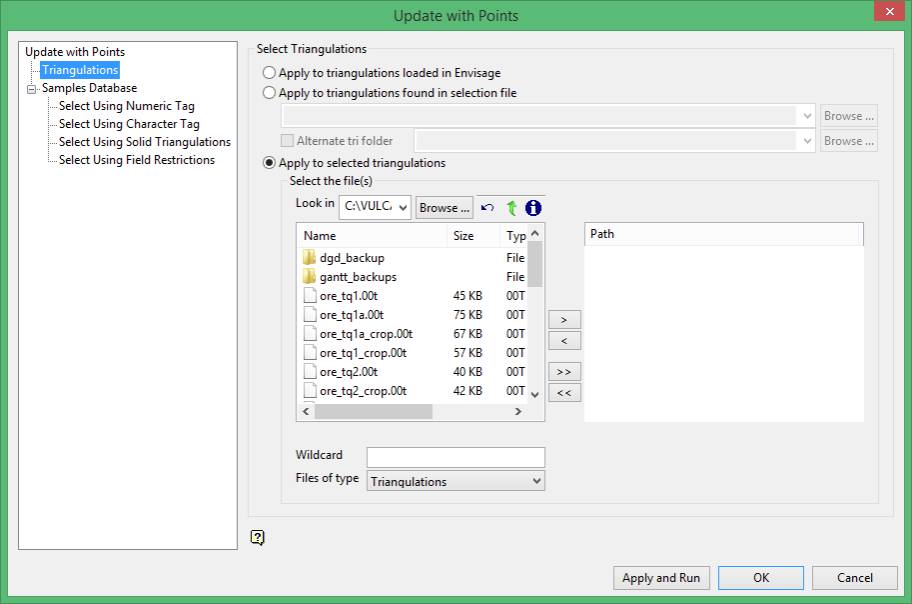
Triangulations
There are several methods to select the triangulations you wish to update. There are triangulations that are...
loaded in Vulcan,
listed in a selection file,
located in another location,
located in the working directory.
If the triangulations are located in another location other than the working directory, select the option for Alternate tri folder. Select the folder from the drop-down list or locate it using the browse button.
Wildcard
Enter any characters used as wildcards here. Wildcard characters can be an * as well as regular characters. For example, if the ore_tq1* were used as a wildcard for the list shown in the screenshot listed above, the result would be
ore_tq1.00t
ore_tq1a.00t
ore_tq1a_crop.00t
ore_tq1_crop.00t
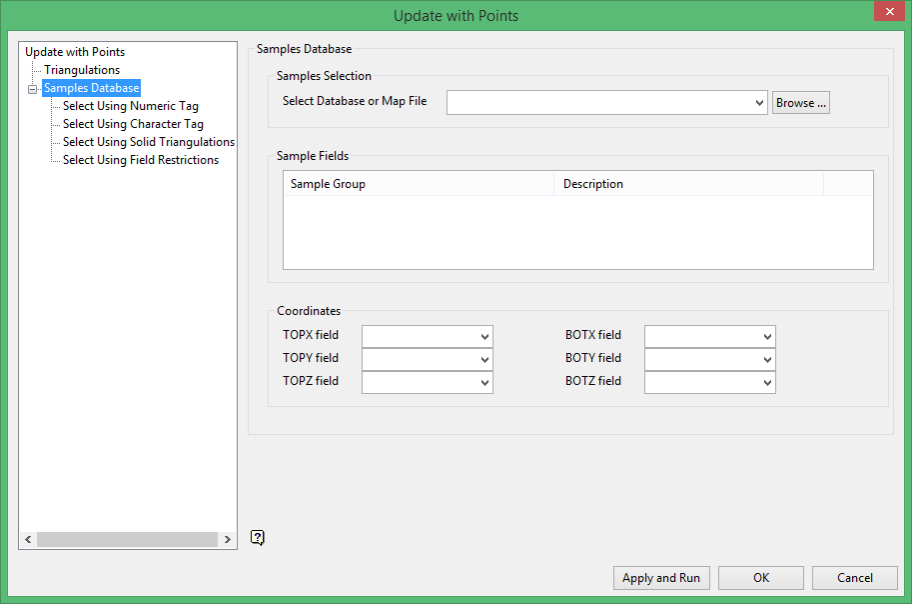
Samples Database
Samples Selection
Select Database of Map File
Enter the database (or map file) to use, which loads the Sample Group.
Coordinates
These must be selected since they will contain the coordinates of the points to adjust.
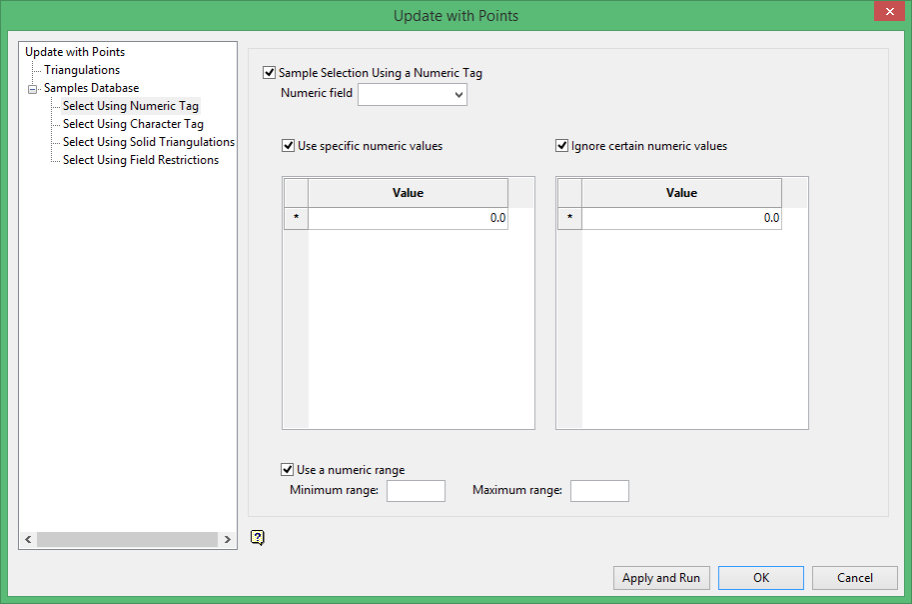
Select Using Numeric Tag
Select using a Numeric tag
Select this checkbox to limit the samples to a specific numeric field. Once the numeric field has been specified, it is then possible to nominate whether to include or ignore those entries that contain specific numeric values.
For example, you may have a database field named 'BOUND' and the entries in this field are '1', '2' and '3', representing, respectively, ore, waste and internal waste.
Use specific numeric values
To use only value '1', select the Use specific numeric values checkbox and specify '1' as the specific value. The value can be entered through the Value column.
Ignore certain numeric values
To ignore specific values, select the Ignore certain numeric values checkbox. The specification of the value(s) to be ignored can be entered through the Value column.
Use a numeric range
Select this checkbox to ignore a whole range of values, for example,. '0 to -9999' to ignore all negative values. It can also be used to ensure any rounding errors are caught. You will need to enter the minimum and maximum for the range.
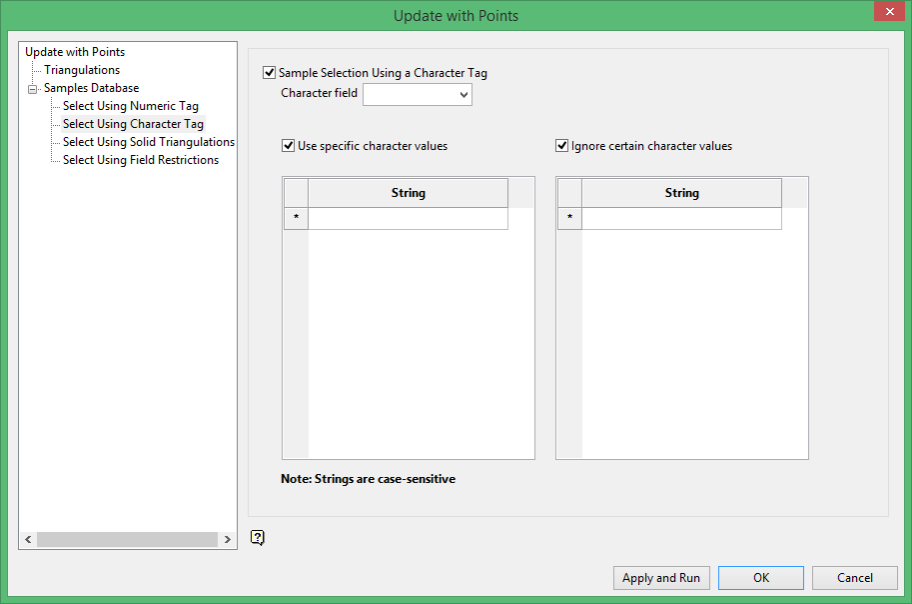
Select Using Character Tag
Select using a character tag
Select this checkbox to limit the samples to a specific character field. Once the character field has been specified, it is then possible to nominate whether to include or ignore those entries that contain specific character strings.
For example, you may have a database field named BOUND and the entries in this field are 'ore', 'waste', and 'internal waste'.
Use specific character values
To use only the character string 'Ore' you would need to check this box and specify 'Ore' as the specific string. The strings to use are specified through the Value column, which is enabled once the Use specific character values checkbox has been selected.
Ignore certain character values
Enable the Ignore certain character values checkbox if you want to ignore specific character strings. The strings to exclude are specified through the Value column, which is displayed below the Ignore certain character values checkbox.
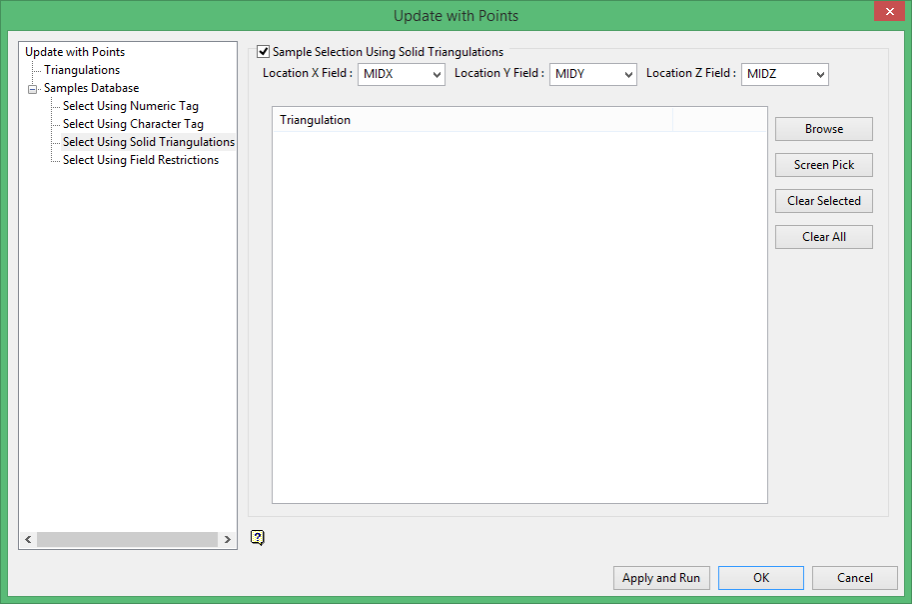
Select Using Solid Triangulations
Select using solid triangulations
Select this checkbox to filter the samples by triangulation. If this checkbox is selected, only the samples that fall within the nominated triangulations will be included. This checkbox must be selected to add the necessary triangulations.
Location X Field :
Filter indicating the X coordinate to be found in selected triangulations.
Location Y Field :
Filter indicating the Y coordinate to be found in selected triangulations.
Location Z Field :
Filter indicating the Z coordinate to be found in selected triangulations.
Adding triangulations to the Triangulations list
Click Screen Pick to select a triangulation that is currently loaded on the screen.
Click Browse to display the Open panel and select the triangulations you want to load.
Select the required triangulation files and add them to the selection list on the right side of the panel.
Click on the name of the file(s) you want to select.
To select a triangulation file from another location, click Browse.
To highlight multiple files that are adjacent to each other in the list, hold down the Shift key and click the first and last file names in that section of the list.
To highlight multiple non-adjacent files, hold down the Ctrl key while you click the file names.
Move the files to the selection list on the right side of the panel.
Click the -> option to move the highlighted files to the selection list on the right.
Click the >> option to move all the files to the selection list on the right.
Click the <- option to remove a highlighted file from the selection list.
Click the << option to remove all files from the selection list.
Click OK to add the triangulation to the Triangulations list.
Removing triangulations from the Triangulations list
To remove a triangulation from Triangulations list, click the triangulation name and click Clear Selected.
To remove a group of triangulations, hold down the Ctrl key and click on each triangulation that you want to clear. Click Clear to remove all the selected triangulations.
To remove all of the triangulations, click Clear All.
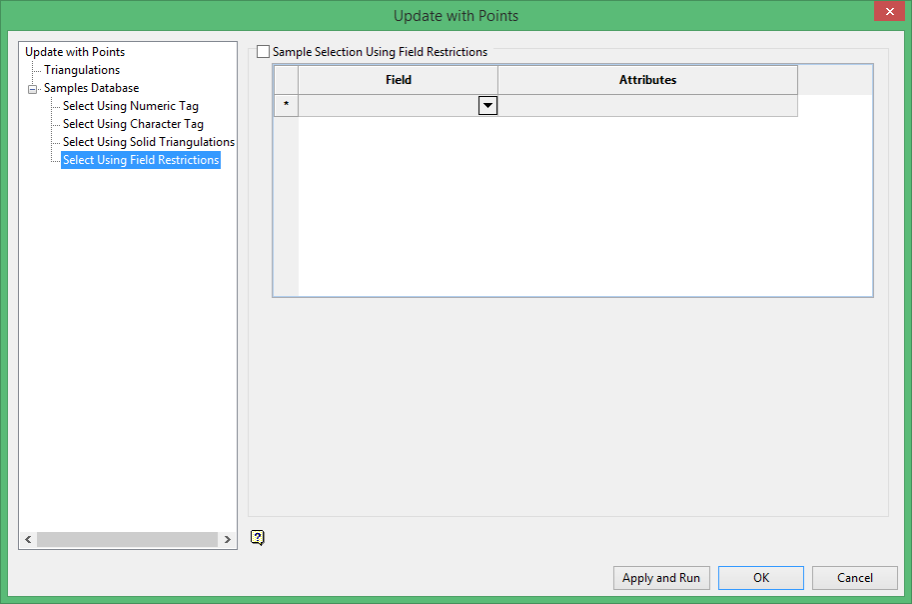
Select Using Field Restrictions
Sample Selection Using Field Restrictions
Select this checkbox to limit the samples to those with fields that match certain selection criteria. Select a Field from the drop-down list and enter applicable selection criteria in the Attributes column.

Include spaces in the entries in the Attributes column only if spaces are included in the desired field values.
When entering a range, always enter the smallest number specified before the largest number.
-792&-720 since -792 is smaller than -720. This range is evaluated as -792.0 ≤ VALUE < -720.0.

