Progress Maps
Use the Progress Maps option to create a progress map layer for each period based on current topography, pushback designs, and scheduling information. Topography is clipped according to a specified elevation for each pushback and period. The new pushback is then copied into the topography layer.
The option takes the current topography and clips any objects inside the intersection polygon and above the specified elevation for that period. It then copies back into the layer any objects from the design layer that are above the specified ending elevation. This process is repeated for each pushback in the order that the pushbacks are specified. The design layer is then used as the starting topography layer for the next period. This is repeated until a progress map layer has been generated for the number of periods specified.
Prerequisites
- Current topography layer.
- Pushback design(s) intersected and clipped with topography. This includes an intersection polygon with an object name that is unique to the layer but the same as the other intersection polygons
- Ending elevation for each pushback for the number of specified periods.
Instructions
Click the Progress Maps button
![]() on the Open Cut Design toolbar.
on the Open Cut Design toolbar.
or
On the Open Pit menu, point to Open Cut Design, and then click Progress Maps to display the Progress Map panel.

Specifications selection
The contents of the Progress Map panel can be saved in a Progress Maps specification file (.pmf), allowing you to retain and apply panel settings across Vulcan sessions.
.pmf
files found in your current working directory. Click Browse to select a file from another location. If you select an existing specification file, then you will be required to confirm whether or not you want to overwrite the chosen file.
To create a new file, enter the file name and file extension. Click the Save to save the file.
Load pushback from period file
Select this check box to load a pushback from an existing period file. The values in the chosen period file can either be separated by commas or by any other character.
Use csv file format with ',' field separator
Select this option if the values in the period file are separated by commas.
PHASE_1_CL,PHASE_2_CL,PHASE_3_CL 180,190,210 160,170,190 120,130,150 100,70,80
Use another file format with character field separator
Select this option if the values in the period file are separated by a different character, For example, a pipe ( | ), a space or the Tab character (\T). If this option is selected, then you will need to specify the character that separates the values.
Period file name
Specify the name of the period file that you want to use. The available drop-down list contains all
.csv,
.txt
and
.asc
files found in the current working directory.
- Progress Map Parameters
- Pushback Parameters
Progress Map Parameters tab
Original topography layer
Specify the name of the topography layer that will be used as a basis for the option (usually the current topography). The available drop-down list contains all layers found in the currently open design database.
Number of pushbacks
Enter the number of designed pushbacks to include. Each pushback must be in its own design layer.
Number of periods
Enter the number of periods to use.
Tolerance
Enter the tolerance value. This value will be added to or subtracted from the elevation specified as a buffer. For example, if the specified ending elevation for a pushback is 2150, then any objects above 2149 will be copied into the final layer.
Intersect object name
Enter the object name of the intersection polygon in each pushback.
Prefix
Enter the prefix value that will be used to name the output layer. Output layers will be named
_01,
_02, etc.
Save an animation file
Select this check box to generate and save an animation file sequence. The drop-down list contains all
.anim_seq
files found in the current working directory. Click Browse to select a file from another location. If you select an existing animation file, then you will be required to confirm whether or not you want to overwrite the chosen file.
To create a new file, enter the file name and file extension.
Ensure project prefix
Select this check box to use the project code as a prefix when naming the resulting animation file. The full name of the resulting animation file will be
<proj><animation_file_name>.anim_seq
. If this check box is not checked, then the resulting animation file will be named
<animation_file_name>.anim_seq
.
Pushback Parameters tab
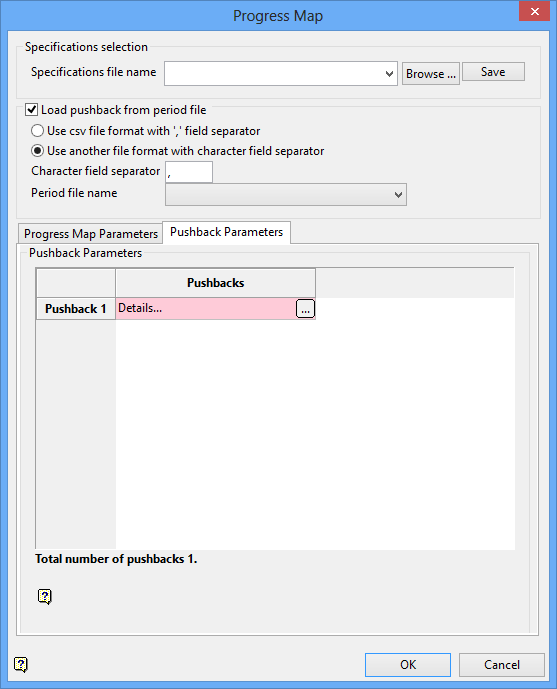
Pushback Parameters
Pushbacks
Select the
![]() button to add the last bench mined for each pushback. Once selected, the Pushback panel displays.
button to add the last bench mined for each pushback. Once selected, the Pushback panel displays.
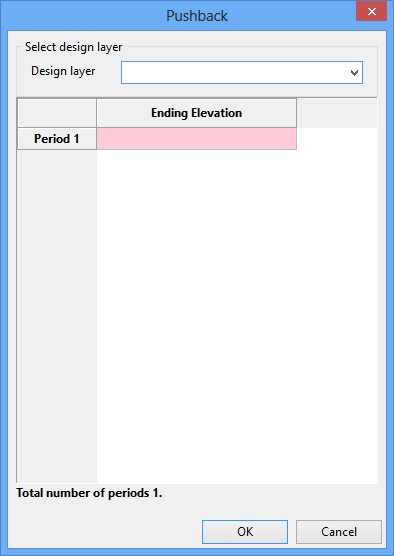
Enter the bottom elevation for the pushback at the end of each specified period.
Click OK.
The running of progress maps may take a while depending on the number of pushbacks and the number of periods. The following examples are based on 2 pushbacks and 3 periods.
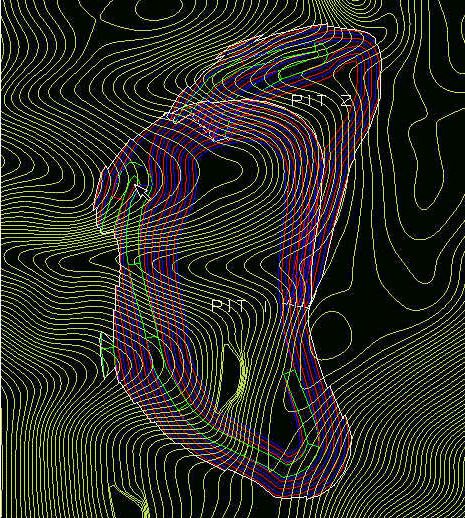
Diagram 1 - Before Progress Map Generation
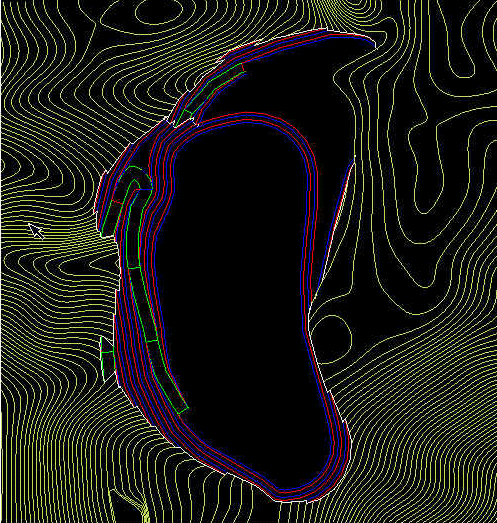
Diagram 2 - After Progress Map Generation/Period 1
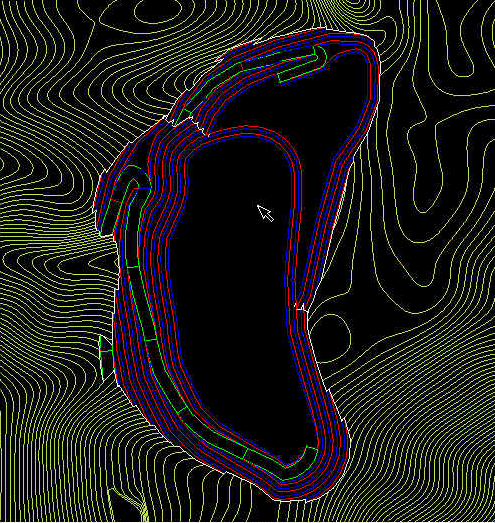
Diagram 3 - After Progress Map Generation/Period 2
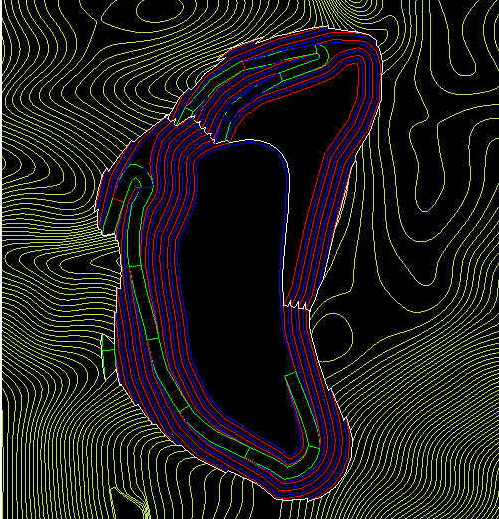
Diagram 4 - After Progress Map Generation/Period 3

