Filter Manager
Apply one of more filters on your data.
On the Data tab, in the Create Data Modifiers group, click on Filter Manager.
Follow these steps:
-
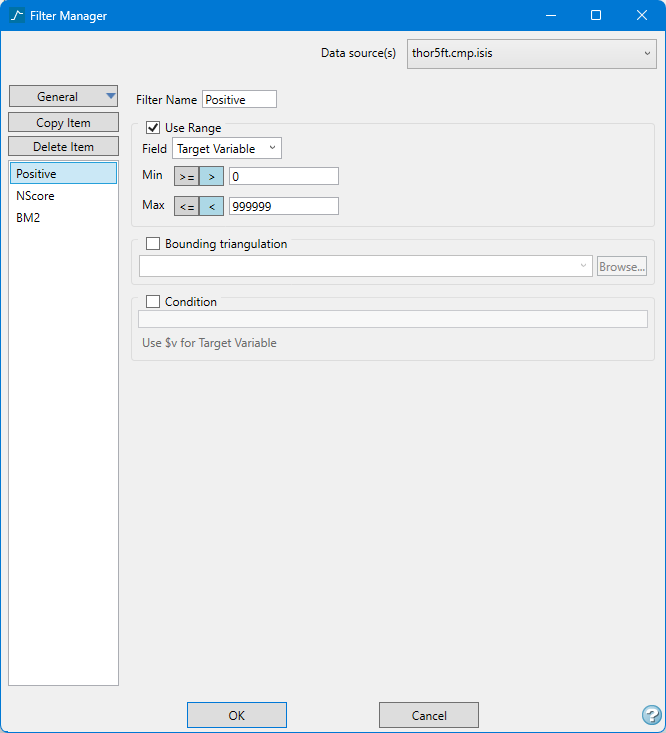
Select the type of filter you want to create by clicking the top button on the left side column.
There are three types of filters: General, Samples, and Block.
Note: The text on this button will change based on your selection from the drop-down list.
Click the Copy button to create a new filter using all the parameters of the current filter that is in focus.
Click the Delete button to delete the current filter that is in focus.
Important: Warning! If you delete a filter, the operation cannot be undone!
-
Select the Data source(s) by using the drop-down list in the upper right corner.
-
Enter a name for the new filter into the field labelled Filter Name if you do not want to use the default name.
There are no character restrictions. As you type a name, it will be display in the column on the left side. The column of names will always be visible while you are editing in the panel.
Note: When a filter is first created the name is highlighted in red, indicating that there is still something that needs to be done before the filter is ready to be saved. While a filter is highlighted in red, the OK button will not be in focus and you will not be able to click it to save any changes.
-
Select Use Range if you wish to use a range of values. Select the Target Variable from the Field drop-down list, then enter the minimum and maximum values.
-
Select Bounding triangulation to restrict the samples/blocks by a triangulation. You will be required to specify the bounding triangulation.
Note: This option is not applicable to open or 2D triangulations.
-
Select Condition to use a constraint upon a numeric variable, for example Fe GT 10.0 (iron value greater than 10.0). The maximum size of a condition statement is 132 alphanumeric characters. A list of available operators/functions is provided in Appendix B of the Core Documentation.
Note: In the conditional statement you can substitute $v for the actual name of the variable. The $v will replace the variable selected from the drop-down list above in the expression. This is useful when analysing multiple variables without rewriting the condition statement each time.
-
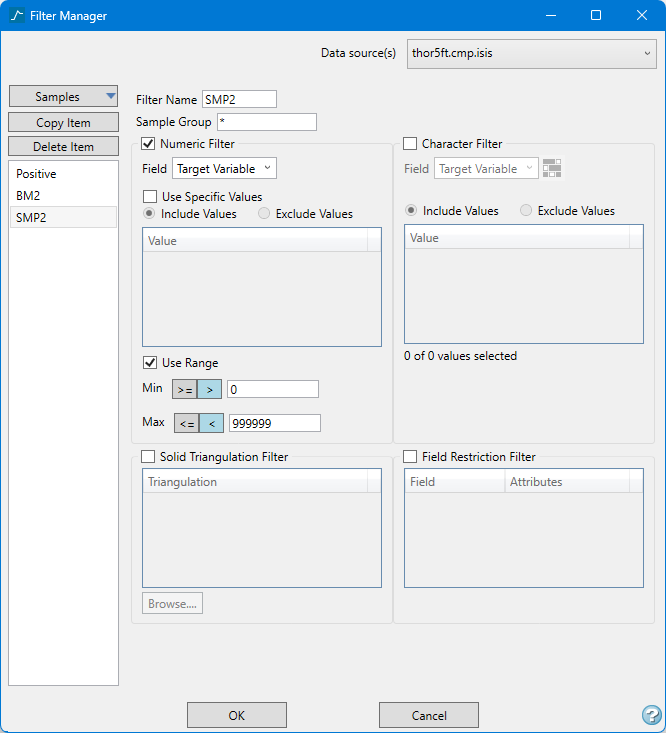
Enter the name of the Sample group or a wildcard character (*).
 Numeric Filter
Select the Numeric Filter checkbox to apply numeric restrictions to any field you select from the Field drop-down list. You can use specific values, a range of values, or both.
Note: Only numeric fields will be shown in the drop-down list.
Select the option Use specific values to include or exclude whatever values you list under Values in the grid.
To use a range of values, select Use range, then enter the minimum and maximum values.
Solid Triangulation Filter
-
Select the Solid Triangulation Filter checkbox to limit the data by triangulation.
-
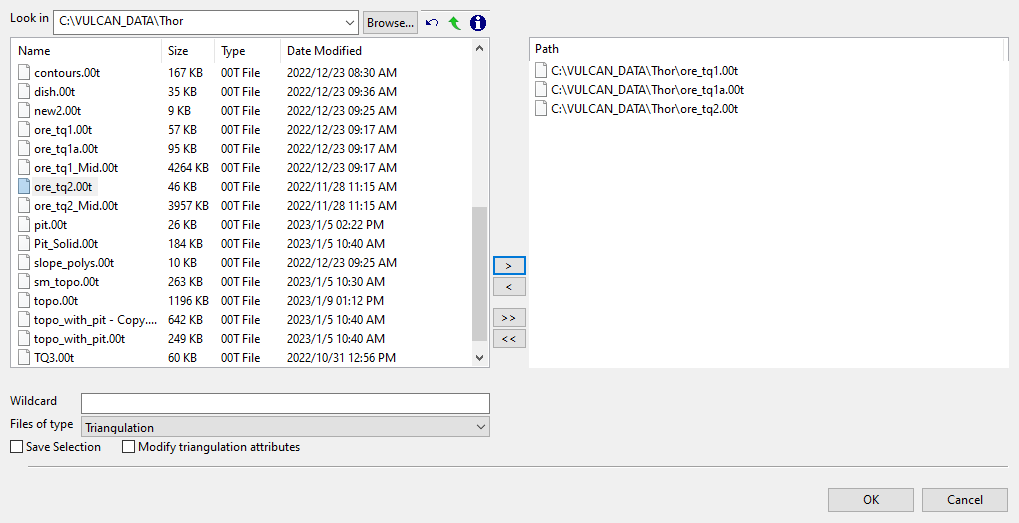
Clicking the Browse icon will display the following panel. From here you can select your triangulations. All triangulations found in the current working directory will be listed in the selection panel that will be displayed.
Selecting images from the panel
-
Click the Browse button to search for any triangulation not found in your current working directory.
-
Click on the name of the file(s) you want to select. Use the
 icons to go to the last folder visited, go up one level, or change the way details are viewed in the window.
 -
To highlight multiple files that are adjacent to each other in the list, hold down the Shift key and click the first and last file names in that section of the list.
-
To highlight multiple non-adjacent files, hold down the CTRL key while you click the file names.
-
Move the items to the selection list on the right side of the panel.
- Click the
 button to move the highlighted items to the selection list on the right.
 - Click the
 button to remove the highlighted items from the selection list on the right.
 - Click the
 button to move all items to the selection list on the right.
 - Click the
 button to remove all items from the selection list on the right.
- Click the
Wildcard characters can be used to limit what appears on the list. Use an * for multiple characters or a % to replace a single character.
-
Character Filter
-
Select the Character Filter checkbox to limit the data by a character string found in the selected database field.
-
Select the database field from the Field drop-down list. Only character fields will be listed.
-
Decide whether you want to include or exclude the text string.
Important: The text strings are case sensitive and must be entered exactly as they will be found in the database.
-
Enter the string without quotation marks in the space provided. You can have multiple strings.
Field Restriction Filter
-
Select the Field Restriction Filter checkbox to restrict the data by field attribute.
-
Select a Field from the drop-down list and enter applicable selection criteria to filter the samples by in the Attributes column.

-
Include spaces in the entries in the Attributes column only if spaces are included in the desired field values.
When entering a range, always enter the smallest number specified before the largest number.
-792&-720since-792is smaller than-720. This range is evaluated as-792.0 ≤ VALUE < -720.0.
-
-
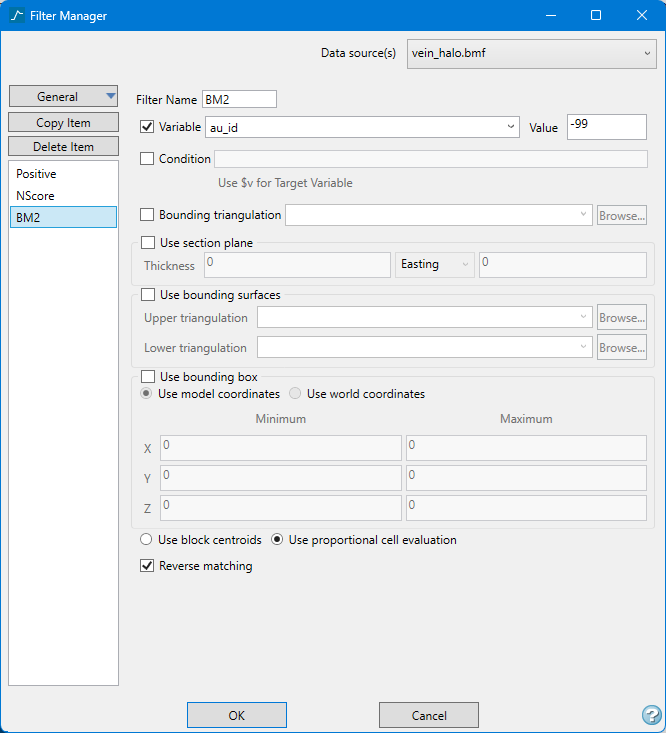
Select Variable if you want to restrict the blocks by a variable. You will need to specify a particular value.
To restrict blocks to those where Material equals Ore, select Material as the variable (from the drop-down list) and enter Ore as the value. However, if you require all blocks that do not have this specified value, then enable the Reverse matching check box found at the bottom of the panel. The block model variable may be numeric (for example a grade variable such as Au) or character (for example Geology).
-
Select Condition to use a further constraint upon a numeric variable, for example Fe GT 10.0 (iron value greater than 10.0). The maximum size of a condition statement is 132 alphanumeric characters. A list of available operators/functions is provided in Appendix B of the Core Documentation.
Note: In the conditional statement you can substitute $v for the actual name of the variable. The $v will replace the variable selected from the drop-down list above in the expression. This is useful when analysing multiple variables without rewriting the condition statement each time.
-
Select Bounding triangulation to restrict the blocks by a triangulation. You will be required to specify the bounding triangulation.
Note: This option is not applicable to open or 2D triangulations.
-
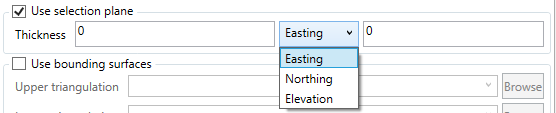
Select Use selection plane to define a selection of blocks by plane. Enter the Thickness of the plane. Use the drop-down list to select either Easting, Northing, or Elevation, and then enter the coordinates.
-
Select Use bounding surfaces to restrict the blocks by bounding surfaces. You will be required to select the upper (top) and lower (bottom) surface triangulations.
-
Select Use bounding box to restrict the blocks by a box. You will be required to enter the minimum and maximum X, Y, and Z values in either model coordinates or real world coordinates.
-
Select Reverse matching to exclude (not display) the selected blocks. This option works in combination with the other options on this panel. For example, if you set up Variable to display all blocks that have a gold grade of (-99.0), selecting the Reverse matching option will prevent any block with a gold grade of (-99.0) from being displayed. Or as another example, if you set up a bounding box to limit Z values between 2300m and 5500m, selecting the Reverse matching option will prevent blocks with Z values between those elevations from being displayed and show blocks with all other Z values.
Click OK when you have completed building your filter.
Click Cancel to close the panel without saving.
Applying the filter
To apply filter to a dataset follow these steps:
-
Highlight the data selection in the Data Explorer pane.
-
On the Data tab, in the Apply Data Modifiers group, select the weighting scheme from the drop-down list next to Apply Filter.
-
Click Apply Filter.
Or
-
Right-click on the data selection in the Data Explorer pane.
-
Select Apply > Apply Filter or Apply Filter and Transformation .

