Modelling Table
Use Modelling Table to model specific information. The modelling table is typically used for the automatic generation of all quality grids. Any type of grid can be produced using this option. Switches allow maximum flexibility in the selection of the data to be modelled.
The parameters defined in this option will be stored in the corresponding <proj><area>.gdc_spec file.
Instructions
On the Grid Calc menu, point to Macros, and then click Modelling Table to display the Modelling Table panel.
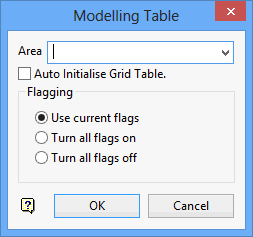
Area
Select the specification area to use.
Auto Initialise Grid Table
Select this check box to fill the modelling table with default values.
Flagging
Use current flags
Select this option to use the current check box status on the Grid Table panel. That is, if the check boxes are ticked then leave them ticked and if unticked then leave them unticked.
Turn all flags on
Select this option to check all of the check boxes on the Grid Table panel.
Turn all flags off
Select this option to untick all of the check boxes on the Grid Table panel.
Click OK to display the Grid Table panel.
Topography
Horizon
Enter, or select from the drop-down list, the topography horizon.
Variable name
Enter, or select from the drop-down list, the topography variable.
Method
Enter, or select from the drop-down list, the method for modelling the topography. This is not required for Quality modelling. The methods are described in detail in the Grid Model documentation.
It is now necessary to enter the Quality variables and the default modelling methods.
Method and Variables
Method
Enter, or select from the drop-down list, the default modelling methods (these are the evenly numbered columns, that is, 0, 2, 4,...) for the corresponding variable (the method applies to the variable directly to the right of it.
Variables
Enter, or select from the drop-down list, the Quality variables to be modelled. These are the unnumbered columns. In the bottom half of the panel you will specify for which horizons to model the variables.
For each horizon/seam, enter the details in the columns.
Horizon (Seam)
Enter the Seam or Horizon names in the Horizon column.
MFI
Enter the corresponding mapfile identifier in the MFI column.
Method
Specify the modelling method in evenly numbered columns (that is, 0, 2, 4,...). When 'Default' is used, the method listed in the method and variable section is used when modelling the corresponding horizon.
Model Grid
Check the unnumbered columns to model the corresponding variable (that is, the variable displays in the same column in the method and variable section). Use these check boxes to designate which grids are to be modelled when the Generate Model option is used.
If left blank, the Model All Grids option in the Generate Model panel can be used to model all grids. For example, in the above diagram SF, SR and TK are modelled for each horizon.
Click OK.
Use the Save Grid Specifications option to save the modelling table setup.

