New Design
Use the New Design option to create a new design. From this design it will be possible to create Isis files and ODBC Link databases.
Tip: It is also possible to create a new design by editing an existing design and saving it with a new name.
Tutorial for creating a samples database here.
Instructions
On the File menu, click New Design to display the New Database Design panel.
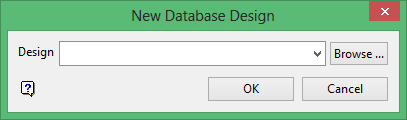
Enter the design name using 3 characters. Optionally, select a file from the drop-down list - which contains all .dsf files found in your current working directory. To create a new file, enter the file name and file extension.
Click OK.
A new design window is then opened. The design name appears in the title bar. Table windows can be collapsed (minimised) or expanded (maximised) by clicking on the bar button to the left of the window.
Design Properties

Description
This is an optional description, the maximum size of the description is 40 alphanumeric characters.
Type
This field displays the type of data that will be contained in the database. Use the Attributes button to edit the design type properties. Once selected, the Design Type panel displays.
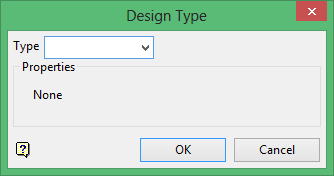
Type
Select the type of data that will be contained in the database. The design type selected will affect which synonyms are present in the synonym drop-down lists, and whether or not any properties options are available.
Three types of designs are supported:
-
Blockout
-
Drilling
-
Geotech
The following section of this panel is only visible when using the 'Drilling' design type.
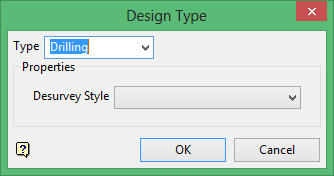
Properties
Desurvey Style
Select the desurvey method from the drop-down list. This field is only applicable for drillhole databases.
The available methods:
-
Tangent
-
Tangent with Length (defined interval length)
-
Tangent with Interval (defined number of intervals)
-
Segment Following (inflection and FROM)
-
Segment Preceding (inflection and TO)
Refer to Desurvey Style for more information on these procedures.
The following fields are only applicable when using the 'Tangent with Length' or 'Tangent with Interval' methods.
Interval
Enter the length or interval between surveys. This field is only applicable when using the 'Tangent with Length' or 'Tangent with Interval' methods.
Tolerance
Use this option if the original survey is not at a precise interval. It is possible then to set the tolerance to say 4m, to ensure that all surveys within ±4 metres of the interval length are calculated. Generating a large number of inflection points between surveys does allow the hole to curve better, but may increase the time it takes to load the holes.
Data source
This field displays the data source to be used. Use the Configure button to edit the data source properties. Once selected, the Data source setup panel displays.
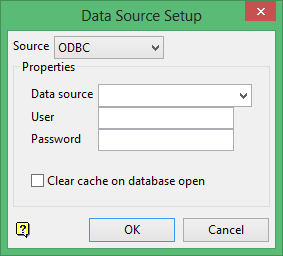
Source
Specify whether the source for the design is from an Isis database or an ODBC link. Select 'ODBC' to use this design to create ODBC Link databases. For more information on setting up the ODBC link refer to the Windows ODBC Setup and Common ODBC Problems sections.
The following section of this panel is only visible when using 'ODBC' as the source.
Properties
Data source
Enter, or select from the drop-down list, the data source to link to.
Enter the user name and password. You will need to enter this information if you enable these options (when you are configuring the ODBC link).
Clear cache on database open
Select this check box to clear the existing cache file whenever the associated ODBC database is opened. If this check box is not selected, then the ODBC cache file will persist until the Vulcan or Isis session is closed. This means that if database keys, for example, holes or blasts, are loaded, then the source ODBC database is changed and these changes won't be reflected until the Vulcan or Isis session is closed.
Once you have completed the properties, you need to insert (places the table before the current table) or append (places the table after the current table) a table. In both cases you must enter a name for the table and you can choose to enter data in the optional fields, Description, Synonyms, and ODBC Table. It is also possible to complete these fields after the table has been displayed.
The way the table displays depends upon your preferences, which are set through the Preferences option (under the Edit menu).
If you have selected multiple windows, then you can use Ctrl + Tab to cycle through the available windows. If, however, you have selected notebooks, then you will need to use the available tabs in order to move between the tables.
Table Properties
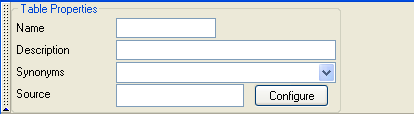
Name
This field displays the name of the table.
Description
This field displays the table description. Table descriptions can contain up to 40 alphanumeric characters.
Synonyms
Synonyms are used to link design tables to external tables when the names of the tables are different as may be the case when compiling data from different sources. Refer to the Synonyms section for more information.
For each table, select a synonym from the drop-down list. The synonyms present in the drop-down list depend upon the design type (selected through the Design Type panel). It is possible to enter two synonyms by entering the names separated by a comma, for example, HoleId,Location. Synonyms are case-sensitive.
Source
This field displays the source of an ODBC table. Use the Configure button to edit the ODBC source properties. Once selected, the Source Information panel displays.
Specify the name of the table in the external database.
Sort columns
This section of the panel to sort the order of ODBC records, otherwise ODBC sources will return records in an indeterminate/random order, leading to overlapping interval errors. In particular, for drilling databases, the assay, geological and survey tables will want to be sorted by FROM (if available) and TO depths in ascending order.
Column
Specify the columns that you want to sort.
Direction
Specify whether to sort the records in ascending or descending order
The Sort columns section is only available when you have chosen to create an ODBC Link design.
Field Properties
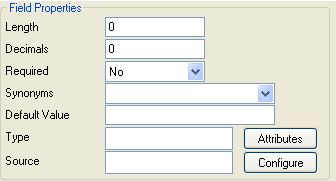
The field properties change with each field. Field properties can also be entered in the data area of the table, where it is possible to copy and paste data.
Length
Enter the maximum number of characters that can be entered for the particular field.
Decimals
Enter the number of decimal places for the field. All data in this field will be rounded to comply with this number.
Required
Select 'Yes' from the drop-down list if this field must contain data. All key fields should be required.
Synonyms
Synonyms are used to link design fields to external fields when the names of the fields are different as may be the case when compiling data from different sources. Refer to Synonyms for more information.
For each field select the synonym from the drop-down list. The synonyms present in the drop-down list depend upon your choice of synonym in the tables properties section of the panel. It is possible to enter two synonyms by entering the names separated by a comma. Please note that synonyms are case sensitive.
Text type fields will be truncated to 8 alphanumeric characters when the table definition exceeds 512 characters.
Synonyms must be present in order for drillhole databases to be desurveyed before loading into Vulcan.
Default Value
Enter a default value for this field. This means that when you create a database from this design the default value will be entered in this field.
If you are using this design to create a database from imported tables, then the default value is used when the field is missing (or truncated) from the table. If the field is blank, then zero will be used for numeric fields and a blank string for text fields.
If you are importing a CSV table that should have the five fields but only four are present, then the default value will be used for the fifth field.
L11,24.500,28.000,TQ1a,31.10
L11,0.000,24.500,,2.000
L16-N3,0.000,6.100,TQ1
L16-N3.23.500,28.000,TQ1,
In the above example, the fourth field in the second row is blank, so the blank value (either zero or an empty text string) will be used. Whereas the fifth field in the third column is missing, so the default value would be used. However, in the fourth column the fifth field is blank not missing.
An easy way to think about is, if you have fewer commas than there are fields, then default values will be used for this missing fields.
Type
This text box displays the type attributes of the selected field. Use the Attributes button to edit the type attributes. Once selected, the Type Attributes panel displays.
Source
This text box displays the ODBC source of the selected field. Use the Configure button to edit the ODBC source properties. Once selected, the Source Information panel displays.
Specify the name of the ODBC column containing the selected field.
In the data area of the table enter the name, type and a description along with other applicable field properties.
Field properties

A design must have at least one primary key. To create a primary key, right-click in the column to the left of the field entries, that is, the area to the left of the Name column, and select Primary Key from the displayed context menu.
Name
Enter the name for the field. To enter a name, click in the cell before typing the field name.
Type
Select one of the following:
Text - Select text if the field is going to contain alphanumeric characters.
Integer - Select Integer is the field is going to contain integers (that is, a numbers without decimals).
Single - Select Single if the field is going to contain real numbers that contain fewer than 7 significant figures.
Double - Select Double if the field is going to contain real numbers that should not be rounded and contain greater than 7 significant figures.
Description
Enter a field description. Field descriptions can contain up to 40 alphanumeric characters.
Length
Enter the maximum number of characters that can be entered for the field.
Decimals
Enter the number of decimal places for the field. All data in this field will be rounded to comply with this number.
Required
Select Yes from the drop-down list if this field must contain data. All key fields should be required.
Synonyms
Synonyms are used to link design fields to external fields when the names of the fields are different as may be the case when compiling data from different sources. Refer to Synonyms for more information. For each field select the synonym from the drop-down list. The synonyms present in the drop-down list depend upon your choice of synonym in the tables properties section of the panel. It is possible to enter two synonyms by entering the names separated by a comma. Please note that synonyms are case sensitive.
Note: Synonyms must be present in order for drillhole databases to be desurveyed before loading into Vulcan.
Default Value
Enter a default value for this field. This means that when you create a database from this design the default value will be entered in this field.
If you are using this design to create a database from imported tables, then the default value is used when the field is missing (or truncated) from the table. If the field is blank, then zero will be used for numeric fields and a blank string for text fields.
Type Attributes
This column displays the drilling type attributes of each field. Upon selection of a field in this column, the Type Attributes panel displays.
Source
This column displays the ODBC source of each field. Upon selection of a field in this column, the Source Information panel displays.
Specify the name of the ODBC column containing the selected field.
You can insert a field, delete a field, make a field the primary key, cut, copy and paste by right-clicking in the row headings. You can also sort records by right-clicking in the column headings.
Once you have finished editing the table, you can insert or append another table or save the design.

