Create Simple
Use Create Simple to create a simple grid mesh model from displayed coordinate data.
This option merely lays a grid over a triangulation, which is generated from the coordinate data. It does not allow for other more sophisticated algorithms, such as smoothing and inverse distance. These are available in the Vulcan Grid Model option and Grid Calc.
Instructions
On the Model menu, point to Grid Mesh Surfaces, and then click Create Simple to display the Model Create panel.
X and Y Mesh Size
Enter the X and Y mesh size. The unit of measurement is set in the project file (.dg1).
Use default window
Select this check box to use this size of the current window as the grid size. If this check box is not checked, then you will be prompted to indicate the size of the grid model once this panel has been completed.
Before the grid is generated a triangulation is constructed from the data. There are two methods for creating the triangulation:
- Preserve Strings
This method will not triangulate points across any string data. This option is most likely to be used when edge detail is required. For example, when there is a geological fault in the model.
Note Due to the grid resolution, faults or breaklines are not fully honoured. - Points only
This method will triangulate all points as shown in the following diagram.
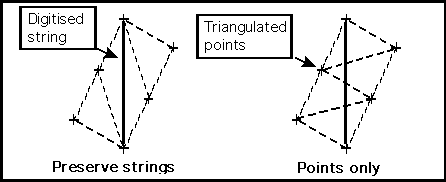
Figure 1: Preserve Strings/Points only
Generate mesh from
Specify whether you want to model the design object's Z-values or its W-tag values when attempting to create a Vulcan grid model.
Model Surface Name
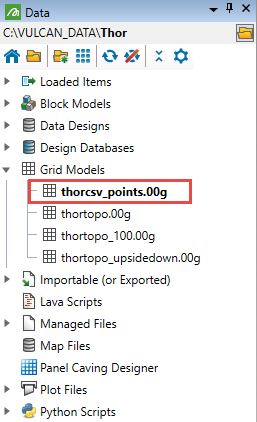
Enter a name for the grid surface, along with the extension. If no extension is enter, then the file will be saved in your working directory, but will not be associated with any file type and it will not be displayed in the Vulcan Explorer window. The project name will automatically be added as a prefix to the name you enter.
Name entered: csv_points
Name with project prefix: thorcsv_points
Full name with extension added so that the file is displayed in the Grid Models section of the Vulcan Explorer: thorcsv_points.00g
Create triangle model
Select this check box to save and display the triangulation that was used to generate the grid.
Enable the Display triangles check box to display the triangulation. If this check box is checked, then the Triangulation Model name panel displays upon completion of this panel.
(For more information about completing the Triangulation panel, see Specifying Triangulation Information Using the Triangulation Panels in the Model section of Vulcan help.)
Create Grid Mesh Model
Select this check box to create and save the model in your working directory.
Display X/Y Mesh
You can select either one or both of the mesh lines to be displayed. See the following diagram.
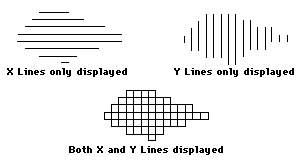
Figure 2: X/Y Mesh Lines
Clip grid mesh to default window
Select this check box to load only that part of the model that falls in the current zoom window, i.e. you can zoom up to the required area before loading or creating the model. If unticked, the entire model will be loaded.
Regularise grid area to grid size
Select this check box to ensure that the maximum and minimum co-ordinates of the grid are multiples of the mesh sizes.
Use all data specified (otherwise just in ledge)
Select this check box to use all the data specified. If unticked only the data which lies in the grid ledge will be used. The grid ledge is the area in which the grid displays. Thus, if you have clipped the grid mesh to the window and selected this option, data outside the window will be used to create the grid. Otherwise only data inside the extents is used.
Click OK.
Specify the grid extents. To do this, indicate the origin of the grid model followed by the opposite corner of the grid model.
The Multiple Selection box is then displayed. From this box, choose your method of selecting data and select the data. Cancel (if applicable) when you have finished selecting data.

