Relimit by Solid
Use this option to create a new triangulation by relimiting existing triangulated surfaces against a nominated solid triangulation.
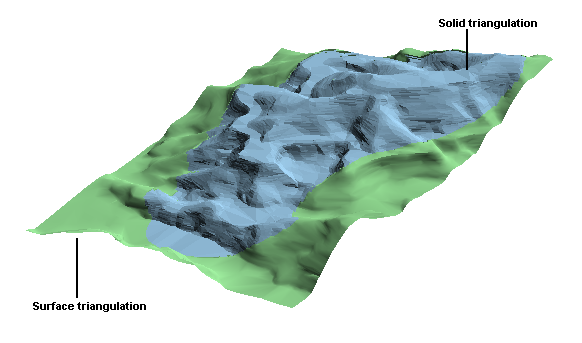
Figure 1: Relimiting a surface triangulation against a solid triangulation
Instructions
On the Model menu, point to Triangle Surface, then click Relimit by Solid.
Follow these steps:
-
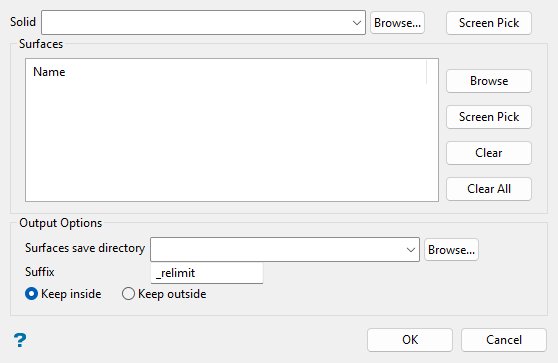
Select a triangulation to relimit surface triangulations against from the Solid drop-down list, which includes all triangulations in the current working directory. Click Browse... to select a solid triangulation file from another location or use the Screen Pick option to select a solid triangulation loaded on screen.
-
Choose the Surfaces to relimit by clicking either Browse or Screen Pick.
Note: Once triangulation files are selected, you can select file names in the list and click Clear Selected or Clear All to deselect triangulations for relimiting as needed.
Use the Screen Pick option to select from triangulations currently loaded on screen.
Alternatively, click Browse to select desired surface triangulation files from a popup selection panel. All triangulations found in the current working directory will be listed in the selection panel. Use the
 icons to go to the last folder visited, go up one level, or change the way details are viewed in the window, respectively. Click the Browse... button in the selection panel to search for any triangulation not found in your current working directory.
 Select desired triangulations from the listed files. To highlight multiple list items at once, use the left mouse option in combination with the Shiftkey (this is for items that are adjacent in the list; for non-adjacent items, use the Ctrlkey and the left mouse option). When using wildcard characters, type
*> for multi-character and?> for single character.Move the items to the selection list on the right side of the panel.
- Click the
 button to move the highlighted items to the selection list on the right.
 - Click the
 button to remove the highlighted items from the selection list on the right.
 - Click the
 button to move all items to the selection list on the right.
 - Click the
 button to remove all items from the selection list on the right.
Select the Save Selection checkbox if you would like to save a selection file (
.sel) for future use. Click OK when you are finished selecting triangulation files. - Click the
-
Specify where to save and how to rename relimited surfaces, if different than the original surfaces, under the Output Options section. Enter a new folder name in the Surfaces save directory field to save relimited surfaces to this new folder in the current working directory, or click Browse... to select an existing folder location. Type text into the Suffix field if you would like to rename relimited surface triangulations accordingly.
-
Specify what portion of the surfaces you want to retain with relimiting, that is, save the areas inside the nominated solid triangulation (Keep inside) or save the areas outside of the nominated solid triangulation (Keep outside).
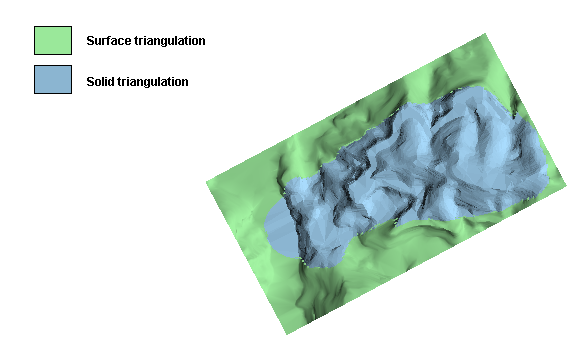
Figure 2: The original triangulations
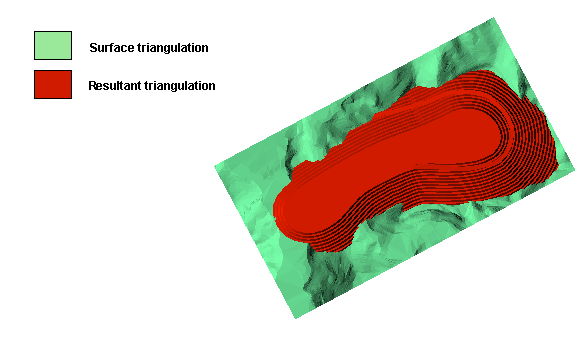
Figure 3: Using the Keep inside option
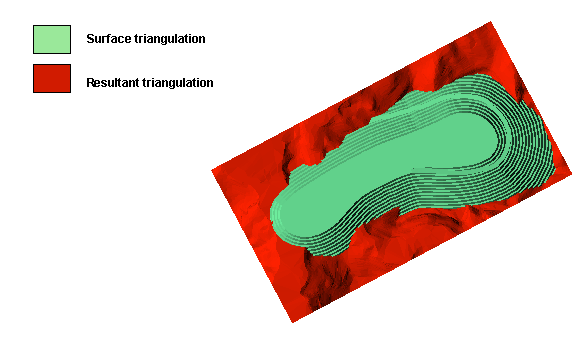
Figure 4: Using the Keep outside option
Display attributes (line colour, pattern, etc.) of loaded triangulations can be changed using the Model > Triangle Files > Properties option, or the ![]() Triangulation Properties button on the Status toolbar.
Triangulation Properties button on the Status toolbar.

