Repair
The Repair option is used to fix inconsistencies that may be found in design database .dgd.isis files. It can be access two ways: as part of the Scan process, or as an individual function from the Vulcan Explorer right-click context menu.
From the Scan Option Instructions
- In Vulcan Explorer, open the Design Database folder
- With the desired design databases closed, select one or more design database
.dgd.isisfile(s) to be scanned.To highlight multiple files, use the left mouse button in combination with the [ Shift ] key for files that are adjacent in the list. For non-adjacent files, use the left mouse button and the Ctrl key.
- Right-click a selection to display the context menu
- Select Scan
If, during the Scan process irregularities are found in the selected design database .dgd.isis file(s), Vulcan will give you the option to repair them. You will be prompted with the following message box.
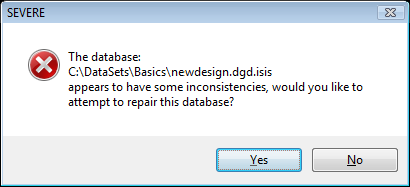
Click Yes. A Repair DGD panel (shown below) will appear. See the information below in the From the Repair Option Instructions for more details on how to proceed.
From the Repair Option Instructions
- In Vulcan Explorer, open the Design Database folder
- With the desired design databases closed, select one or more design database
.dgd.isisfile(s) to be repaired.To highlight multiple files, use the left mouse button in combination with the [ Shift ] key for files that are adjacent in the list. For non-adjacent files, use the left mouse button and the Ctrl key.
- Right-click to display the context menu
- Select Repair
If repairing a single design database, the following panel displays.

Repair DGD panel - single DGD (.dgd) file
If repairing multiple design databases, the following panel displays. Note the listing of selected .dgd.isis design databases.
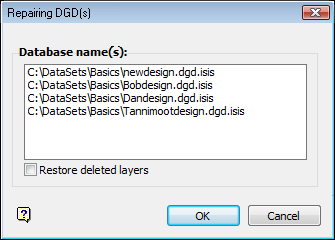
Repair DGD panel - multiple .dgd.isis files
Restore deleted layers
Select this check box to restore all layers that have been deleted since the last compress and rebuild operation.
Click OK to begin the repair process.
Notes
- Before the repair begins the original
.dgd.isisfile (for example<filename>.dgd.isis) will be moved to a separate directory named,dgd_backup\Repair_Backup, where the file will be renamed "<filename>_orig_0.dgd.isis. " This will leave the original file intact. - A new
<filename>.dgd.isisfile is created during the repair process. All repairs will be saved to the new file. - If the repair is not successful, the original file that was saved to the
dgd_backup\Repair_Backupfolder will be restored. - During the repair, the Workbench tab will display the progression of the repair(s).
When the repair is complete a message box will appear confirming whether the repair attempt was successful.

