Import Data from a DTED Elevation Data File
Use this option to import data from a Digital Terrain Elevation Data (DTED) file. You can use Vulcan to import the information from a DTED file, including latitude, latitude, and elevation point data. You can also convert the data to a different coordinate system and display or transfer the data to a file.
About DTED Files
DTED files are a collection of data points gathered from radar imaging performed by a NASA space shuttle mission in February 2000. NASA provides DTED data on CDs in various resolutions based on angular separation. Vulcan supports DTED Level 0, DTED Level 1, and DTED Level 2.
Each DTED CD includes data for one region, such as Australia or North America. The data for each region is tiled into files that each cover a rectangle of one degree latitude and longitude (in the Level 0 data set). These tiled files reside in subdirectories for each degree of longitude, all of which reside under a directory named "dted" in the root folder. The data in the tiled files comprises a series of points separated by the angular distance, each of which has an elevation (in metres) relative to mean sea level. These can then be read as X, Y, and Z values where X and Y are longitude and latitude, respectively. This information is then read across the tiles by Vulcan.
Instructions
On the File menu, click Import to display the Import panel.
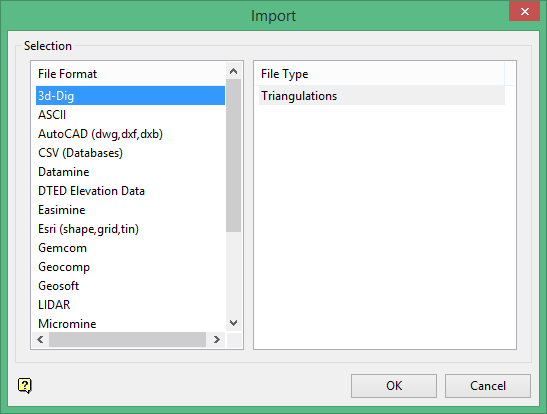
Click DTED Elevation Data in the File Format column on the left.
Select Design Strings from the File Type field on the right side of the panel.
Click OK to display the SRTM DTED Data Load panel.
DTED Root
Select the root folder from the DTED root folder drop-down menu, or click Browse to select the file from a location other than your working directory. This folder contains the dted folder and the dmed file for the SRTM DTED area.
If the data has been copied from a DTED CD to a hard drive, it must retain the same directory structure and the root directory must contain both the dted and dmed items from the CD.
Data Extent
Select Digitize Extent to automatically calculate the data extents based on the data in the selected files.
Select Enter extent to manually enter the extent information.
- If you select this option, select Easting/Northing or Lat/Long from the drop-down list to specify the extent.
- If you select Easting/Northing, enter the minimum and maximum for the extents in the appropriate boxes. This option is recommended if you are using coordinates for a map window.
- If you select Lat/Long, enter the minimum and maximum for the extents in degrees, minutes, and seconds. This option is recommended if you are using a latitude/longitude window.
Filter out elevations below
Select this check box to ignore elevations below a certain level when calculating the extent. The default elevation for this option is -1 (the negative value indicating that the elevation is below sea level), which is the standard value for filtering out data points that may be incorrect. However, you may have special circumstances in which you are working at elevations below sea level, in which case you may want to adjust this value.
If you select this option, enter the elevation below which you want to filter out values.
Output coordinate conversion
Lat/long to UTM map-grid coordinates
Use this if you want convert the latitude and longitude coordinates from the DTED file to UTM coordinates when the file is imported. If you select this option, you will need to specify the parameters in the Map grid parameters section.
Select Lat/long to new datum
Use this to convert the latitude and longitude coordinates from the DTED file to a new datum when the file is imported.
If you select this option, select the new datum from the Datum drop-down list:
- GDA94 (Geocentric Datum of Australia)
- AGD84 (Australian Geodetic Datum 1984)
- AGD66 (Australian Geodetic Datum 1966)
- Custom
Lat/long unchanged from DTED
Use this to import the latitude and longitude coordinates directly from the DTED file without any conversion when the file is imported.
Map grid parameters
This section is only enabled if you are outputting to a map grid coordinate system. If you selected to enter extents using Lat/Long in the Data extent section, this section does not apply.
Select the type of map grid from the Map grid drop-down menu:
- MGA94 (Map Grid of Australia)
- AMG84 (Australian Map Grid 1984)
- AMG66 (Australian Map Grid 1966)
- UTM (Universal Transverse Mercator Grid)
- Custom
Enter the UTM zone in the Zone box to specify the coordinate range for the area in which you are working.
A map of UTM zones is available at http://www.dmap.co.uk/File_utmworld.htm.
Select the False northing used Select this check box if false northing was used in calculating coordinates.
The False northing option is available for countries in the southern hemisphere that use a false north value in the datum so that northing values (Y coordinates) are positive rather than negative values. Typically, the northing values in a map projection start at zero (the equator), so for most countries fully in the southern hemisphere, a false zero datum below the equator is used so that the values are easier to read. If you are working within the northern hemisphere, this should not be selected. In countries that straddle the equator, this may or may not be used.
Data type
Load as points
Use this to load the data as points. If you choose this option, select or enter the name of the layer in the Layer name drop-down menu.
Load as underlay
Use this to load the data as an underlay. If you choose this option, select or enter the name of the point cloud file in the Cloud name drop-down menu, or click Browse to select the point cloud file (.cld) from a location other than your working directory.
Load as triangulation
Use this to load the data as a triangulation. If you choose this option, select or enter the name of the triangulation in the Tri name drop-down menu, or click Browse to select the triangulation file from a location other than your working directory.
Load to file
Use this to load the data to a data file. If you choose this option, select the name of the file from the File name drop-down menu, or click Browse to select the data file (.dat) from a location other than your working directory.
If you selected Lat/long to new datum or Lat/long unchanged from DTED in the Output coordinate conversion section, select a notation style for the output coordinates:
- DMS (degree-minute-second)
- Deg (degrees)
- Rad (radians)
- Gra (gradians)
Select the colour scheme from the Colour scheme drop-down menu:
This option does not apply if you select the Load to file option.
- None
- Atlas
- Spectrum
- Range
Click OK to import the data.

